Markers
Markers on designs allow for setting points of interest at user-selected locations. This includes using a marker as a benchmark “control point” location in the design. To use a marker as a Benchmark location, refer to ‘Set Zero using a marker’ in the Implementation section of this manual.
Set marker - use this tool to set a marker on the map. Markers are always placed at the current location.
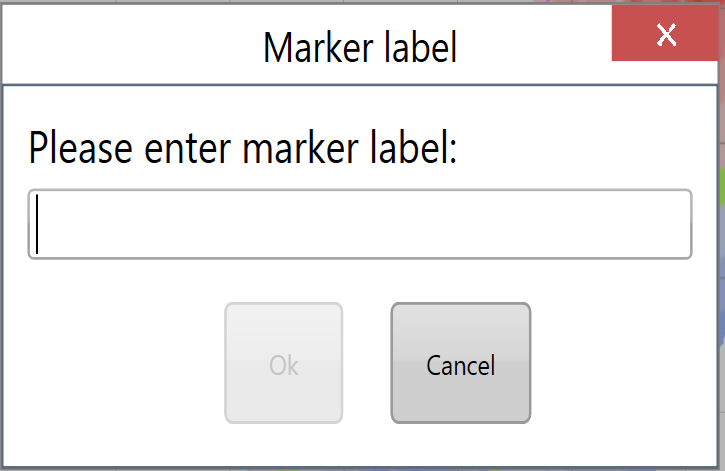
When a new marker is created a window will appear allowing a name for the marker to be entered.
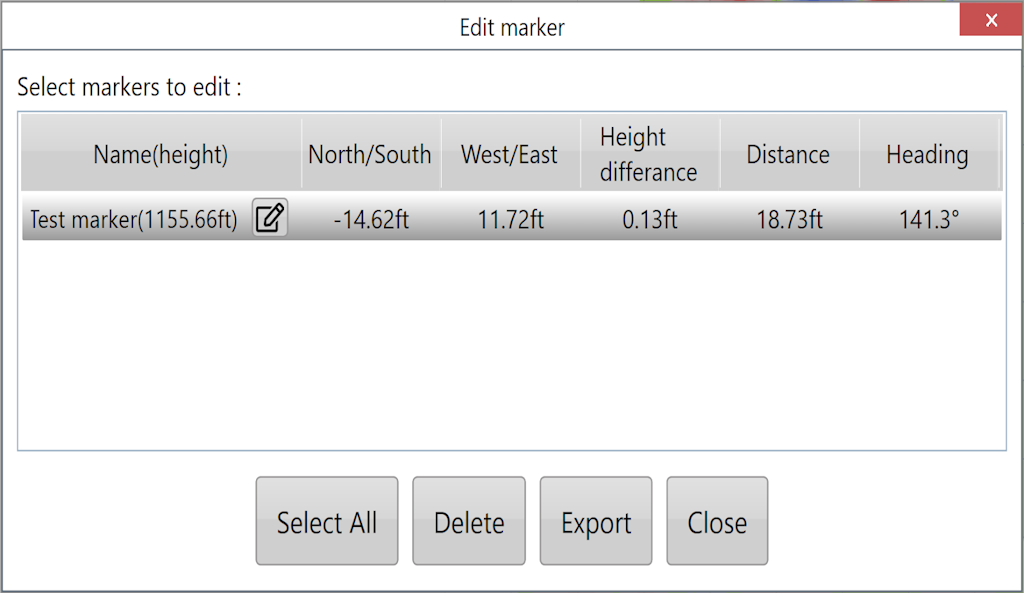
Edit Marker - this opens a window that allows you to select any marker on the map and edit it.
The ‘Edit Marker’ button will open the below window allowing you to see the information of each marker that has been placed including heading, distance and height of the marker relative to your current position.