Levee Creation Parameters
'Start Elevation' will be populated automatically. You can also choose the ‘Start Elevation’ by manually pressing on the ‘Start Elevation’ button and then touching the design map at the location you would like to start the levees from. Press Finish selecting to apply.
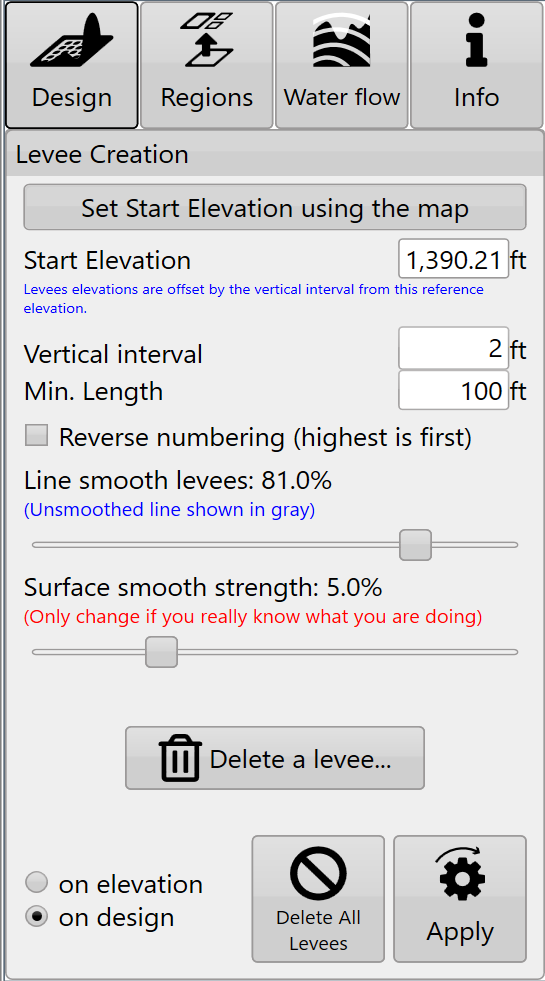
'Vertical interval' tells T3RRA Cutta and T3RRA Ditch how much elevation change from the previous levee is needed before adding another levee.
'Reverse numbering' – By default levees are numbered from highest elevation to lowest, reverse numbering switches it to count up from the lowest elevation.
'Line smooth levees' adjusts how many sharp turns and how smoothly the levee lines will be created. The further to the right the slider is the more round the lines will be (with decreased sharp turns).
'Surface smooth strength' adjusts the surface by applying an averaging filter to the surface of the field to remove bumps and dips without creating a full field earthwork design.
'Min. size' determines the minimum length a levee must be before it is included as a drivable path. Levees that are shorter than this will appear grayed out and not be available as paths.
'Delete contour lines' will bring up a window allowing you to enter the number associated with the levees you want to remove.
Like other design tools, Levees allows you to use the original elevation surface or the design surface as the basis for the calculations. It may be beneficial to perform a landforming operation on this field prior to putting in levees and then base the levees off the design surface.
Cutta Even if you are not performing a landforming operation it can sometimes be useful to perform a light smoothing design on the surface first before attempting to lay out levees (ie, to work around poor data). Be warned though - If large changes are made before creating levees, they may not work properly.
Press 'Apply' after parameters are entered. Levees can be applied to regions separately. This is great to change the spacing of levees across a field.
NOTE: Levees can be added to each region individually.
 Exporting will allow the lines to be saved in many formats, including guidance curves that can be loaded to John Deere’s guidance system.
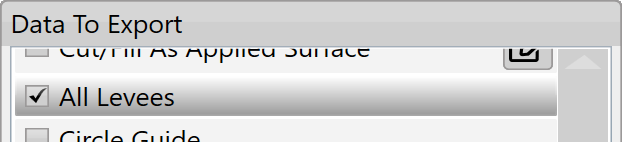
Select the Export button on the main page to start exporting levees. Then select the export type on the left. In the middle will appear list of exportable items - select 'All Levees' as shown on the right.

For a YouTube video tutorial on Levees, visit https://youtu.be/V8NLmRCQEx0 or use your phone to scan this barcode.