Polyline measurement
 The ‘Polyline measurement’ tool is used to create a guide line with multiple segments. The length of individual segments and the angles between them may also be displayed. When the tool has been selected, the cursor will change into a cross. Left clicking anywhere in the working area will place the first point, and clicking again will place segments. To finish adding segments, double click on the final point. Double clicking will open a window where settings for the polyline can be changed. The points of the polyline can be adjusted by dragging the yellow squares.
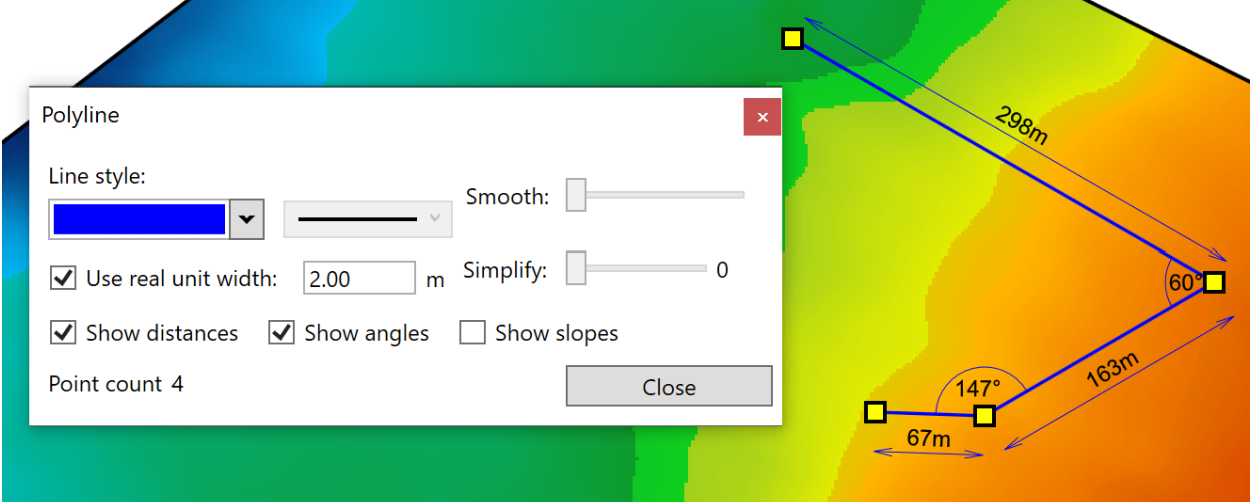
- ‘Line style’. The left drop down menu lets you set the line color, while the right drop down menu lets you set line thickness.
- ‘Smooth’ will take the points that are available and adjust them to a more direct path with fewer corners. When the slider is all the way to the right, the points of the measurement guide will be lined up in a straight line.
- ‘Simplify’ will remove points along the polyline while attempting to follow the original path as closely as possible. This is most visible when the slider is used on polylines that make small direction adjustments.
- ‘Use real unit width’ when selected will disable the right drop down menu of ‘Line style’ and set the width to the value on the right of the checkbox. When using this option, the line thickness is no longer linked to pixels and will increase in size as the zoom level increases.
- ‘Show distances’ will display the length of each segment of the polyline.
- ‘Show angles’ will display the inside angles of each joint between segments.
- ‘Show slopes’ will display the overall grade of each segment as a percentage.