Point Label
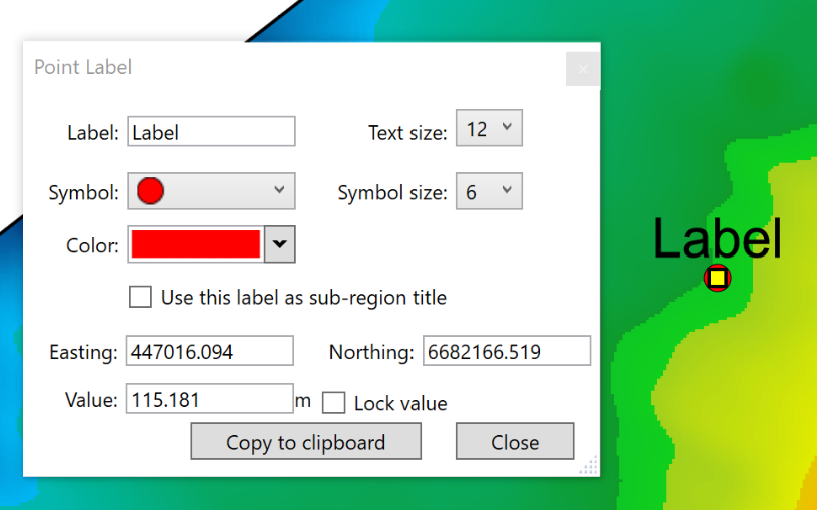
 This tool lets you place labels on a field as reference points, or simply to remind you of points you may need to watch out for or pay closer attention to. Selecting the tool will change the mouse cursor to a cross. Clicking in the working area with the cross will create a point and open a pop-up window, allowing you to edit its properties:
- ‘Label’ The text in this box will be displayed on the map. The size of the text can be altered by using the ‘Text size’ option on its right.
- ‘Symbol’ allows you to change the symbol or shape that is used for the point.
- ‘Symbol size’ allows you to make the symbol larger or smaller.
- ‘Color’ allows you to change the color of the label marker that is placed on the field in the working area.
- ‘Use this label as sub-region title’ affects the printed output. When selected, will use the label as the title for the region part it is in. It is only applicable when region-parts are set to output when printing.
- Easting and Northing show the coordinates of where the point label has been placed. It can be changed using the yellow point on the marker or by inputting new values here.
- ‘Value’ option displays the elevation or height of the label and can be changed by entering a new value here. If you enter a custom value, ensure you lock it with the neighboring option.
- ‘Lock value’ locks the value that has been set in the ‘value’ field so that it will not update to the currently active surface. Unlocking a point label is a way to get a surface elevation of cut/fill value at a specific point.
- Clicking on the ‘Copy to clipboard’ button will copy the name of the label and its coordinates so they can be used elsewhere.
When creating a label, if you have a label layer selected on the right, it will be added to that layer (otherwise it will create a new layer for it).