Dam Creator
 The ‘Dam creator’ tool provides a simple process of creating a dam on any selected space on the field surface. This tool is able to make two types of dam, ‘Full Cut’ dams and ‘Borrow Pit’ Dams. So what are the differences and benefits for these dam types?
‘Full Cut’ dams take the earth needed to build the walls/banks from the center of the dam. The advantage of this type of dam is that it maximizes the amount of water that can be stored. The disadvantage is that the earth needs to be moved a greater distance. This makes it better suited to smaller diameter designs.
‘Borrow Pit’ dams take the earth they need from the inner edge of the dam to build the bank. The benefit of this style of dam is that it is faster to make and the earth needed is not moved as far, the disadvantage is that it has less water storage capacity compared to the full cut design.
 Select the tool.
- The cursor will change into a crosshair used to place the dam centerline. Click on the map to add points to the dam outline. Double-click the last point to finalize the outline. More points can be inserted later.
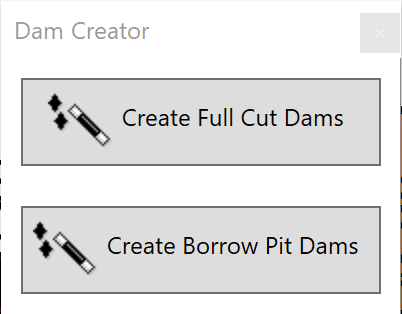
- After creating the outline, a pop up window will appear, showing 2 design options. ‘Create Full Cut Dams’ or ‘Create Borrow Pit Dams’
- The ‘Full Cut Dam’ creates a default wall with outer and inner slopes, height, and width.
- The ‘Borrow Pit Dam’ creates a default cross section with both bank (i.e. wall) and channel (i.e. borrow pit) slopes, heights, and widths.
- Once you have chosen a dam type, you will be able to further customize your dam.
NOTE: If you wish to edit a dam that has already been made, first switch to Guides layers in the right panel. Next find the guidelines for the dam, select them and left-click on the ‘Edit guides’ tool.
Design
Design contains all the settings required for making dams in T3RRA Design Plus.
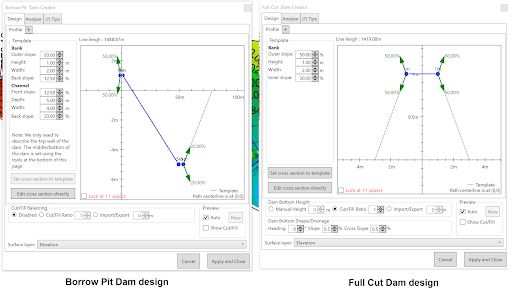
- ‘Profile’ is the cross section of the dam. Multiple profiles can be added by pressing the ‘+’ button.
- When using multiple profiles, all settings are made from the “origin” point which is a red node on one of the corners.
- A profile can be moved around the dam wall by setting its ‘Distance from start’.
- When you have more than one profile, the dam wall blends the profiles between them. To create a length of the dam wall with a constant cross section, put the same profile on each side of the length. Hint: Right-click in a blank part of the cross section plot to save and/or load a specific cross section shape.
- Template is the settings for the dam profile. By clicking the ‘Edit cross section directly’ button, the cross section can be changed manually. Simply click and drag the blue and green markers.
- ‘Dam Bottom Height’ is the grouping of settings for the inside bottom of the dam.
- ‘Dam Bottom Shape/Drainage’ is a group of settings that also control the bottom of the dam, however they differ from height by controlling slope and heading to allow for specific outlet points to be made.
- ‘Surface layer’ selects which layer the dam design changes will be made to.
Analyze
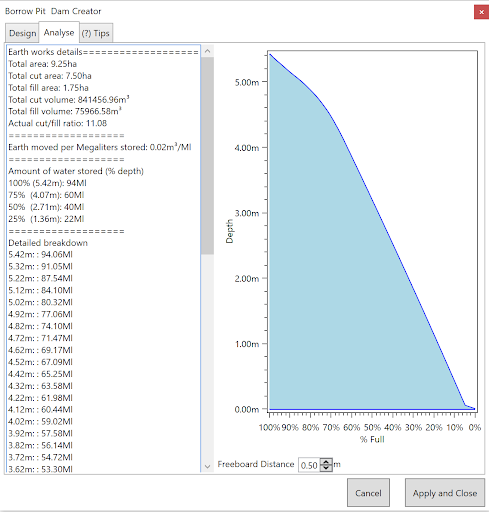 The analysis page displays a summary of earth moving and water capacity. This includes a graph of water volumes by depth. The freeboard distance can be set at the bottom of the window to adjust the water capacity details.
Tips
The ‘Tips’ page provides some quick notes on the use of the dam creation tool.