Importing files
Because T3RRA software normally reads .tci “project” files, external files need to be imported using the 'Import' button on the initial screen.
NOTE: T3RRA Design can be used to convert many other file types for use in T3RRA software
NOTE: T3RRA Apply is unable to import data, and can only work with designs from other T3RRA projects.
 In T3RRA software we make a distinction between loading a project, and importing data. When we refer to “loading” it concerns the opening of a native T3RRA .tci project file. When we refer to “importing” it refers to a 3rd party data file. Whereas a .tci file will load in a single step there are sometimes multiple steps to importing data as the data may need to be changed or altered during the import process, or there may need to be decisions made during the import in order to get the correct data.
The following guide shows the steps required to successfully import a file.
 1) To import a file from an external source first press the import button on the Main Page or from the “Collect” step. You can import more data at any time. If you have a keyboard attached (e.g. Desktop in the office), press Ctrl+I.
2) Next press the button for the type of file you are trying to import on the left hand side, then click “Pick File” and select the file you wish to import.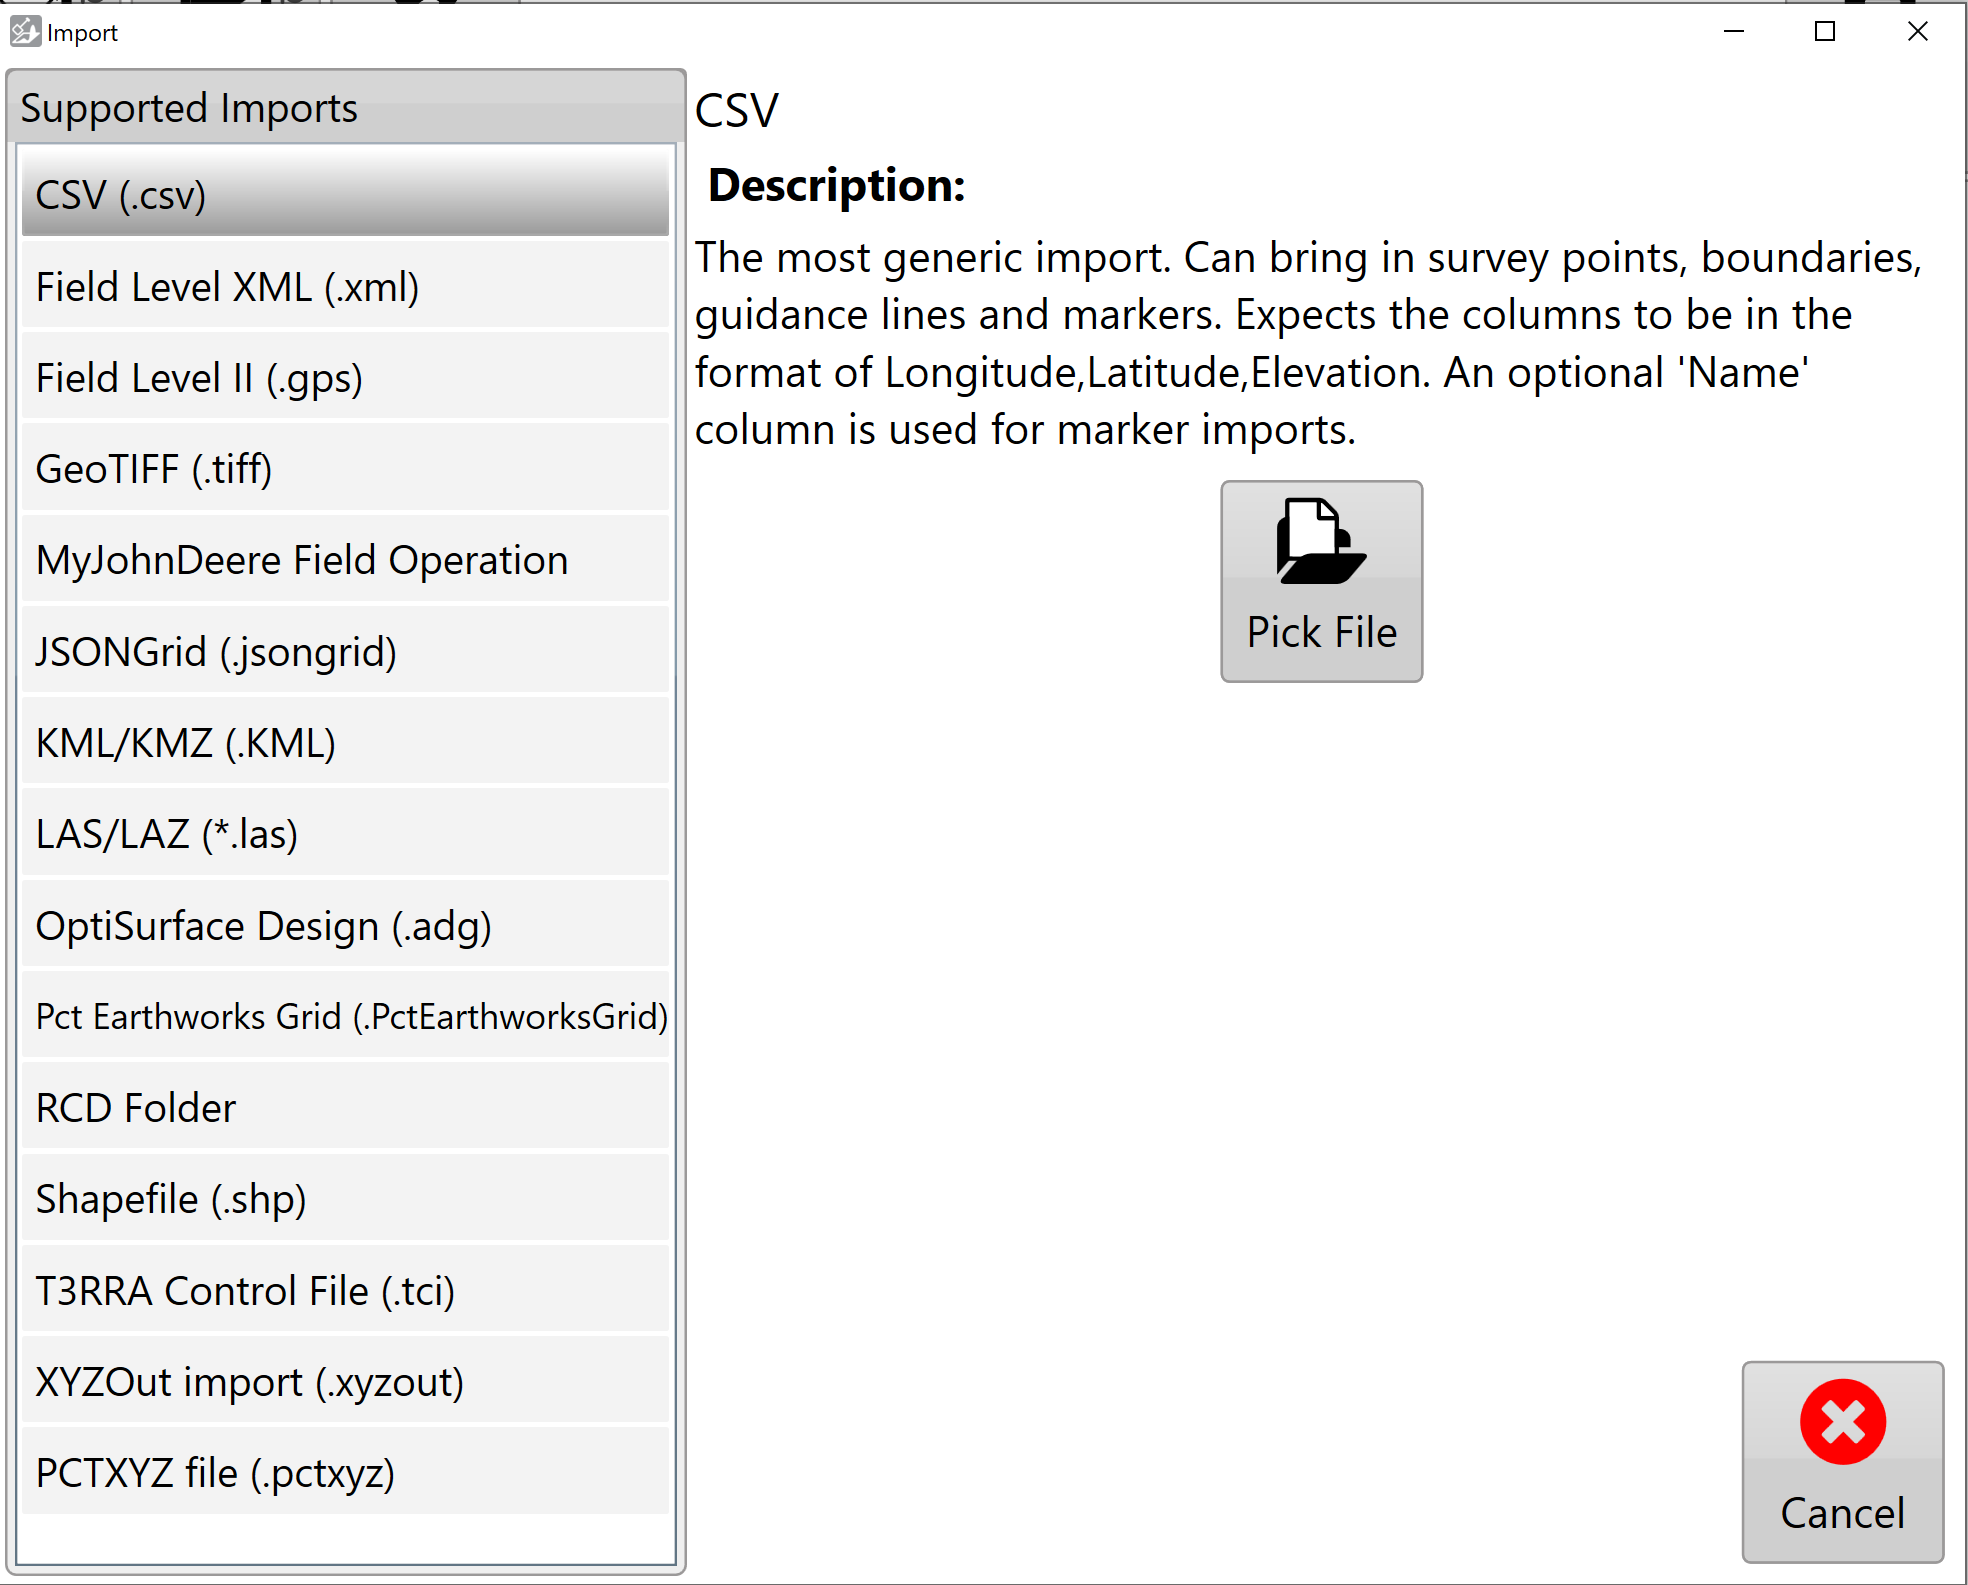
3) For some imports you might need to specify extra information, such as projection information. Once you’ve provided the required information, click “Read” in the bottom right corner.
4) You will now be able to select which data you wish to import. On the right is a preview of all the data to be imported.
NOTE: If the auto-detected data type is incorrect, you can change it using the drop downs.
Click “Import” to start working with the imported data.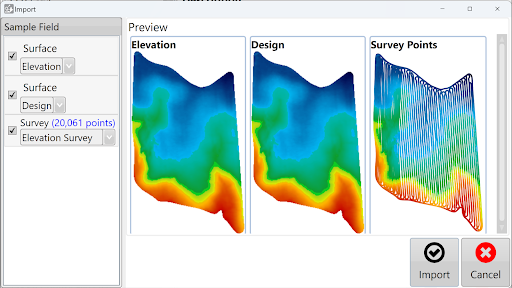
5) After data has been imported, surfacing and design options can be applied.

NOTE: elevation survey point data that has been imported will have surfacing done automatically.