
5.7 | Markers & Benchmarks

Level COMMAND allows important locations within a project to be recorded using Markers and Benchmarks. Although both are created using the same tool, they serve different purposes during surveying, grading and future site visits.
Markers provide useful reference points for operators and designers, while Benchmarks provide permanent reference locations used for project alignment and zeroing.
Marker Types
Two marker types are available:
General Markers
General Markers record locations or features of interest within a project. They are commonly used to identify:
- Trees or obstacles
- Fence lines and gateways
- Irrigation equipment
- Utility crossings
- Rocks or hazards
- Other significant site features
General Markers provide useful visual reference points but cannot be used when performing a benchmark zero.
Benchmark Markers
Benchmark Markers are permanent reference locations used for project alignment and zeroing.
Unlike General Markers, Benchmark Markers can be selected from the Zero to Benchmark tool and allow a project to be accurately re-aligned during future grading operations.
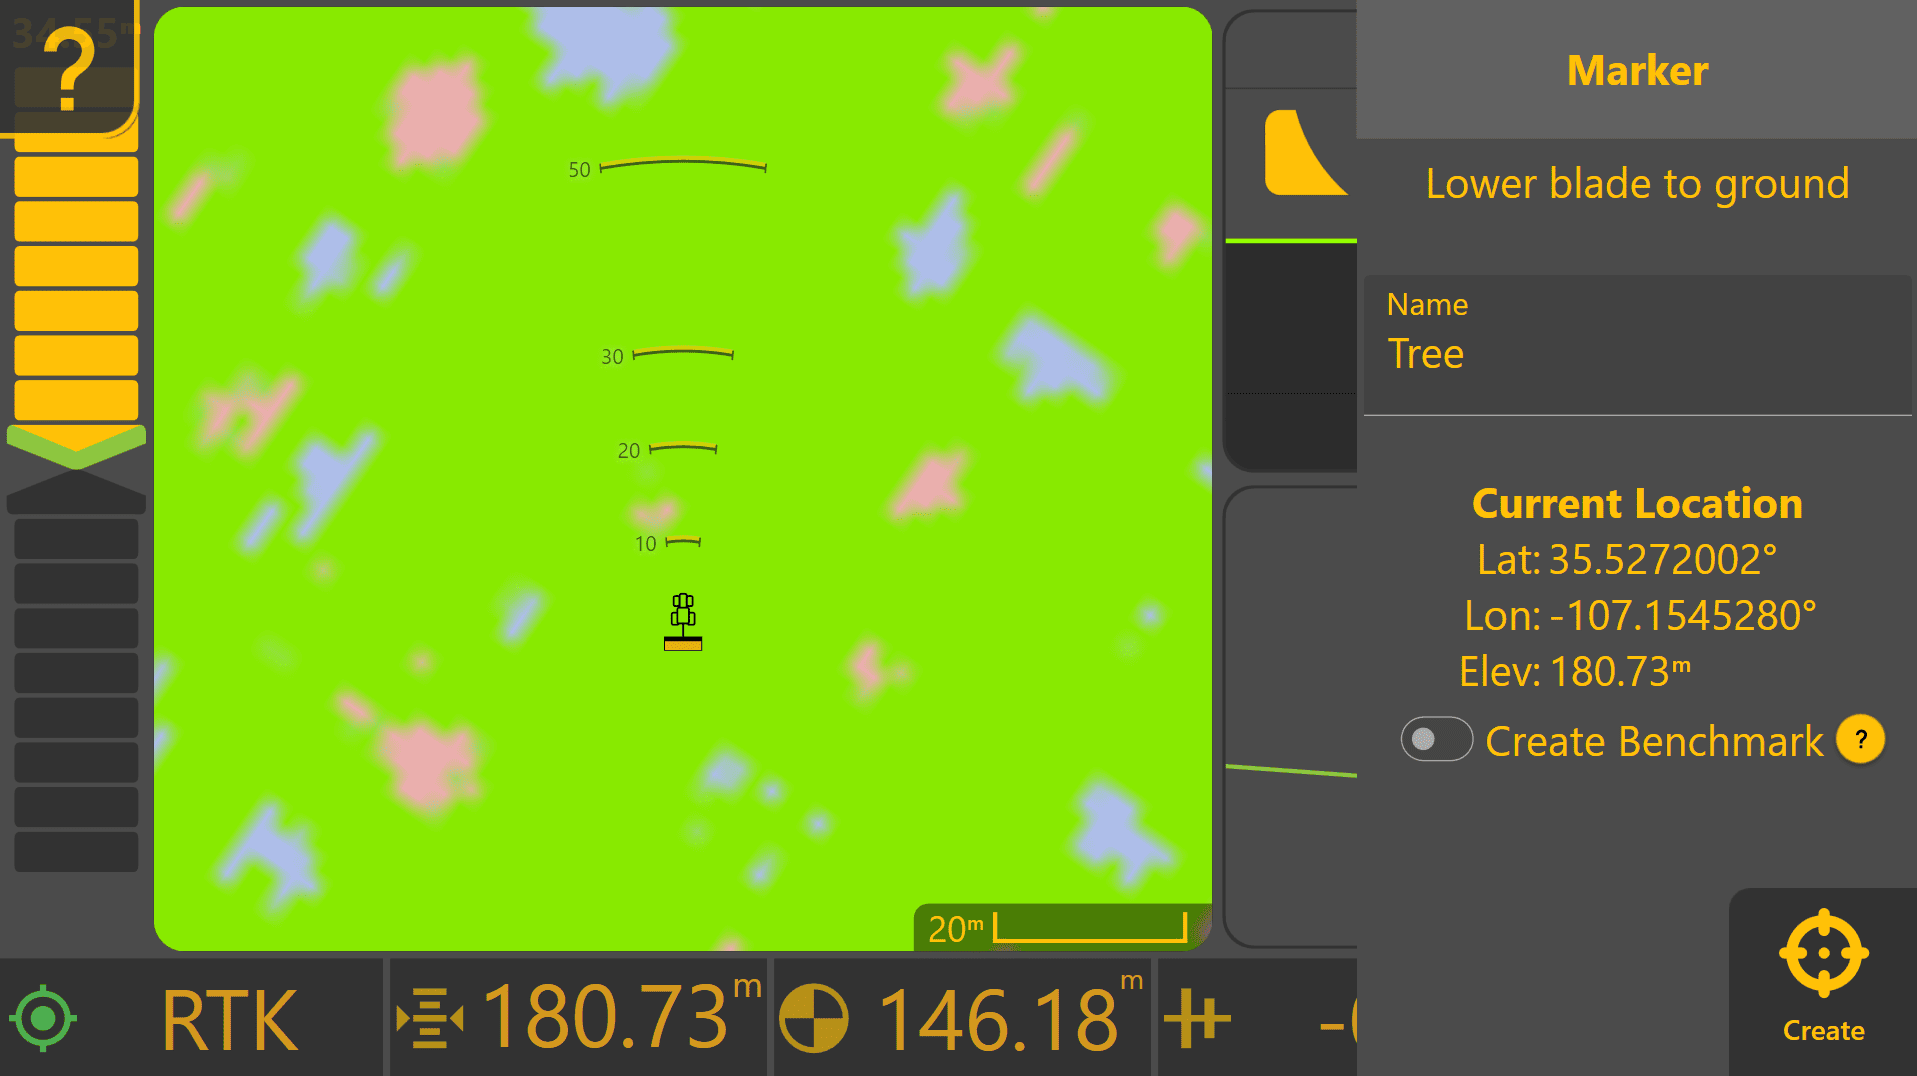
Creating a Marker
To create a General Marker or Benchmark Marker:
- Press Marker from the Apply View.
- Enter a descriptive marker name.
- Enable Create Benchmark if the marker will be used for zeroing.
- Press Create.
The current latitude, longitude and elevation are recorded as part of the marker.
Choosing a Good Benchmark
A Benchmark should be created at a location that can be accurately relocated throughout the life of the project.
Whenever possible, choose a location that:
- Will remain undisturbed during construction.
- Has a flat, stable surface.
- Allows the implement to be positioned accurately.
- Provides sufficient room to safely manoeuvre the machine.
- Can be easily recognised during future visits.
Examples include:
- Concrete pads
- Road shoulders near field entrances
- Survey monuments
- Permanent fence corners
- Other clearly identifiable locations
Avoid locations that are likely to be excavated, filled, cultivated or otherwise disturbed during the project.
When recording a Benchmark from the Apply View, lower the implement onto the ground before creating the marker so the recorded elevation represents the working surface.
Markers During Surveying
Markers can be created at any time, but they are particularly useful while surveying.
Recording important locations before exporting survey data allows those features to become part of the exported project, providing valuable reference information for designers, contractors and future machine operators.
Common markers recorded during a survey include:
- Benchmark locations
- Gateways and access points
- Fence corners
- Irrigation infrastructure
- Power poles and utility crossings
- Trees or significant obstacles
- Drain inlets, outlets and other important field features
Including these reference points within the survey often reduces the need for additional site visits and improves communication between the operator and designer.
When to Create Benchmarks
Creating a new Benchmark is appropriate when:
- Surveying an area for future design work.
- An imported project does not already contain a suitable Benchmark.
- Establishing a permanent reference point for future verification.
When creating a Plane Project, the Plane Origin is automatically stored as a Benchmark Marker and can be used later for re-zeroing the Plane if required.
If an imported project already contains surveyed Benchmarks, these should normally be used instead of creating new ones.
Important Considerations
Creating a Benchmark does not improve GNSS accuracy.
Instead, Benchmarks improve repeatability by allowing the machine to return to the same physical reference point whenever the project is revisited. This helps maintain alignment between the project and the real world over time.
Poorly chosen Benchmark locations may introduce alignment errors if the ground surface changes, the location is disturbed, or the implement cannot be positioned consistently.
Operator Tip: Treat Benchmark Markers as permanent project reference points. Spending a few extra minutes selecting a stable, easy-to-find location can save considerable time when returning to the project months or even years later.
Once you are familiar with creating Markers and Benchmarks, continue to 5.8 | Choosing a Zeroing Method, which explains how different zeroing workflows are selected for Plane Projects, imported designs and existing surfaces.