
5.5 | Plane Projects & Surface Creation
Plane ProjectProjects allowsallow yousimple design surfaces to createbe simple flat surfacescreated without first surveying the entire work area. ThisThey Levelare COMMANDcommonly featureused supportsfor thecreating creationflat ofpads, graded surfaces, drain batters and other simple earthworks. Each Plane Project can contain up to four planeindividual Plane surfaces, making it easy to switch between different work areas or design surfaces thatwithout cancreating quicklyadditional beprojects.
Creating a project.Plane For example, a series of pads, various sides of a hill, or even batters of a drain.
Getting StartedProject

Navigate toFrom the ChangeApply ProjectView, pagepress andMore click> theStart "New Plane" button (see left)Plane. Once the newPlane planeProject projecthas isbeen created, thea PlanePlanes button will appear on the mainApply pageView. (see right). OnceWhen a planePlane surface is created,selected, itthe button will showdisplay the name of the selectedactive planePlane.
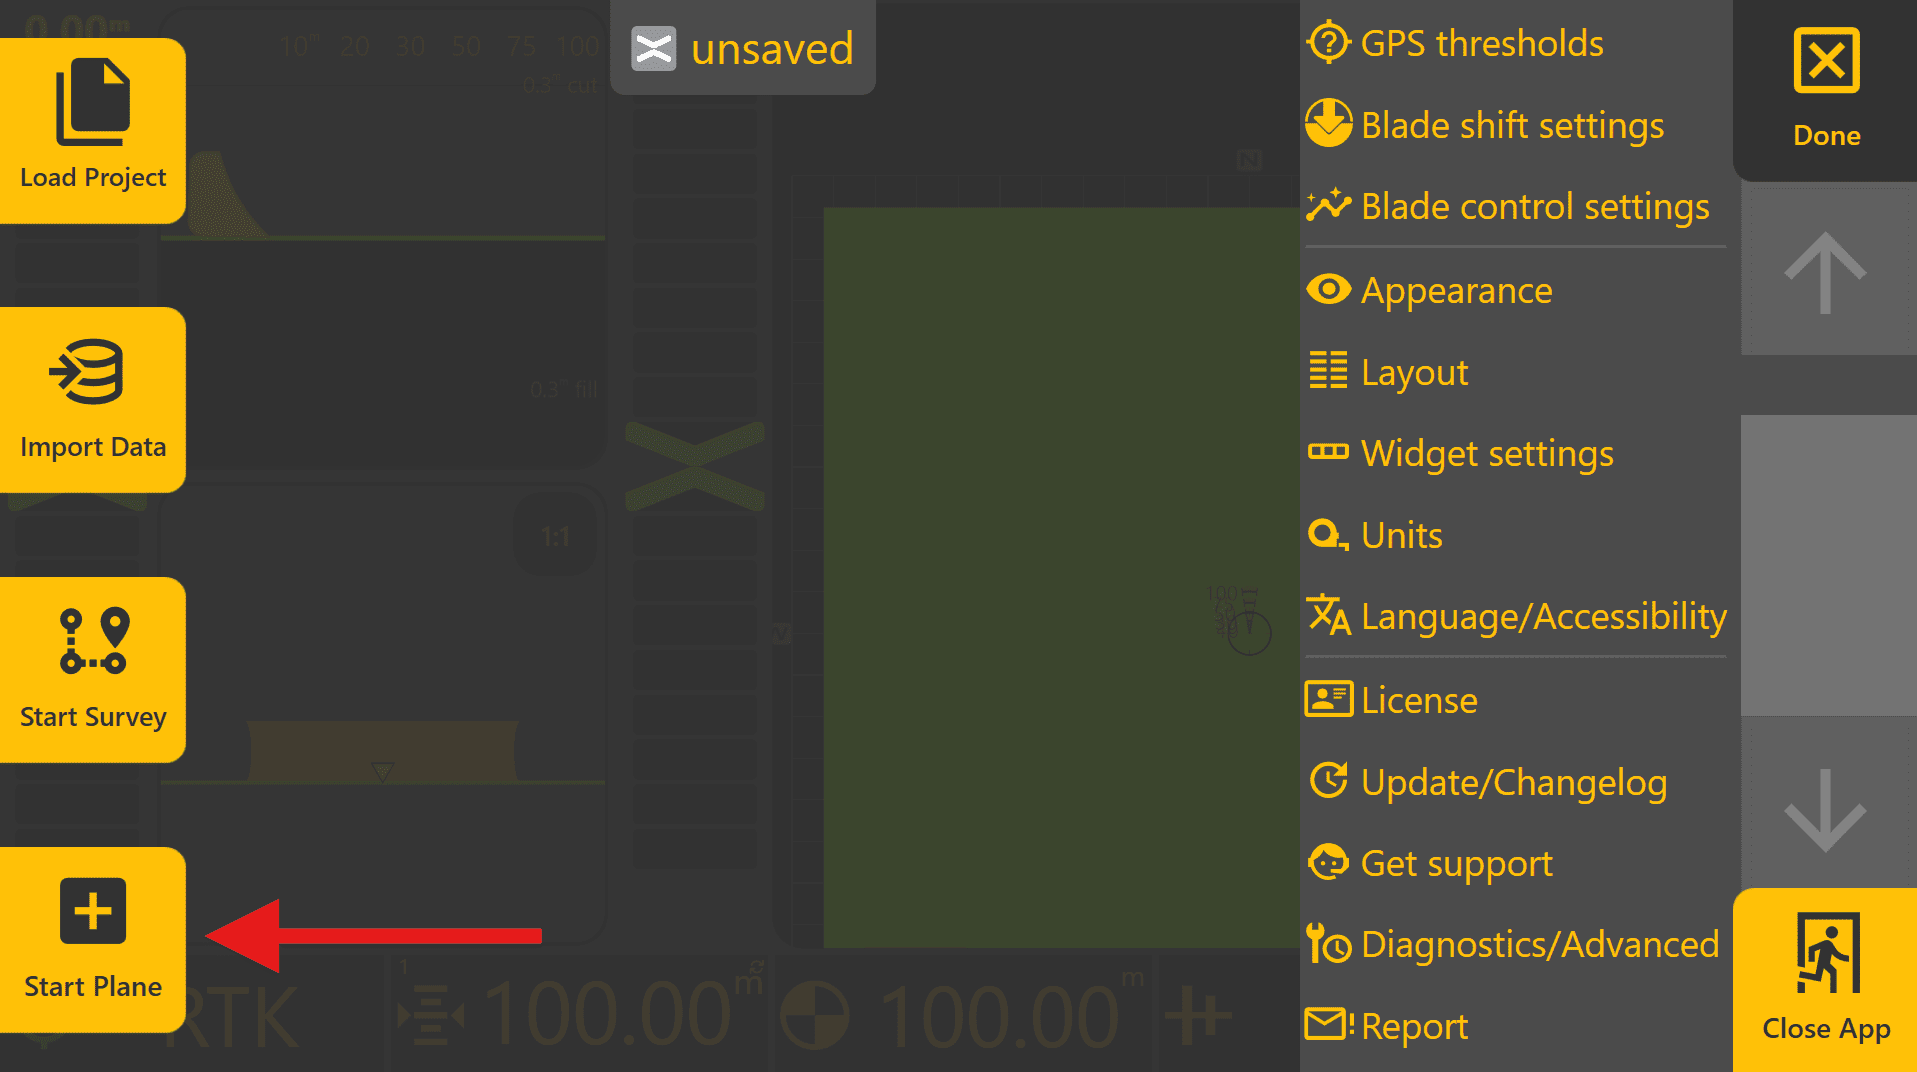
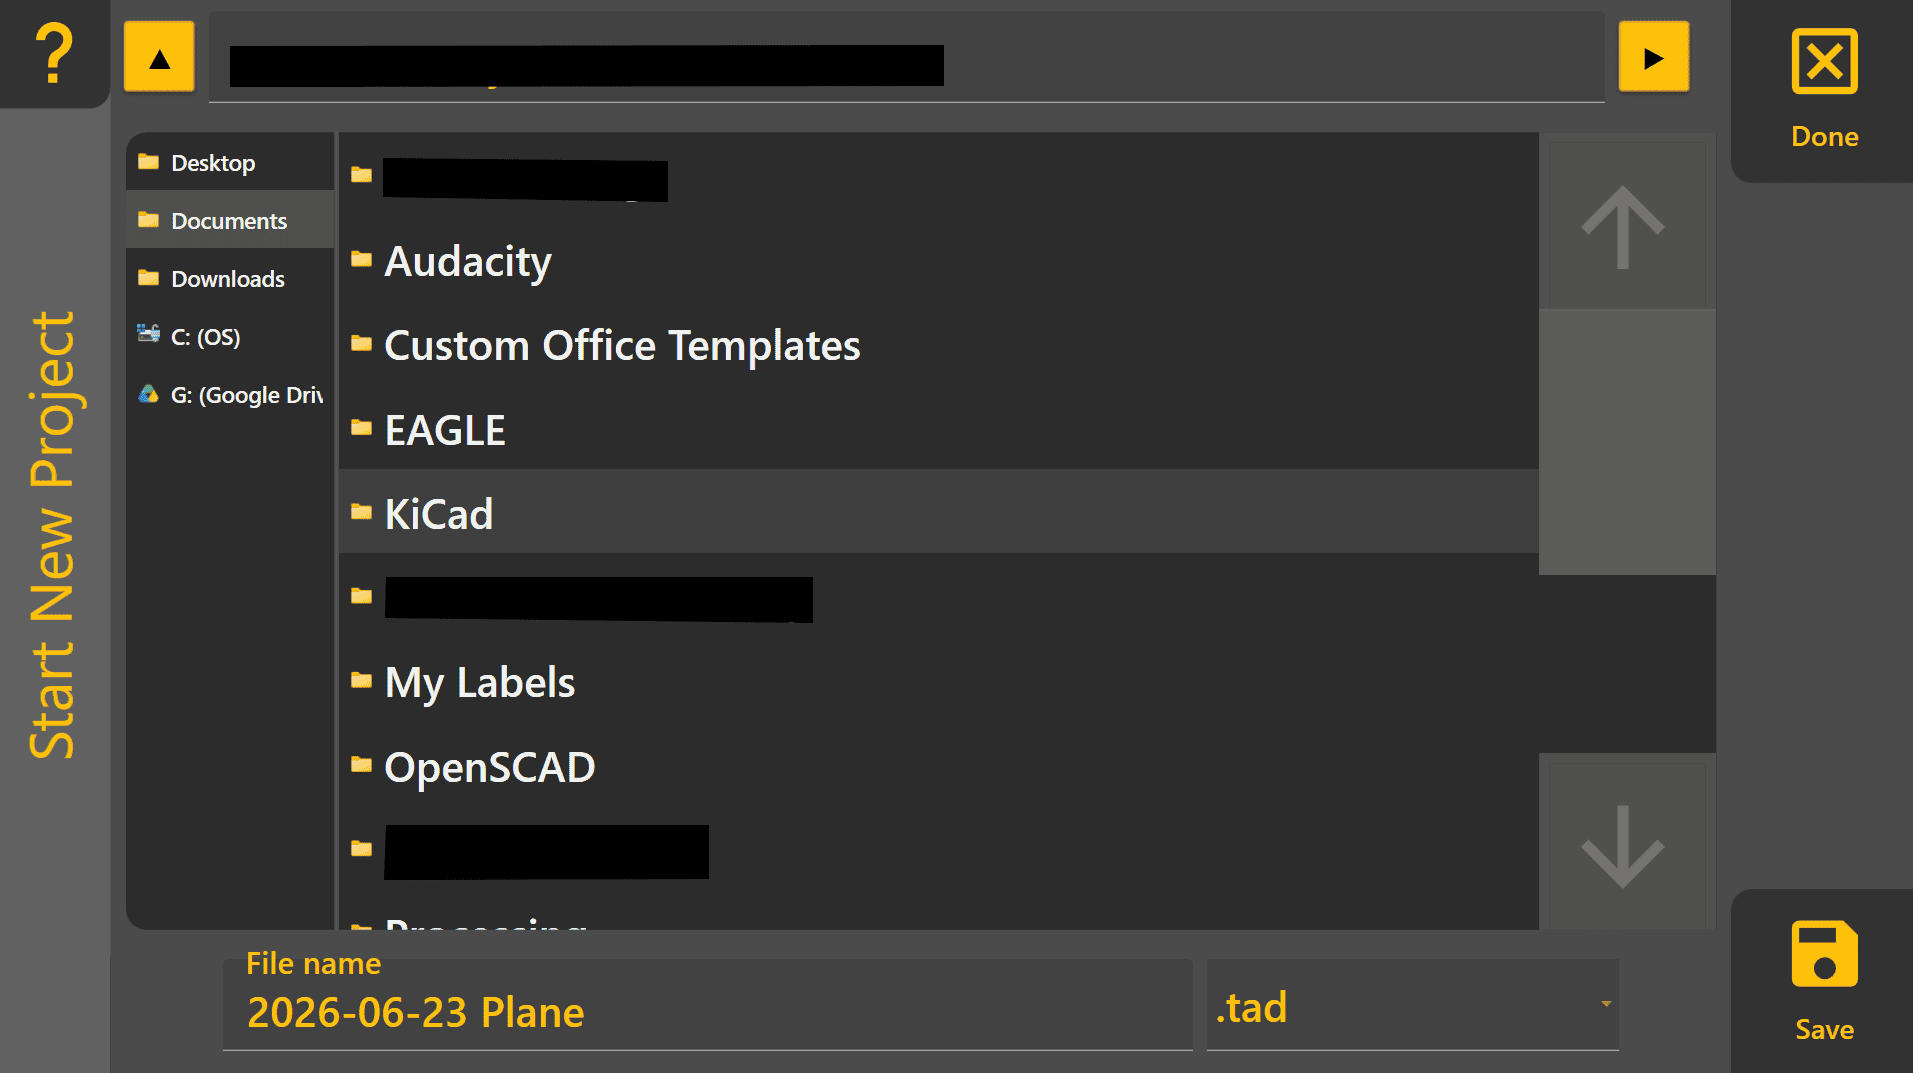
To begin designing a Plane, press the "Planes" button at the right side of the screen, then "Create" for one of the available plane slots (1-4). Up to four Plane surfaces can be stored within a project, making it easy to switch between different work areas without creating additional projects. Once pressed, a Plane design area will appear at the right side on top of the Apply View. In the top right, a Help button also allows you to quickly reference this help page.
Select/Define


Selecting surfaceand Managing Plane Surfaces
Press the the "Planes" button on the right sidebar.side Allof the Apply View to display the available Plane slots.
Up to four planePlane slotssurfaces arecan thenbe shownstored onwithin thea right.single TapPlane anProject. emptyEach slotPlane tocan have its own:
To create a planenew there,Plane, orselect tapany anunused slot labelled Create. Alternatively, to switch between existing plane toPlanes, select itthe ordesired editPlane itsfrom values.the Each plane has slopes, an offset, a name and a size that you can edit.
To swap to another plane tap on it.list. The selectedactive planePlane hasis indicated by a yellow outline.
To edit an existing plane,Plane, select it first,and then tap onselect it again.again Thatto is, tapopen the Plane fromEditor. The Plane Editor is used to define and modify all Plane properties, including origin, slopes and survey-based Plane generation.
To define a new plane click on any unused slot (it will be labeled as "Create") and you will be taken to the edit screen.page.
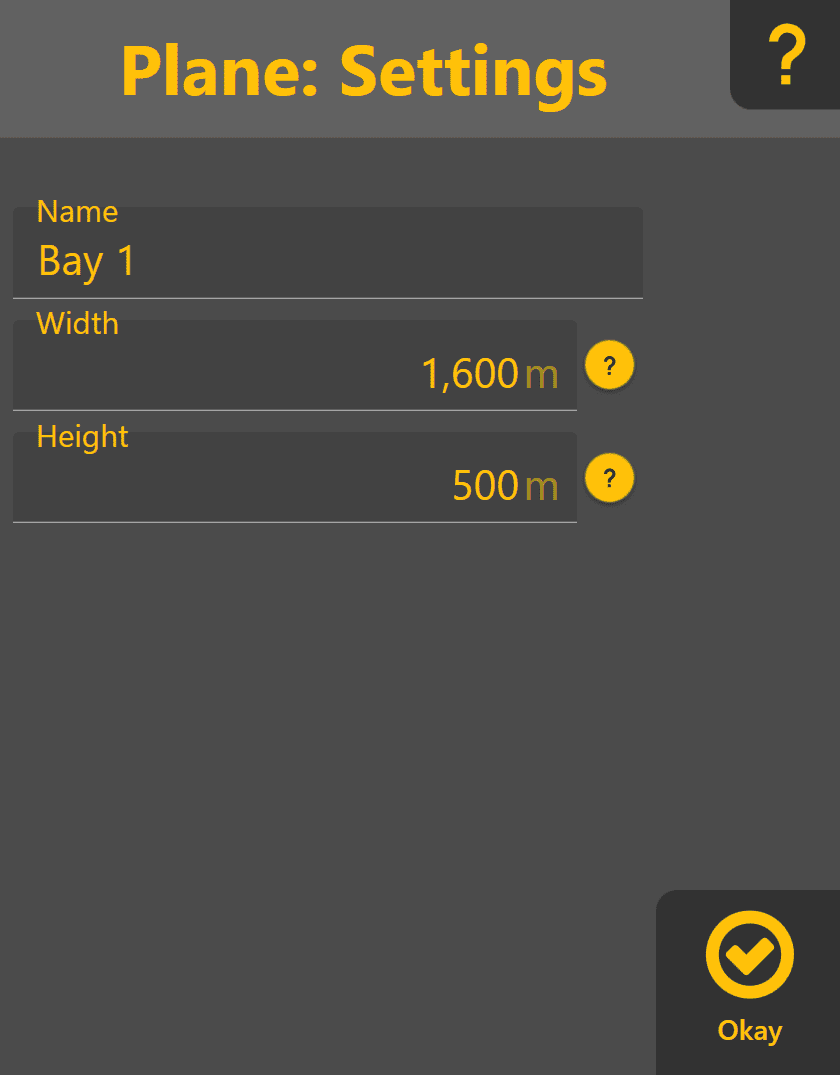
Plane Settings
'Delete' will delete the current plane, allowing it's slot to be reused.
Press "Settings" to viewwithin the Plane NameEditor andto size (Width and Height). Nameconfigure the Plane toname makeand dimensions. Assigning a meaningful name makes it easier to referenceidentify different work areas within thea workproject.
Plane Width and adjustHeight determine the sizevisible extent of the generated Plane as needed to avoid the entire surface extending past the work area if desired.surface. These settingsvalues canmay be adjusted laterat ifany needed.time without affecting the calculated grade of the Plane.
Setting the Origin Point
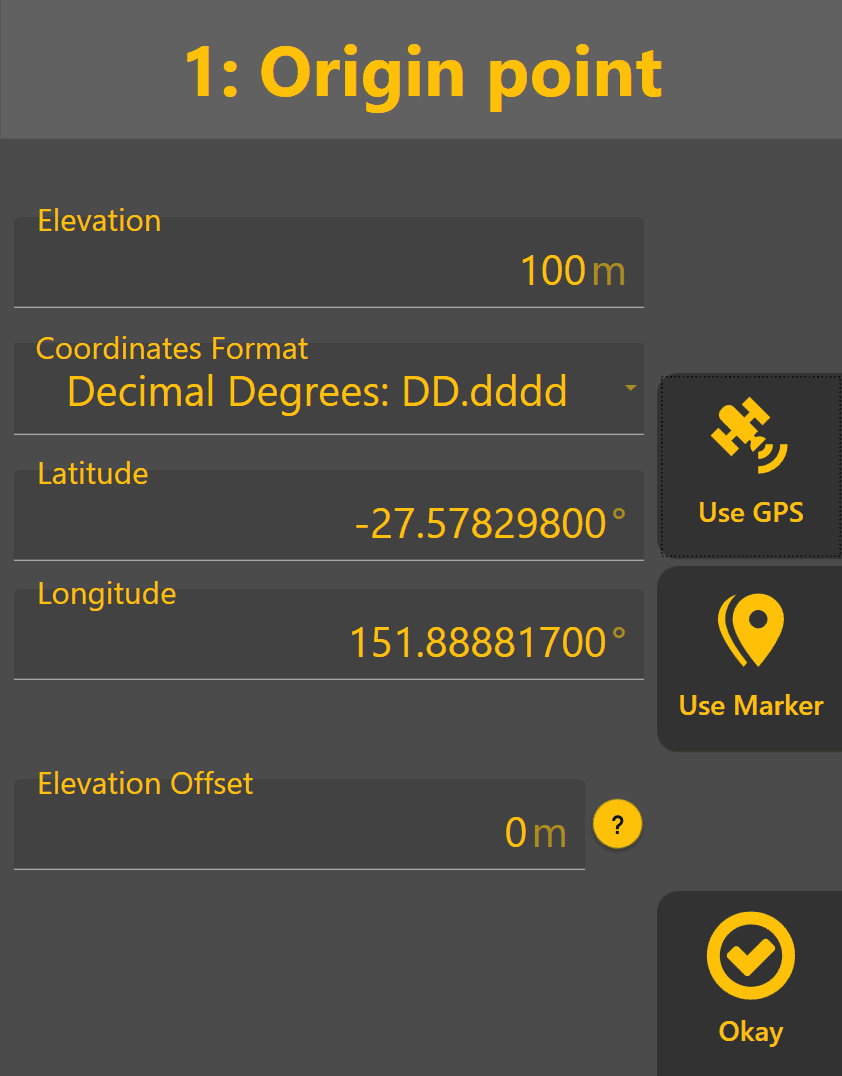
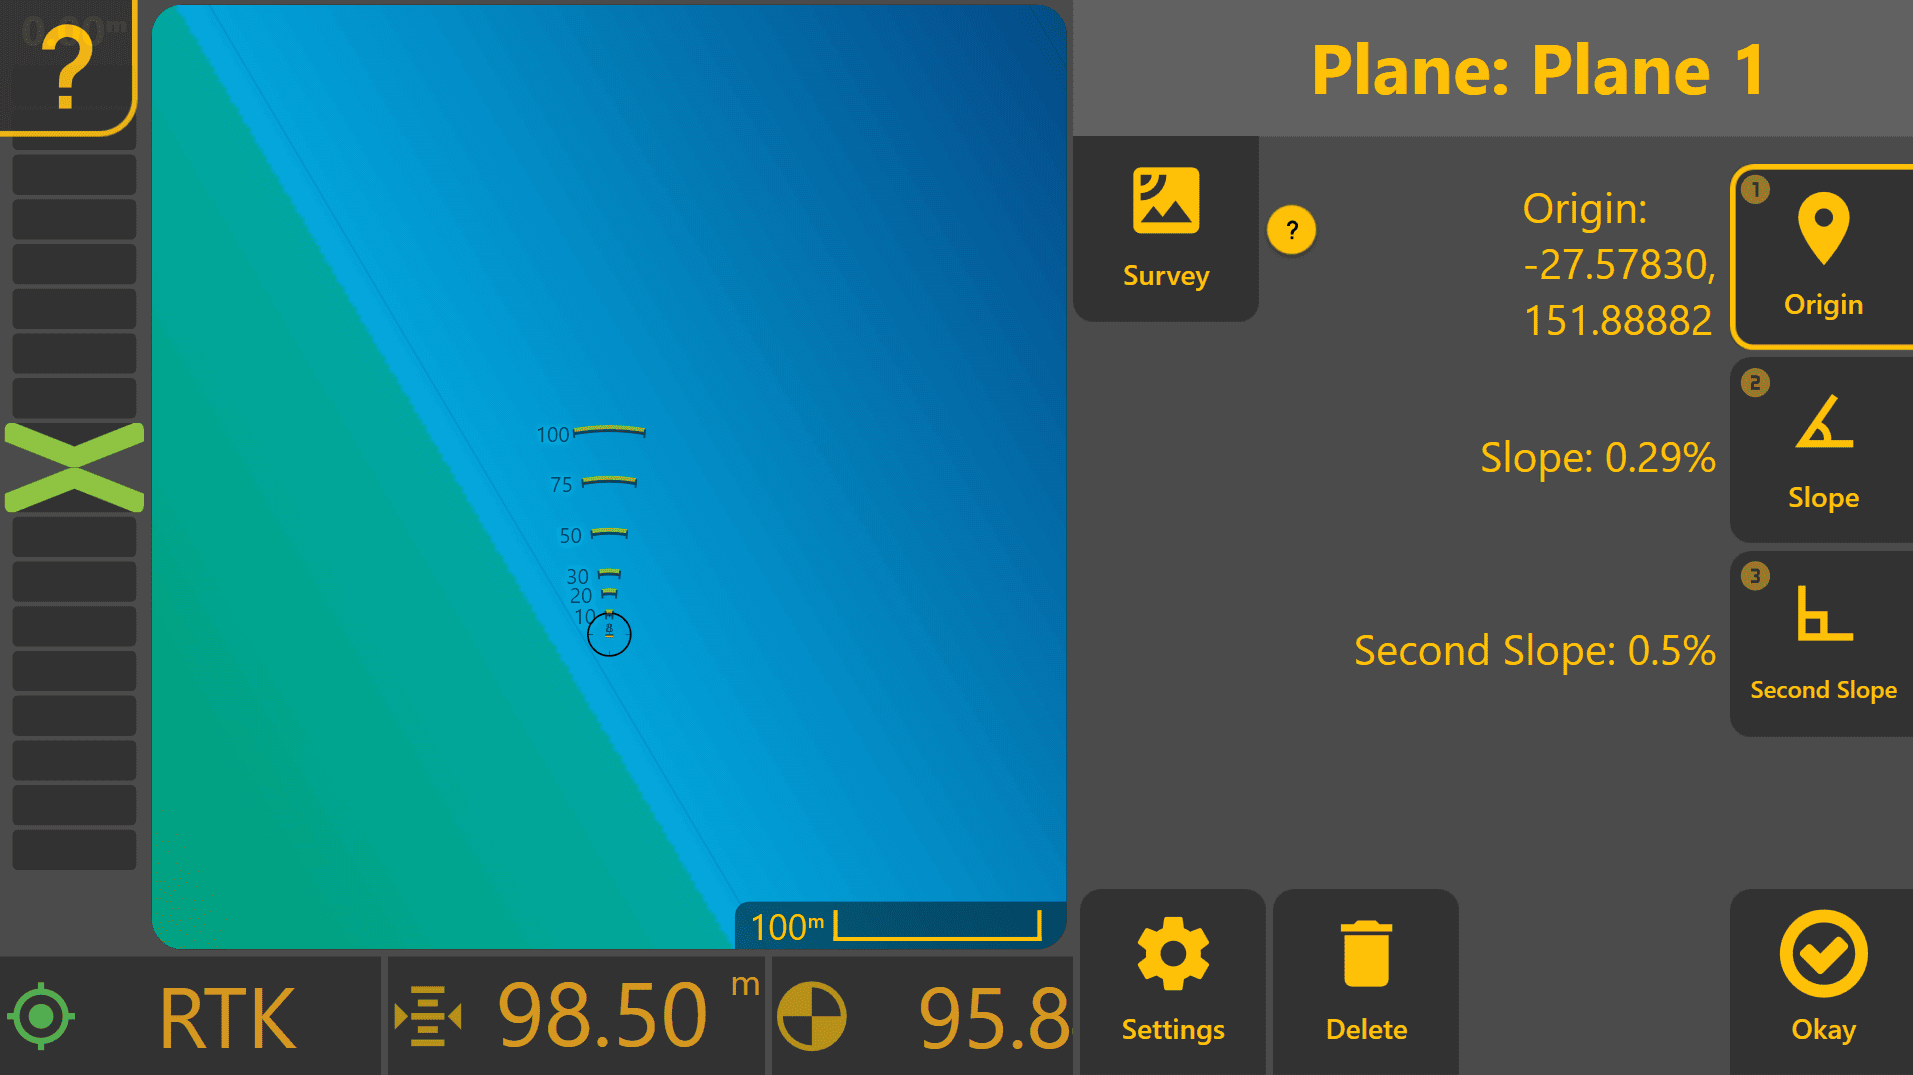
Follow through steps 1-3 at the right side. Press Origin to define the Origin (aka anchor point). Press "Use GPS" to set the Origin point to the current elevation of the implement GNSS receiver. Alternatively, Lat/Lon/Elev coordinates can be entered manually if using a surveyed benchmark for the Plane design. Once set, press "Okay" and a flat-grade Plane will be created with the Origin point at the centre.
'Use Marker' Will allow you to select a marker to use as the Origin.
The "Coordinates Format" will allow one to specify the latitude/longitude in various formats - ie it's only a visual change.
To quickly move the plane up (e.g. for filling in the work area) or down (e.g. for flattening and removing top soil or undulations) later, an Elevation Offset can be applied to the Origin using the Elevation Offset field and will shift the Plane upward with a positive value or downward with a negative value.
Setting the Primary Slope
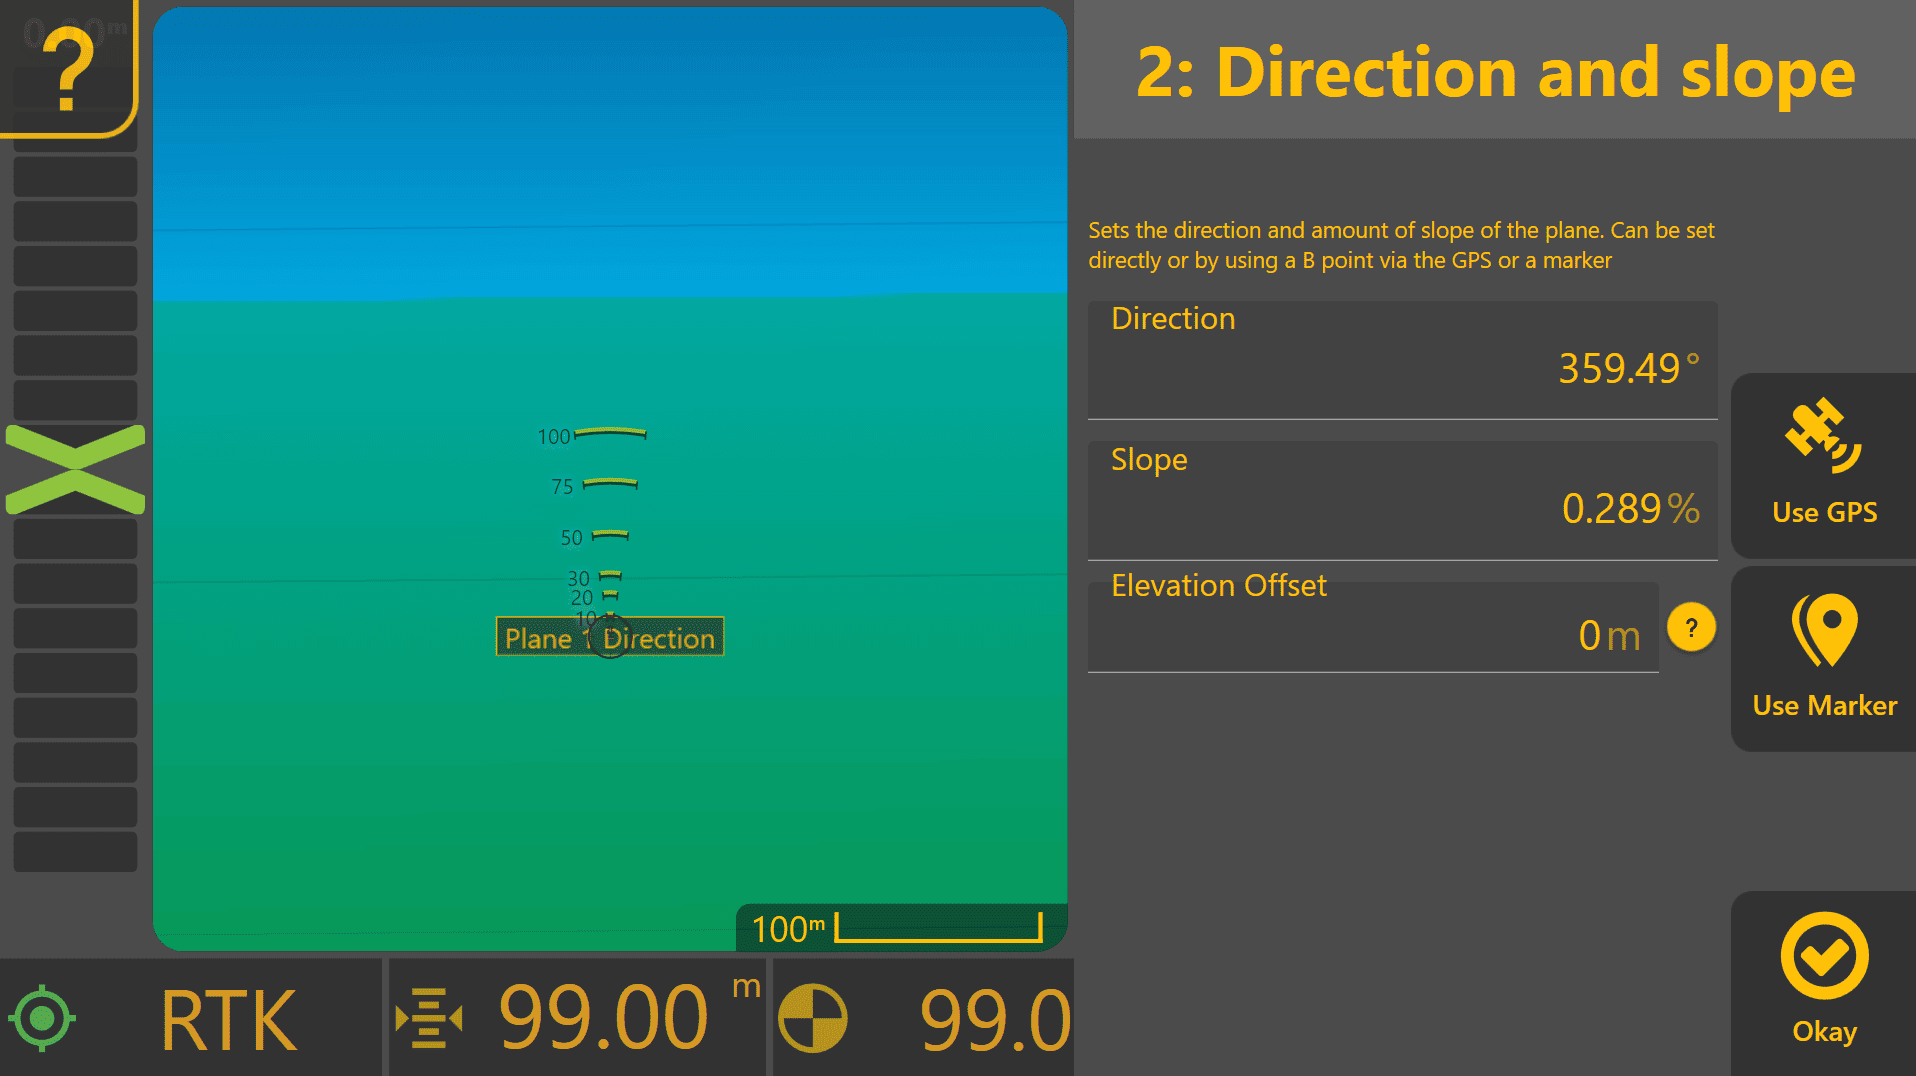
Press the "Slope" button to design the Slope (primary slope and direction) of the Plane. Drive from the Origin to a second point on the desired grade surface, place the blade on the ground and then press "Use GPS". The slope between the Origin point and the slope marker will be generate automatically and displayed as well as the Plane surface updating with the new slope on the map. Direction and slope from the Origin can also be entered manually here. Once finished, press "Okay".
'Direction' Which way the slope value will affect the plane.
'Slope' How steep the grade of the plane will be. It uses percentage notation - i.e. 100 × rise / run.
'Use GPS' Will take the current position of the implement, and calculate the heading/slope between that and the Origin. These values can then be edited afterwards if the values aren't quite as desired.
'Use Marker' Will allow the selection of a marker, and calculate the heading/slope between that and the Origin. These values can then be edited afterwards if the values aren't quite as desired.
Setting the Secondary Slope
The X Slope is the slope at right angles/90° to the Primary Slope. It shares a similar behavior to the Primary Slope UI except doesn't allow specifying direction. Press the "Second Slope" button to design the Second Slope (at right angles to the primary slope) of the Plane. Drive from the Origin to the desired secondary high-point or low-point in the work area, place the blade on the ground and then press "Use GPS" to set the Plane's second slope marker to the current implement height and calculate the secondary slope automatically.
Alternatively, enter the secondary slope percentage manually in the field shown to apply a known secondary slope across the the entire plane, cross-sectionally to the primary slope.
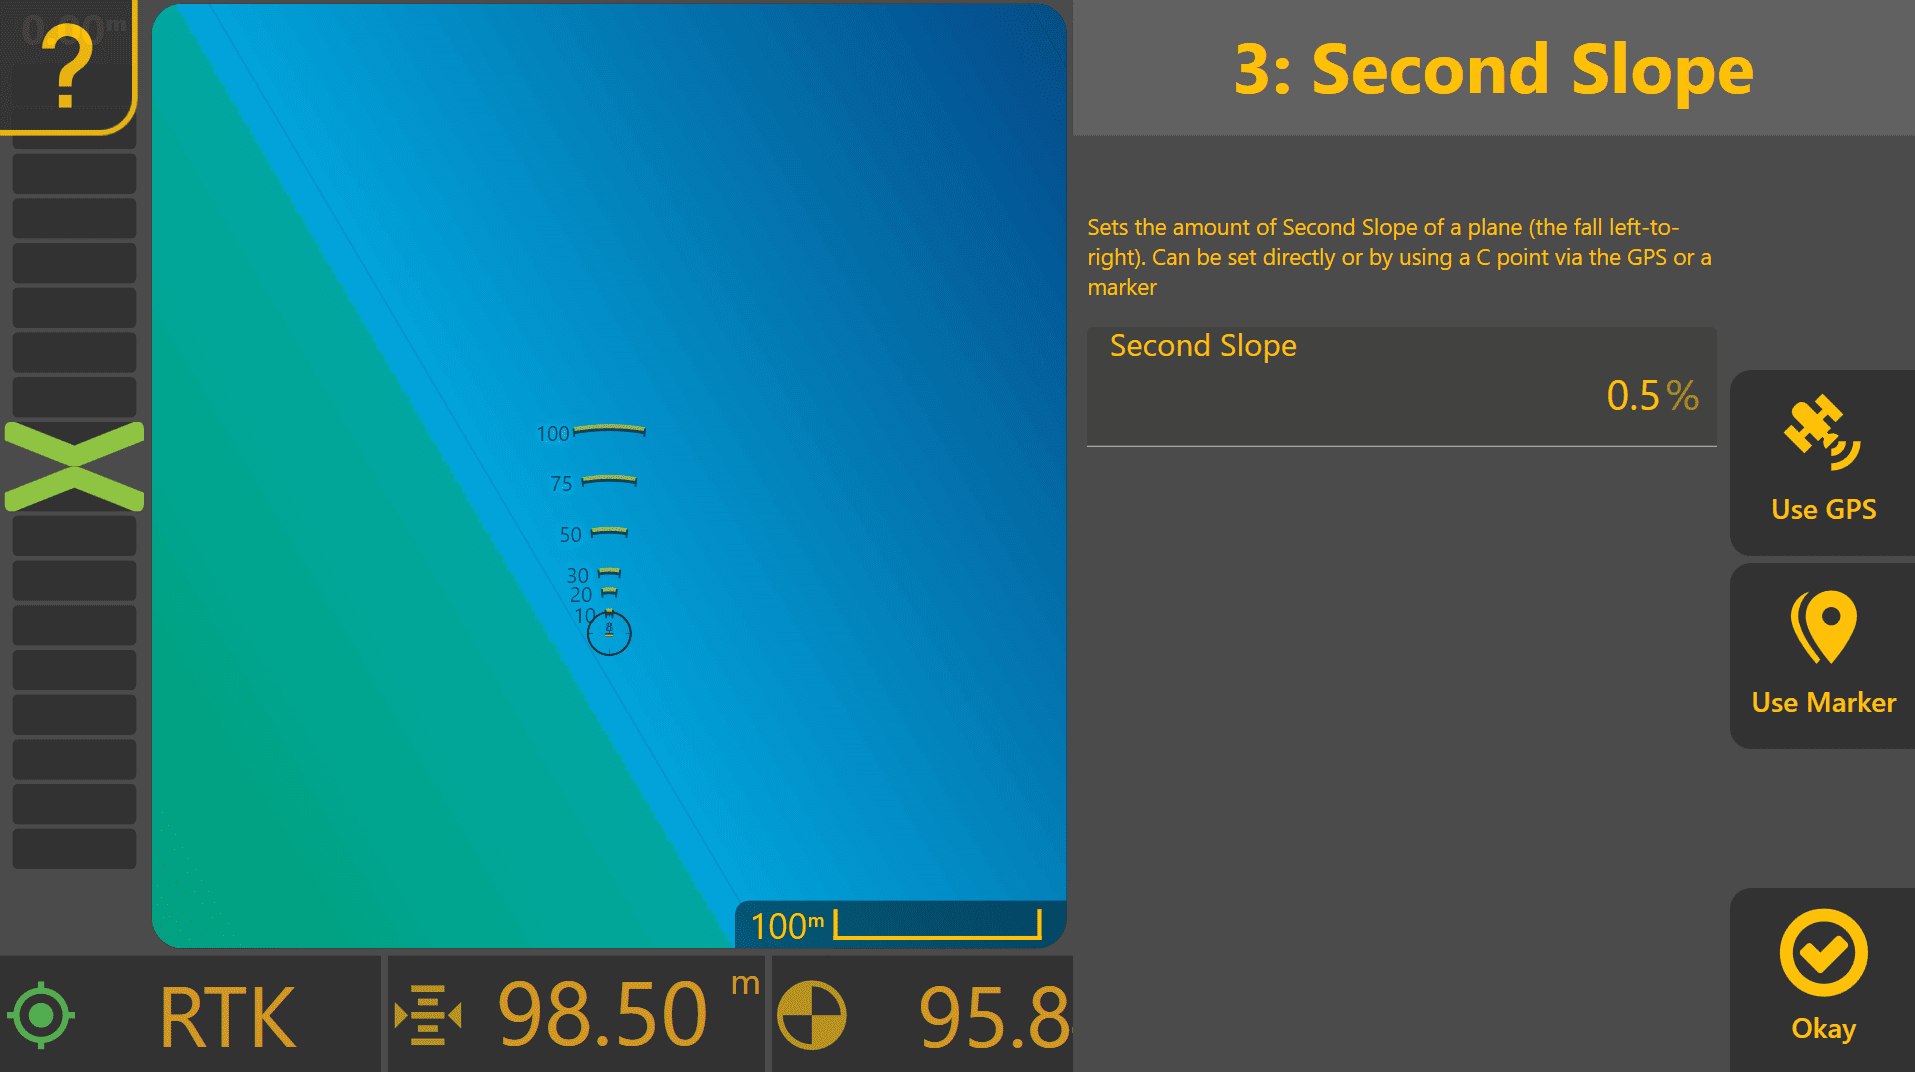
The overall slope and direction of the Plane is then be calculated based on differences between heights at the Origin, primary slope marker and second slope marker. Press "Okay" to finish.
Plane Editor: Survey
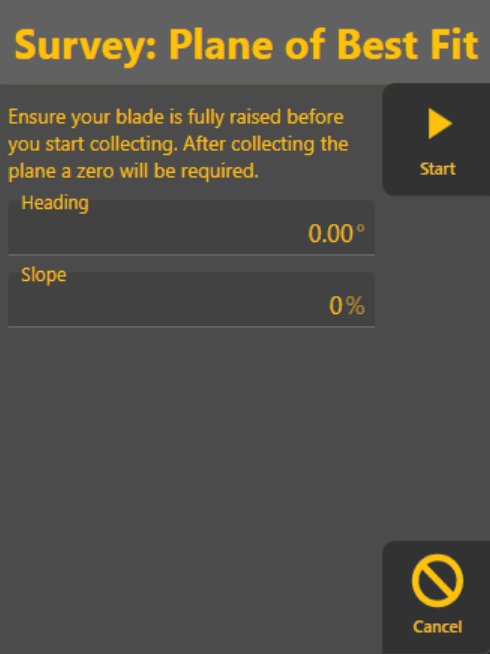 When you are not sure about the slope and heading, you can survey to create a plane of best fit. Once you have your bucket raised, tap the 'Start' button and survey an area. The heading and slope should stabilize as more GPS points are collected. The buttons mentioned below become visible once you have started surveying.
Tap 'Pause' and 'Resume' to exclude unwanted GPS points from your survey.
Tap 'Stop' when you're done, and the plane will be ready to zero against.
To check the heading and slope values of the plane, simply tap on the plane when it is already selected.