
Importing Data
Because T3RRA software normallyuses readsthe T3RRA Project File (.tci) “project”as files,its native project format. Data from supported external filessources need tomust be imported using the 'Import'Import buttonfunction onbefore theit initialcan screen.be used within a T3RRA project.
NOTE: T3RRA Design provides additional import and conversion capabilities and can be used to convertprepare many other file typesformats for use inwith T3RRA softwaresoftware.
NOTE:T3RRA Apply does not support data import. T3RRA Apply is unable to import data, and can only work with designs fromcreated in, or provided by, other T3RRA projects.
Loading vs Importing
InThroughout T3RRA software weand makethis amanual, distinction between loading a project, and importing data. When we refer to “loading”two itdifferent concernsoperations:
.tci project file.
A .tci project can normally be loaded directly. Importing external data file.may Whereasrequire a .tci file will load in a single step there are sometimes multipleadditional steps tobecause importingT3RRA datamay asneed information about the source data, or the data may need to be changedinterpreted or alteredconverted duringbefore it can be used.
Importing a File
External data can be imported when creating a project or added to an existing project at any time.
 1. Open the
 importImport process,Window
Select thereImport may need to be decisions made duringfrom the import in order to get the correct data.
The following guide shows the steps required to successfully import a file.
1) To import a file from an external source first press the import button on the Main Page or from the “Collect”Collect step.step Youof canthe importWizard.
If you have a keyboard attachedis (e.g.connected, Desktoppress inCtrl+I to open the office),Import press Ctrl+I.window.
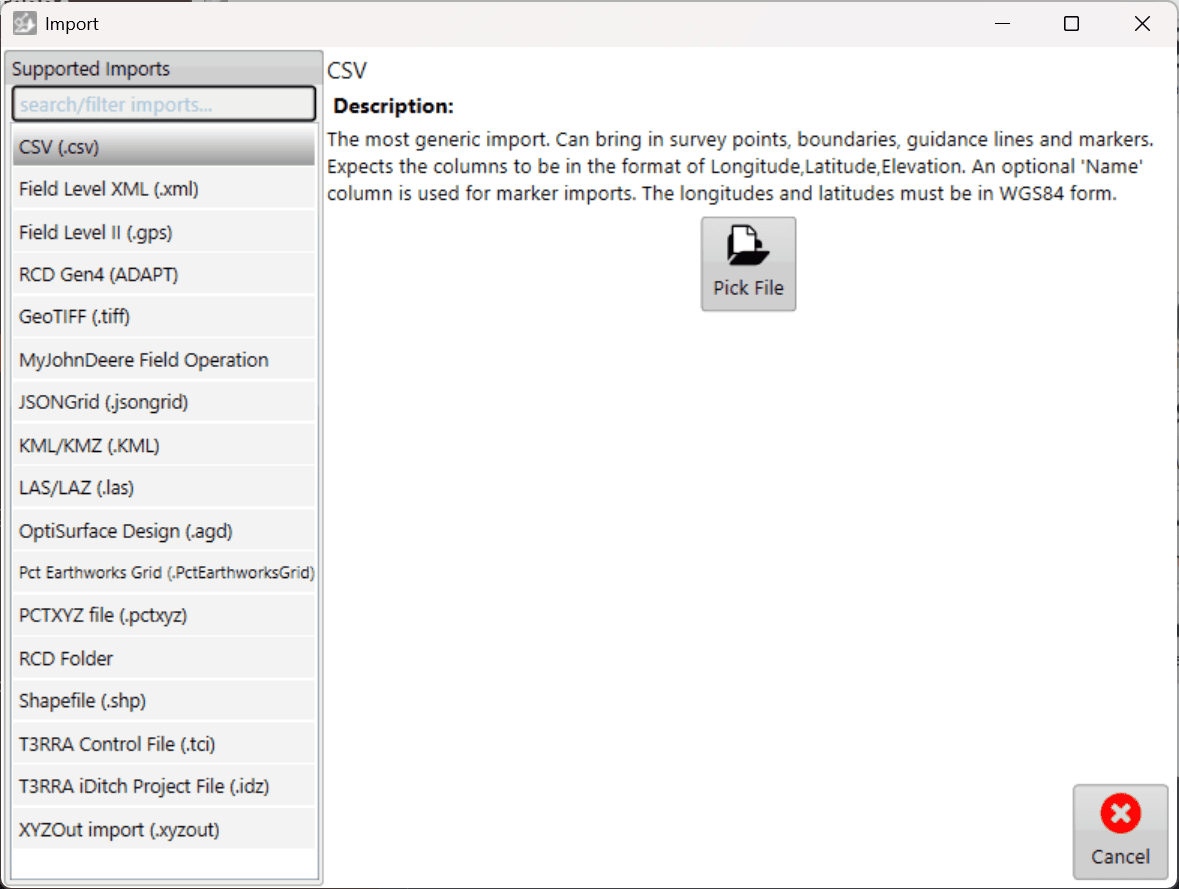
2. 2) Next pressSelect the buttonImport forType and File
Select the typeappropriate ofdata or file youtype arefrom tryingthe to importoptions on the left handside side,of the Import window.
Select Pick File, then clickbrowse “Pick File”to and select the file you wish to import.
3. Configure the Import
3)Some Forfile sometypes importsrequire youadditional mightinformation needbefore tothey specifycan extrabe information,read, such as coordinate system or projection information.
Enter you’ve provided theany required information, clickthen “Read”select Read in the bottom lower-right corner.
ForWhen importing CSV import,data containing latitude and longitude coordinates, the longitude and latitude valuescoordinates must beuse in WGS84 form..
4. Review the Data
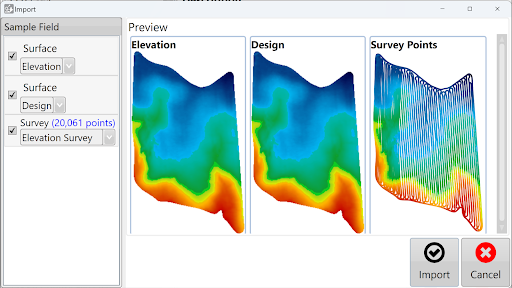
4)Once Youthe willfile nowhas bebeen able toread, select whichthe data you wish to import. OnA preview of the available data is displayed on the right is a previewside of allthe window.
T3RRA will attempt to automatically identify the type of data tocontained bewithin imported.NOTE:the file. If the auto-detected data type is incorrect, you can change it usinguse the dropavailable downs.Clickdrop-down “Import”menus to start working withselect the importedcorrect data.type.
Review the data and selections, then select Import.
5. Continue with the Imported Data
5)Once Afterthe import is complete, the imported data hasis beenavailable imported,for surfacinguse within the project. Surfacing and design optionsoperations can then be applied.performed as required.
When elevation survey point data is imported, T3RRA automatically creates the corresponding surface.

NOTE: elevation survey point data that has been imported will have surfacing done automatically.