The Apply View
This view is optimized to get you moving dirt. It's split into several areas. There is a on-grade indicator on the left, map and implement views in the center, options on the right, and status widgets along the bottom.
Left: On-grade indicator

The on-grade indicator displays how far you are from the current target elevation. If you're too high, blocks above the mid-point will be highlighted. If you're too low, blocks below will be highlighted. For larger errors it will like an arrow pointing you in the right direction. If you look closely, your control error will be shown at the top. In the example on the right, the blade is 5cm (2 inches) too high. If you have nudged the blade up or down, a hint will be shown at the bottom.
Center: Map and implement views
This displays your current location and optionally a side and back view of your implement.
Right: Options
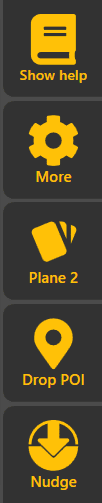
On the right, several buttons allow you to operate and configure Level COMMAND. Tap one of them to show more details.
Show help will display this help.
More will list settings and other actions for you to choose from.
Planes is shown when working with a plane project, and lets you switch between planes and configure them.
Drop POI allows you to drop a Point Of Interest (POI) at your current location.
Nudge lets you offset the blade's target height from the design elevation. This allows you to make height adjustments to complete large cuts in stages.
NOTE: To exit from Level COMMAND, simply tap the More button then tap the Close App button.
Bottom: Status widgets
These small rectangles show various details about your system. Long-press on a widget to open the Widget Settings and change the displayed widgets. There are many to select from, so try them out till you've found the right ones! But the one in the bottom right will always be the COMMAND status widget.

The name of each widget is shown in Widget Settings, so to check their names, just long-press on one (except the COMMAND widget on the right).