Setting Zero
Zeroing is the process of aligning you implement with the design as it was originally created. The design might have been surveyed using a different implement, your implement may have been adjusted, or there might have been some GPS drift. Zeroing solves this by determining the needed adjustment.
When should oneto Zero
It can be better to avoid zeroing, as you must be very precise to get the best value. It can be that the blade wasn't quite put on the ground fully, or it was put in too far and dug in a bit. It could be that the blade is off-target to the left or right, shifting the field. This is why it's only recommended to zero if:
- The file hasn't ever been zeroed to before
- The base-station has moved
- The blade isn't properly cutting - ie it's consistently too high or too low
What is a benchmark/Where should it be?
A benchmark is a known point that allows you to calibrate your phyicalphysical machine withtwith the digitialdigital world.
Benchmarks should be in locations that are repeatable and easily accessible. Ideally they want to be on a stable location (ie a concrete pad) where the blade can be reliably placed. It should also allow the lat/lon position to be reliably recreated, ie if there's a mark on the concrete that the center of the bladblade needs to be over.
Sometimes surveyors/designers provide benchmarks on fence posts or other locations that the blade can't reach, in that case the FAQ below.
Should your design not have any benchmarks Level Command will create "Auto-Benchmarks". Auto-benchmarks are placed on flat areas of zero-cut fill. This is less ideal than using a known benchmark as normal traffic or water could affect the exact height of the location which is why it's recommended to have one included in the design. When using auto-benchmarks several will be provided. Choose the one that will be least likely to be driven over and most convientconvenient to use as once you've used one the others will be removed.
How should oneto Zero
When zeroing it's important to be as precise as possible as that will likely lead to a better outcome in the implementation. Any deviation from the original survey will mean the entire design will be offset by that amount.
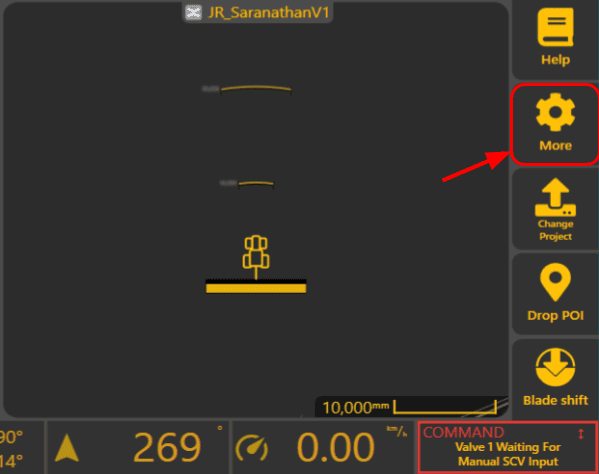
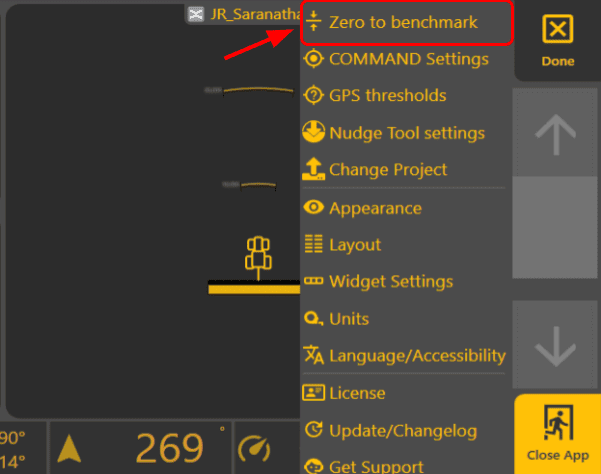
Open the zero window by clicking on "More" then "Zero To Benchmark"
Select the marker you wish to zero to and then drive the implement/blade over the exact location of the marker. You will see a dashed line highlighting the location of the marker. Carefully place it down on the ground. If zeroing on dirt it should be touching the ground but not digging into it.
Adjusting the zero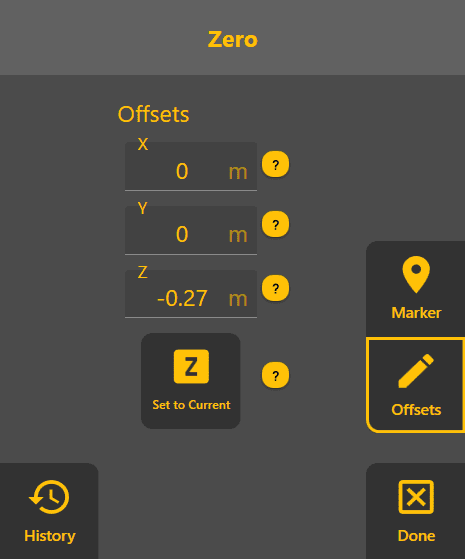

In advanced situations you might find the need to tweak the zero. Select "Offsets" and you will be able to.
X: Adjusts east/west. Positive values move east.
Y: Adjusts north/south. Positive values move north.
Z: Adjusts up/down. Positive values move up.
As these values are adjusted you will see the position update in real time on the rest of the display - so it makes it easy to dial it in.
Set To Current
Set to current will set your Z height to be on the current design surface height. This is an advanced option only recommended when you aren't able to use benchmarks or auto bench marks.
How to use "Set To Current"
- Find an area that is trustworthy (either zero cut/fill or one that has been cut/filled to design) and then
- Set the blade on the ground.
- Click "Set to Current".
- A countdown will be displayed to ensure we have an accurate reading.
- Ensure that the desired control is achieved by driving around and ensuring that it is cutting and filling as expecting - i.e. not cutting where it should not be, etc.
- If not performing correctly, either try performing "Set to Current" again or manually adjust the Z offset.
History
To check previous zero actions, you can tap the "History" button. It is only shown on the "Offsets" page. The history page lists all the zeros that have been performed with your machine. The more recent zeros are at the top. Tap on a zero entry to view more of its details.
FAQ
The benchmark is on a fence post/some other inaccessible area. How can that benchmark be used?
Ideally, request the designer to provide a benchmark on an accessible area. If not, then talk to one of our support team to assist you as this process is failyfairly involved.
How can I undo my Zero Offset changes?
You can view your previous zeros by tapping the "Offsets" button, then the "History" button. Scroll to the zero you want, and tap on it. It will display the details so you can re-enter them.