**T3RRA Design** provides additional import and conversion capabilities and can be used to prepare many other file formats for use with T3RRA software.
**T3RRA Apply does not support data import.** T3RRA Apply can only work with designs created in, or provided by, other T3RRA projects.
## Loading vs Importing Throughout T3RRA software and this manual, **loading** and **importing** refer to two different operations: - **Loading** means opening an existing T3RRA `.tci` project file. - **Importing** means bringing data from an external or third-party source into a T3RRA project. A `.tci` project can normally be loaded directly. Importing external data may require additional steps because T3RRA may need information about the source data, or the data may need to be interpreted or converted before it can be used. ## Importing a File External data can be imported when creating a project or added to an existing project at any time. ### [](https://docs.t3rra.com/uploads/images/gallery/2026-08/YOeimage.png)1. Open the Import Window Select **Import** from the **Main Page** or from the **Collect** step of the Wizard. If a keyboard is connected, press **Ctrl+I** to open the Import window. ### 2. Select the Import Type and File Select the appropriate data or file type from the options on the left side of the Import window. Select **Pick File**, then browse to and select the file you wish to import. [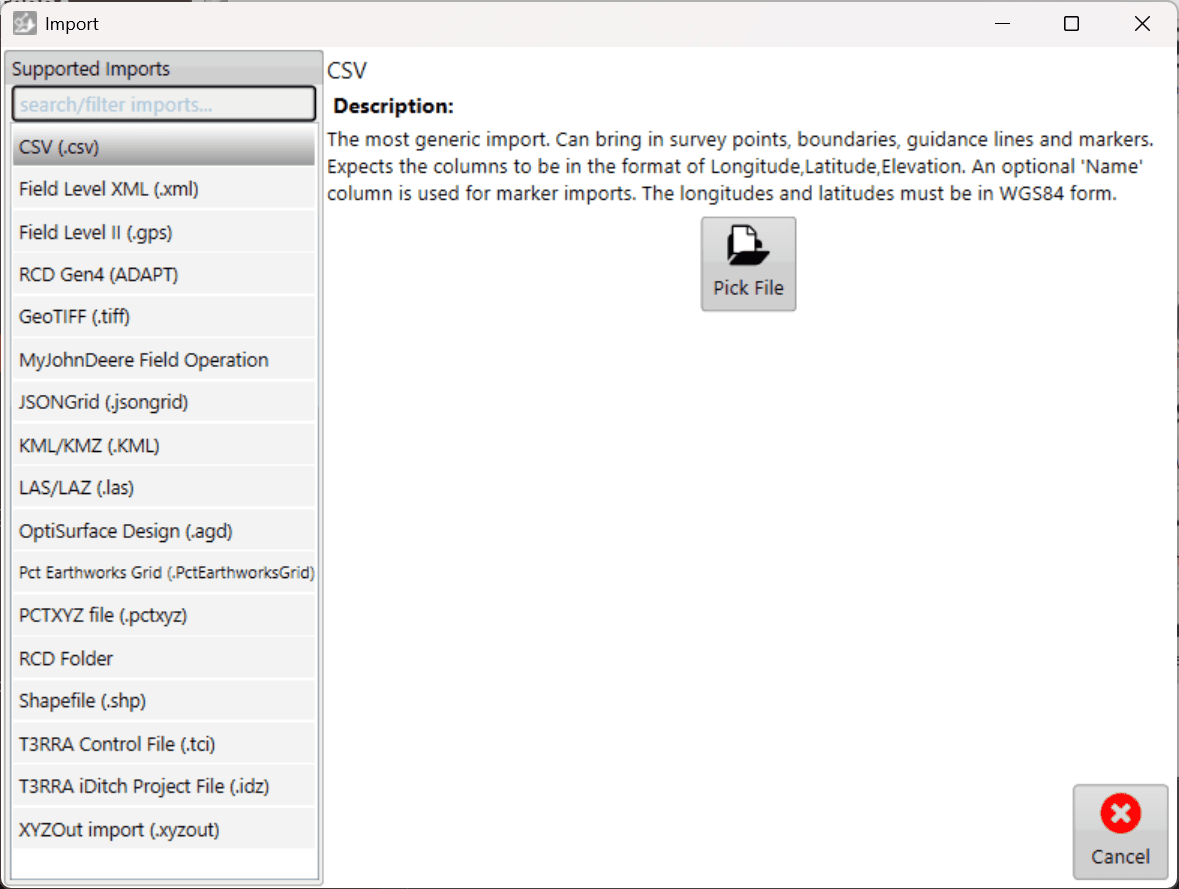](https://docs.t3rra.com/uploads/images/gallery/2026-04/pFw5zUByAuf4kdhE-image.png) ### 3. Configure the Import Some file types require additional information before they can be read, such as coordinate system or projection information. Enter any required information, then select **Read** in the lower-right corner.When importing CSV data containing latitude and longitude coordinates, the coordinates must use **WGS84**.
### 4. Review the Data Once the file has been read, select the data you wish to import. A preview of the available data is displayed on the right side of the window. T3RRA will attempt to automatically identify the type of data contained within the file. If the detected data type is incorrect, use the available drop-down menus to select the correct type. Review the data and selections, then select **Import**. 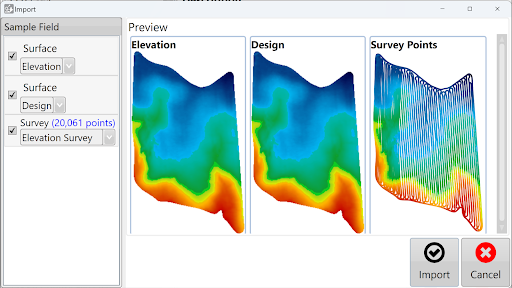 ### 5. Continue with the Imported Data Once the import is complete, the imported data is available for use within the project. Surfacing and design operations can then be performed as required.When elevation survey point data is imported, T3RRA automatically creates the corresponding surface.
