# 7.7 | Multi-fit Design

<span style="font-weight: 300;">![Multi-fit design tool icon](https://docs.t3rra.com/uploads/images/gallery/2025-03/scaled-1680-/oqKde8aqnntmftj-0e-ff-vbo8ok4tqm7vu5w-png.png)'</span><span style="font-weight: 400;">**Multi-fit**</span><span style="font-weight: 300;">' creates an optimized non-linear surface with slopes between the entered minimum and maximum. Multi-fit balances the dirt down the field in the direction you specify. The balancing occurs within strips, and is great for working within rows and moving minimal dirt.</span>

<span class="fr-video fr-deletable fr-fvc fr-dvb fr-draggable fr-active"><iframe class="fr-draggable align-center" height="360" src="https://www.youtube.com/embed/SYG32-HJQEY?&wmode=opaque" style="border: 0;" title="Watch the Multi-fit Design video on YouTube" width="640"></iframe>

</span>

[Watch the Multi-fit Design video on YouTube](https://www.youtube.com/watch?v=SYG32-HJQEY)

<span style="font-weight: 300;">  
![Elevation versus distance graph with Original and Best-fit lines](https://docs.t3rra.com/uploads/images/gallery/2025-03/scaled-1680-/8nTgx2f-b5wyis2uaj-zu0wkh0-abpcrnzrbw-png.png) </span>

- <span style="font-weight: 300;">A Multi-Fit design allows the slopes to vary within set tolerances and can greatly reduce the amount of dirt moved.</span>
- <span style="font-weight: 300;">Dividing the field into regions can further decrease the dirt movement required. </span><span style="font-weight: 300;">Enter details in the below panel and into all fields to generate a Multi-fit plane. </span>

![Multi-fit settings panel showing direction, slope range and optimisation options](https://docs.t3rra.com/uploads/images/gallery/2025-03/scaled-1680-/bwLscybr8h56ibyvgk2qswv4h2ymp2he5okua-png.png)

<span style="font-weight: 300;">'</span><span style="font-weight: 400;">**Set slope range**</span><span style="font-weight: 300;">'</span>

<span style="font-weight: 300;">You can use the iGrade™ Plane Calculator to find out the average slope percentage. Alternatively you can find this in T3RRA Cutta by doing a plane of best fit in a direction and then looking at the primary and cross slopes in the plane statistics window. If in doubt, consult an irrigation engineer.</span>

<p class="callout warning">*If ‘min%’ or ‘max%’ are left blank the design results will not be desirable.*</p>

<span style="font-weight: 300;">'</span><span style="font-weight: 400;">**Perform cross-strip optimization**</span><span style="font-weight: 300;">'</span>

<span style="font-weight: 300;">This will attempt to tilt the strip sections to match the actual side slope present. Use in fields that have high side slopes (&gt;2% slope). It is unlikely to provide any benefit in relatively flat fields. </span><span style="font-weight: 300;">*This is enabled by default.*</span>

<span style="font-weight: 300;">'</span><span style="font-weight: 400;">**Perform preliminary side slope adjustment**</span><span style="font-weight: 300;">'</span>

<span style="font-weight: 300;">This will cause an initial side slope adjustment to occur. It will attempt to ensure that the side slope is no greater than the minimum row slope. </span><span style="font-weight: 300;">*Use if water might have a tendency to run across rows rather than down the rows.*</span>

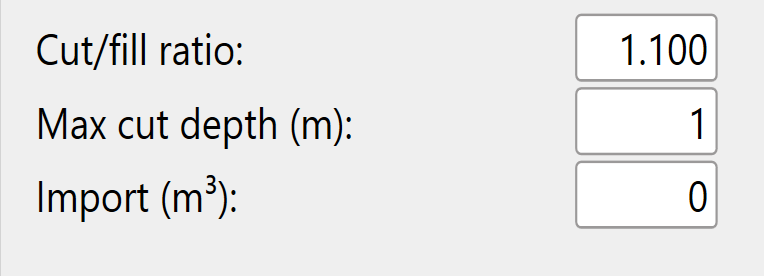
**Cut/fill ratio, Max cut depth, &amp;** <span style="font-weight: 400;">**Import**</span><span style="font-weight: bold;"> </span><span style="font-weight: 300;">can be set in 2 locations. The defaults that will be applied to new projects can be set in the</span><span style="font-weight: 300;"> [Settings menu&gt;Project tab](https://t3rra-help.freshdesk.com/en/support/solutions/articles/51000328670-project-tab)</span><span style="font-weight: 300;"> or in the lower left corner of the Multi-Fit (and Best-Fit) page.</span>

![Settings fields for cut/fill ratio, maximum cut depth and import](https://docs.t3rra.com/uploads/images/gallery/2025-03/scaled-1680-/RCVnetbgojqge-vxd12jzda8b9wjz5acrgj8g-png.png)

<span style="font-weight: 300;">'</span><span style="font-weight: 400;">**Cut/fill ratio**</span><span style="font-weight: 300;">' - Determined by the type of material being moved and what percentage of it will “settle” or “shrink” once compacted. </span><span style="font-weight: 300;">*T3RRA software does not calculate this value.*</span>

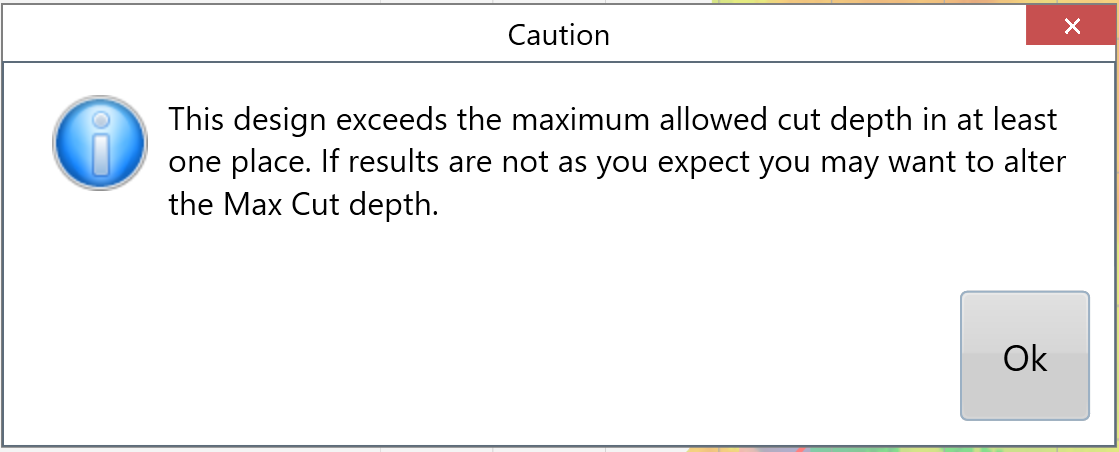
<span style="font-weight: 300;">![Caution dialog reporting that the design exceeds maximum allowed cut depth](https://docs.t3rra.com/uploads/images/gallery/2025-03/scaled-1680-/uJCtjdvaar2cdh4ldr1pgaqtvjxuuvpfwx5eg-png.png)'</span><span style="font-weight: 400;">**Max cut depth**</span><span style="font-weight: 300;">' - The maximum allowed cut depth. The warning (shown right) will appear to notify you if any points on the map exceed the Max Cut depth.</span>

<span style="font-weight: 300;">'</span><span style="font-weight: 400;">**Import**</span><span style="font-weight: 300;">' - Used when you need to bring in dirt from a stockpile or export dirt from the field to another area. Change the amount to a negative value for exporting.</span>

<span style="font-weight: 300;">Once you are happy with the design follow the steps in the '</span>[<span style="font-weight: 300;">completing your design</span>](https://t3rra-help.freshdesk.com/en/support/solutions/articles/51000330106-completing-your-design)<span style="font-weight: 300;">' section.</span>