# 6.6 | Survey Point edit controls

<span dir="ltr">During surveying and surfacing, there are various different ways to edit/remove drain and survey points.</span>
<span style="overflow: hidden; display: inline-block; margin: 0px 0px; border: 0px solid #000000; width: 624px; height: 152.17px;">![](https://docs.t3rra.com/uploads/images/gallery/2025-03/scaled-1680-/YP29k6idc5jx0qpotceaa8ohjnjsly8c-rgiw-png.png)</span>

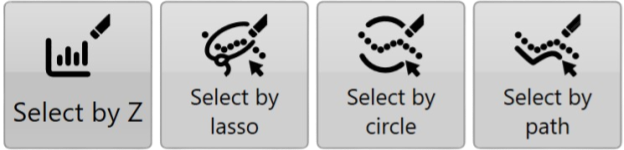
<span dir="ltr">**<span style="font-size: 16px;">'</span>**</span>**<span style="font-size: 16px;">Select by Z’</span>** allows you select elevation points by their height. After you click on it, you’ll see a graph of all your elevation data. Choose the data you want to select by clicking on the two dashed lines and using them to ‘wrap’ the data you want to select. When you click “Apply” you will be able to see the selection on the map, the selected points will be black.

<span style="overflow: hidden; display: inline-block; margin: 0px 0px; border: 0px solid #000000; width: 624px; height: 242.55px;">![](https://docs.t3rra.com/uploads/images/gallery/2025-03/scaled-1680-/HZaiuul7vrlynnafkohqgul2ipf4ldju7ysfq-png.png)</span>

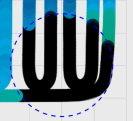
**<span style="font-size: 16px;">'</span>**<span style="font-size: 16px;">**Select by circle**</span><span dir="ltr"><span style="font-size: 16px;">**'**</span> will select everything within the circumference of the drawn circle. Press down at the center of the circle and then drag outwards. A blue dotted line will show what you are about to select. The data will be selected when you release your finger. <span dir="ltr">![](https://docs.t3rra.com/uploads/images/gallery/2025-03/scaled-1680-/CL0woh2dvu2fvtrytiskwfdkh3sse2prvbm8w-png.png)</span>   
</span>

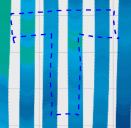
<span dir="ltr">**<span style="font-size: 16px;">‘Select by lasso’</span>**<span style="font-size: 14px;"> </span></span><span style="font-size: 13px;"><span dir="ltr">allows a freeform selection. Click on the map and drag your finger to draw around the data you wish to edit. A blue dotted line will show what you are about to select. The data will be selected when you release your finger.</span></span>

<span dir="ltr">'</span>Select by path<span dir="ltr">' will delete all consecutive points between point A and point B. Press down on the point where you would like to start, drag the point to an end point. All points that had been collected on that path between these two points will be selected. The data will be selected when you release your finger.</span>
<span style="display: block;"><span dir="ltr">![](https://docs.t3rra.com/uploads/images/gallery/2025-03/scaled-1680-/jr02hs8-bx6z-tu-ar2stsvirrihrpgzhzpmg-png.png)</span></span>

<span dir="ltr">While these functions are in use their buttons will display large red circles on them. This indicates that deleting is active. This is to help make sure you do not accidentally select things while trying to perform other tasks such as moving the screen or zooming. Pressing the buttons will cancel selection.</span>
<span dir="ltr">![6lijpx0mrc1p7ck91vkafnrvk0ibmilc-x4yq-png.png](https://docs.t3rra.com/uploads/images/gallery/2025-03/scaled-1680-/6lijpx0mrc1p7ck91vkafnrvk0ibmilc-x4yq-png.png)</span>

<span dir="ltr">Once selections have been made you have two options.</span>

<span style="overflow: hidden; display: inline-block; margin: 0px 0px; border: 0px solid #000000; width: 54.75px; height: 55.05px;">![](https://docs.t3rra.com/uploads/images/gallery/2025-03/scaled-1680-/ncdxlyd7tlrm3zhs9s0rwqraqk6eyygrvhpuq-png.png)</span>

#### **Deleting Survey/Drain Points**

Click on the “Delete” button that appears after selecting points. This will immediately delete the selected points. It’s recommended to save before doing this as the change is permanent.

<span style="overflow: hidden; display: inline-block; margin: 0px 0px; border: 0px solid #000000; width: 54.75px; height: 56px;">![](https://docs.t3rra.com/uploads/images/gallery/2025-03/scaled-1680-/ouacq-54xnsuvqebwnoryyd0wlii5gu0ppv1q-png.png)</span>

#### **Changing height of Survey/Drain Points**

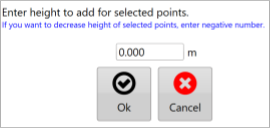
<span dir="ltr">Click on the “Modify Elevation button” and you will then see the below screen. Enter the amount to change the elevation by and click “Apply”. Your data will immediately be updated and you will be able to see the change on screen. It’s recommended to save before doing this as the change is permanent.</span>
<span style="overflow: hidden; display: inline-block; margin: 0px 0px; border: 0px solid #000000; width: 270.25px; height: 129px;">![](https://docs.t3rra.com/uploads/images/gallery/2025-03/scaled-1680-/iiQh4-d-updimkkaujd1nuj2nldsar3qvj2ma-png.png)</span>

#### <span class="fr-video fr-deletable fr-fvc fr-dvb fr-draggable fr-active"><iframe class="fr-draggable align-center" height="360" src="https://www.youtube.com/embed/Q0581DSU7j4?&wmode=opaque" style="border: 0;" width="640"></iframe>

</span>  