# 4. Wizard

# The T3RRA Wizard

<span dir="ltr" style="font-size: 14pt; font-family: Helvetica, sans-serif; color: rgb(0, 0, 0); font-weight: 300;">The ‘</span><span style="font-family: Helvetica,sans-serif;"><span style="font-size: 14pt; color: rgb(0, 0, 0); font-weight: 400;">**Wizard**</span><span style="font-size: 14pt; color: rgb(0, 0, 0); font-weight: 300;">’ is home to the primary functions of T3RRA software and the place where you will find the tools used to survey, design, and implement.</span></span>

![](https://docs.t3rra.com/uploads/images/gallery/2025-03/scaled-1680-/coC4atmm7m7la3iv13mmrbuee-ztn6ua6kufw-png.png)

<span style="font-family: Helvetica,sans-serif;"><span style="font-size: 14pt; color: rgb(0, 0, 0); font-weight: 300;">The wizard will guide you through the 4 logical steps involved in the T3RRA software process.</span></span>

<span style="font-family: Helvetica,sans-serif;">![](https://docs.t3rra.com/uploads/images/gallery/2025-03/scaled-1680-/YJkzedfnpukpbolkr8fj40irbmgp-5rcymfiq-png.png)</span>

<span style="font-family: Helvetica,sans-serif;">  
</span>

<span style="font-family: Helvetica,sans-serif;"><span dir="ltr" style="font-size: 14pt; color: rgb(0, 0, 0); font-weight: 300;">![](https://docs.t3rra.com/uploads/images/gallery/2025-03/scaled-1680-/NuPt-fzjgkkq7kagewuvt0zkjfu53cgbj60eg-png.png)If you need to start a new project you are able to return to the ‘</span><span style="font-size: 14pt; color: rgb(0, 0, 0); font-weight: 400;">**Main Page/New Project Page**</span><span style="font-size: 14pt; color: rgb(0, 0, 0); font-weight: 300;">’ by pressing the ‘</span><span style="font-size: 14pt; color: rgb(0, 0, 0); font-weight: 400;">**New proj.**</span><span style="font-size: 14pt; color: rgb(0, 0, 0); font-weight: 300;">’ button found in the top left corner of all wizard pages. </span></span>

<span style="font-family: Helvetica,sans-serif;">  
</span>

<span style="font-family: Helvetica,sans-serif;">  
</span>

<span style="font-family: Helvetica,sans-serif;">  
</span>

<span style="font-family: Helvetica,sans-serif;"><span dir="ltr" style="font-size: 14pt; color: rgb(0, 0, 0); font-weight: 400;">![](https://docs.t3rra.com/uploads/images/gallery/2025-03/scaled-1680-/mb7lhrljheawke-g8pffeq8t9efpfqp-vg35g-png.png) </span></span>

<span style="font-family: Helvetica,sans-serif;"><span dir="ltr" style="font-size: 14pt; color: rgb(0, 0, 0); font-weight: 400;">**T3RRA Survey**</span><span style="font-size: 14pt; color: rgb(0, 0, 0); font-weight: 300;"> does not have ‘</span><span style="font-size: 14pt; color: rgb(0, 0, 0); font-weight: 400;">**Design**</span><span style="font-size: 14pt; color: rgb(0, 0, 0); font-weight: 300;">’ or ‘</span><span style="font-size: 14pt; color: rgb(0, 0, 0); font-weight: 400;">**Apply**</span><span style="font-size: 14pt; color: rgb(0, 0, 0); font-weight: 300;">’ (Implementation) wizard steps. Sections in this manual relating to these are not relevant to </span><span style="font-size: 14pt; color: rgb(0, 0, 0); font-weight: 400;">**T3RRA Survey**</span></span><span dir="ltr" style="font-size: 14pt; font-family: Helvetica, sans-serif; color: rgb(0, 0, 0); font-weight: 300;">.</span>

# Common tools found in the Wizard

<span dir="ltr" style="font-size: 14pt; font-family: Helvetica, sans-serif; color: rgb(0, 0, 0); font-weight: 300;">There are several buttons that can be found on many wizard pages.</span>

<table class="fr-no-borders" id="bkmrk-zoom-controls-choose" style="width: 100%;"><tbody><tr><td dir="ltr" style="width: 50.0000%;"><span style="color: rgb(0, 0, 0); font-family: Helvetica, sans-serif; font-size: 18.6667px; font-style: normal; font-variant-ligatures: normal; font-variant-caps: normal; font-weight: 300; letter-spacing: normal; orphans: 2; text-align: left; text-indent: 0px; text-transform: none; white-space: normal; widows: 2; word-spacing: 0px; -webkit-text-stroke-width: 0px; text-decoration-thickness: initial; text-decoration-style: initial; text-decoration-color: initial; display: inline !important; float: none;">Zoom Controls</span>  
</td><td dir="ltr" style="width: 50.0000%;">![](https://docs.t3rra.com/uploads/images/gallery/2025-03/scaled-1680-/m2paeo32n34epwvh6tfpx2o0bfzjbonkmszya-png.png) ![](https://docs.t3rra.com/uploads/images/gallery/2025-03/scaled-1680-/9Hzg6qkpgcfiir0vtg3fgsosn8cgaouz9orbw-png.png)</td></tr><tr><td style="width: 50%; text-align: left; vertical-align: middle;"><span style="font-family: Helvetica,sans-serif;"><span dir="ltr" style="font-size: 14pt; color: rgb(0, 0, 0); font-weight: 300;">Choose Model/Layer</span></span>

</td><td dir="ltr" style="width: 50.0000%;">![](https://docs.t3rra.com/uploads/images/gallery/2025-03/scaled-1680-/4Bl1y2ff2fbelygkubrqjhhvw-4xqj78y7kfa-png.png)</td></tr><tr><td style="width: 50.0000%;"><span style="font-family: Helvetica,sans-serif;"><span dir="ltr" style="font-size: 14pt; color: rgb(0, 0, 0); font-weight: 300;">Image Overlay</span></span>

</td><td dir="ltr" style="width: 50.0000%;">![](https://docs.t3rra.com/uploads/images/gallery/2025-03/scaled-1680-/Xh4dhw-0nl9btbj9g3nvntf5yftug1qujickq-png.png)</td></tr><tr><td style="width: 50.0000%;"><span style="font-family: Helvetica,sans-serif;"><span dir="ltr" style="font-size: 14pt; color: rgb(0, 0, 0); font-weight: 300;">GPS Controls (limited to surveying and implementation)</span></span>

</td><td dir="ltr" style="width: 50.0000%;">![](https://docs.t3rra.com/uploads/images/gallery/2025-03/scaled-1680-/KLXyti0a6pu-qmivtojpi2znwan6pxvkudeza-png.png)</td></tr><tr><td style="width: 50.0000%;"><span style="font-family: Helvetica,sans-serif;"><span dir="ltr" style="font-size: 14pt; color: rgb(0, 0, 0); font-weight: 300;">
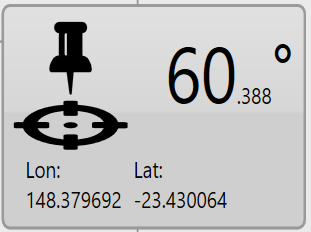
Markers (limited to surveying and implementation)</span></span>

</td><td dir="ltr" style="width: 50.0000%;">![](https://docs.t3rra.com/uploads/images/gallery/2025-03/scaled-1680-/NFxsm-dj7mhj3jgix2rxj2sknsf1x5zjoobrg-png.png)</td></tr><tr><td style="width: 50.0000%;"><span style="font-family: Helvetica,sans-serif;"><span dir="ltr" style="font-size: 14pt; color: rgb(0, 0, 0); font-weight: 300;">
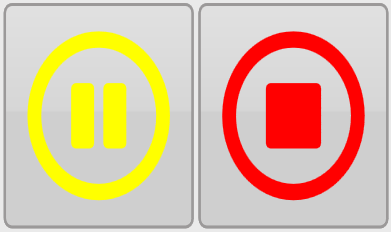
Start, Stop, and Pause commands</span></span>

<span style="font-family: Helvetica,sans-serif;"><span dir="ltr" style="font-size: 14pt; color: rgb(0, 0, 0); font-weight: 300;">(limited to surveying and implementation)</span></span>

</td><td dir="ltr" style="width: 50.0000%;">![](https://docs.t3rra.com/uploads/images/gallery/2025-03/scaled-1680-/HI5xslqfknpacb31kukuxkbyokdyyofecyepa-png.png) ![](https://docs.t3rra.com/uploads/images/gallery/2025-03/scaled-1680-/rPd91ekb7-n7ppuj373a1ayhsxjzyoe4gvszq-png.png)</td></tr><tr><td style="width: 50.0000%;"><span style="font-family: Helvetica,sans-serif;"><span dir="ltr" style="font-size: 14pt; color: rgb(0, 0, 0); font-weight: 300;">Delete Drain (limited to surveying and surfacing)</span></span>

</td><td dir="ltr" style="width: 50.0000%;">![](https://docs.t3rra.com/uploads/images/gallery/2025-03/scaled-1680-/H1ijhwzhhq0kjee0a7yxe-mkjqzuv99gupelw-png.png)</td></tr><tr><td style="width: 50.0000%;"><span style="font-family: Helvetica,sans-serif;"><span dir="ltr" style="font-size: 14pt; color: rgb(0, 0, 0); font-weight: 300;">
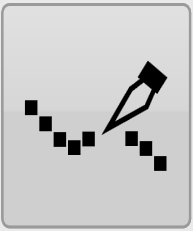
Extend Drain (limited to surveying and surfacing)</span></span>

</td><td dir="ltr" style="width: 50.0000%;">![](https://docs.t3rra.com/uploads/images/gallery/2025-03/scaled-1680-/QTlcoivao-al2gnmo6ijwmnvmxdraaqmfwvq-png.png)</td></tr><tr><td style="width: 50.0000%;"><span style="font-family: Helvetica,sans-serif;"><span dir="ltr" style="font-size: 14pt; color: rgb(0, 0, 0); font-weight: 300;">Split Drain (limited to surveying and surfacing)</span></span>

</td><td dir="ltr" style="width: 50.0000%;">![](https://docs.t3rra.com/uploads/images/gallery/2025-03/scaled-1680-/el9ibrunzudonf5yg10exeopqnc4qzet6in0w-png.png)</td></tr><tr><td style="width: 50.0000%;"><span style="font-family: Helvetica,sans-serif;"><span dir="ltr" style="font-size: 14pt; color: rgb(0, 0, 0); font-weight: 300;">
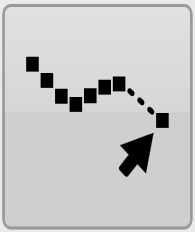
Delete Points (limited to surveying and surfacing)</span></span>

</td><td dir="ltr" style="width: 50.0000%;">![](https://docs.t3rra.com/uploads/images/gallery/2025-03/scaled-1680-/xiEnu1-wob71t5ecwy3gvstzb6qvc3dwlpigg-png.png) ![](https://docs.t3rra.com/uploads/images/gallery/2025-03/scaled-1680-/YXMq3zowz5d5eir57k-7t-gwfkkzou1pmr9fa-png.png)</td></tr><tr><td style="width: 50.0000%;"><span style="font-family: Helvetica,sans-serif;"><span dir="ltr" style="font-size: 14pt; color: rgb(0, 0, 0); font-weight: 300;">Tracking Options (limited to surveying and implementation)</span></span>

</td><td dir="ltr" style="width: 50.0000%;">![](https://docs.t3rra.com/uploads/images/gallery/2025-03/scaled-1680-/zeUhwisag-gmlo3oix937dan2ehzy6tk7bpha-png.png)</td></tr><tr><td data-del-cell="true" dir="ltr" style="width: 50.0000%;"><span style="color: rgb(0, 0, 0); font-family: Helvetica, sans-serif; font-size: 18.6667px; font-style: normal; font-variant-ligatures: normal; font-variant-caps: normal; font-weight: 300; letter-spacing: normal; orphans: 2; text-align: left; text-indent: 0px; text-transform: none; white-space: normal; widows: 2; word-spacing: 0px; -webkit-text-stroke-width: 0px; text-decoration-thickness: initial; text-decoration-style: initial; text-decoration-color: initial; display: inline !important; float: none;">Screenshots</span> </td><td dir="ltr" style="width: 50.0000%;">![](https://docs.t3rra.com/uploads/images/gallery/2025-03/scaled-1680-/CFy2kbu1zxsdjjhnm2fdci-xpwptut0jbs3eg-png.png)</td></tr><tr><td style="width: 50.0000%;"><span dir="ltr" style="font-size: 14pt; font-family: Helvetica, sans-serif; color: rgb(0, 0, 0); font-weight: 300;">Battery power indicator</span>

</td><td dir="ltr" style="width: 50.0000%;">![](https://docs.t3rra.com/uploads/images/gallery/2025-03/scaled-1680-/g2Nqyorr5by3gfbnbqnrmomnj34paj4qxvmzq-png.png)</td></tr></tbody></table>

# Zoom Controls

<span dir="ltr" style="font-size: 14pt; font-family: Helvetica, sans-serif; color: rgb(0, 0, 0);">![](https://docs.t3rra.com/uploads/images/gallery/2025-03/scaled-1680-/D7Ayq944a9lbrilyxxq9jqd0hiwoq5msgnc-g-jpeg.jpeg) There are multiple methods available for zooming your map.</span>

<span style="font-family: Helvetica,sans-serif;">  
</span>

<span style="font-family: Helvetica,sans-serif;"><span style="font-size: 14pt; color: rgb(0, 0, 0);">The first method that can be used is the 2-finger pinch controls. By pinching your fingers together on the screen you can zoom out and by moving your fingers apart you can zoom in.</span></span>

<span style="font-family: Helvetica,sans-serif;">  
</span>

<span style="font-family: Helvetica,sans-serif;">  
</span>

<span style="font-family: Helvetica,sans-serif;">  
</span>

<span style="font-family: Helvetica,sans-serif;"><span style="font-size: 14pt; color: rgb(0, 0, 0);">The alternate method is the use of zoom in and zoom out buttons that can be added to the bar along the top right.</span></span>

<span dir="ltr" style="font-family: Helvetica,sans-serif;">![](https://docs.t3rra.com/uploads/images/gallery/2025-03/scaled-1680-/iD8kjairoculrex4xdv1gqutaczehahrkygmq-png.png)</span>

<span style="font-family: Helvetica,sans-serif;">  
</span>

<span style="font-family: Helvetica,sans-serif;"><span dir="ltr" style="font-size: 14pt; color: rgb(0, 0, 0);">The zoom buttons are not shown by default. To enable these buttons check the '**Show zoom buttons**' box under ‘**Settings &gt; Application**’.</span></span>

<span dir="ltr" style="font-family: Helvetica,sans-serif;">![](https://docs.t3rra.com/uploads/images/gallery/2025-03/scaled-1680-/M57qpuhjj7jo1w5uxn2rha24fk8an9ueougfg-png.png)</span>

<span style="font-family: Helvetica,sans-serif;"><span dir="ltr" style="font-size: 14pt; color: rgb(0, 0, 0);">![](https://docs.t3rra.com/uploads/images/gallery/2025-03/scaled-1680-/DlMgvqkxojetxyvsimhl7nhbo2sjoexrneyqq-png.png) Independent of these zoom controls is the 'Zoom to full' button, this button does NOT need to be enabled. When pressed the button zooms the map in or out to the maximum size that shows the entire surface grid of the map.</span></span>

<span style="font-family: Helvetica,sans-serif;">  
</span>

# Image Overlays

<span dir="ltr" style="font-size: 14pt; font-family: Helvetica, sans-serif; color: rgb(0, 0, 0); font-weight: 300;">![](https://docs.t3rra.com/uploads/images/gallery/2025-03/scaled-1680-/qHZv8myqiroo3lytv0mv50ejdwzf-vx3x6jva-png.png)‘Image overlays’ allows geo-referenced image data to be imported into a field.</span>

<span style="font-family: Helvetica,sans-serif;"><span style="font-size: 14pt; color: rgb(0, 0, 0); font-weight: 300;">The image overlay is accessed by pressing the button at the top of the screen (Shown right).</span></span>

<span style="font-family: Helvetica,sans-serif;"> </span>

<span dir="ltr" style="font-family: Helvetica,sans-serif;">**<span dir="ltr" style="font-size: 18px;">![](https://docs.t3rra.com/uploads/images/gallery/2025-03/scaled-1680-/QkRxqhdvmowigdd9eqxc3pvssdpaimiaietug-png.png)Add image</span>**</span>

<span style="font-family: Helvetica,sans-serif;"><span style="font-size: 14pt; color: rgb(0, 0, 0); font-weight: 300;">This is the primary method for adding overlay images to the field. When the button is pressed a file window will open to select the desired file. The file types that are currently supported as overlay images are </span><span style="font-size: 14pt; color: rgb(0, 0, 0); font-weight: 400;">**.KML**</span>**<span style="font-size: 14pt; color: rgb(0, 0, 0);"> </span>**<span style="font-size: 14pt; color: rgb(0, 0, 0);">and </span><span style="font-size: 14pt; color: rgb(0, 0, 0); font-weight: 400;">**.TIFF**</span><span style="font-size: 14pt; color: rgb(0, 0, 0); font-weight: 300;">.</span></span>

<span style="font-family: Helvetica,sans-serif;">  
</span>

<span style="font-family: Helvetica,sans-serif;"><span style="font-size: 14pt; color: rgb(0, 0, 0); font-weight: 400;">**Load image from JDOC**</span></span>

<span style="font-family: Helvetica,sans-serif;"><span style="font-size: 14pt; color: rgb(0, 0, 0); font-weight: 300;">Images from the John Deere Operations Center can be downloaded into the image overlay. This is useful for comparing previous data (such as yields) with current survey data. </span></span>

<span style="font-family: Helvetica,sans-serif;">  
</span>

<span style="font-family: Helvetica,sans-serif;"><span style="font-size: 14pt; color: rgb(0, 0, 0); font-weight: 400;">**Delete images**</span></span>

<span style="font-family: Helvetica,sans-serif;"><span style="font-size: 14pt; color: rgb(0, 0, 0); font-weight: 300;">Overlay images can be deleted by unchecking the box next to them and pressing the ‘delete images’ button. This will delete the layer from the available list.</span></span>

<span style="font-family: Helvetica,sans-serif;">  
</span>

<span style="font-family: Helvetica,sans-serif;"><span style="font-size: 14pt; color: rgb(0, 0, 0); font-weight: 400;">**Transparency**</span></span>

<span style="font-family: Helvetica,sans-serif;"><span style="font-size: 14pt; color: rgb(0, 0, 0); font-weight: 300;">Overlay images can be set to be transparent so that layers below them can be seen. Check the box to the left of the layer and then press the transparency button on the right side.</span></span>

<span style="font-family: Helvetica,sans-serif;">  
</span>

<span style="font-family: Helvetica,sans-serif;"><span style="font-size: 14pt; color: rgb(0, 0, 0); font-weight: 400;">**Layers**</span></span>

<span dir="ltr" style="font-size: 14pt; font-family: Helvetica, sans-serif; color: rgb(0, 0, 0); font-weight: 300;">Pressing on any of the layers will cause it to be displayed over the others.</span>

# Choose Mode/Terrain/Layer

#### <span style="font-family: Helvetica,sans-serif;"><span style="font-size: 21pt; color: rgb(0, 0, 0); font-weight: 400;">**Mode**</span></span>

<span style="font-family: Helvetica,sans-serif;"><span dir="ltr" style="font-size: 14pt; color: rgb(0, 0, 0); font-weight: 400;">**2D View**</span><span dir="ltr" style="font-size: 14pt; color: rgb(0, 0, 0); font-weight: 300;"> - By default the map will be displayed in a 2D aerial view.</span></span>

<span style="font-family: Helvetica,sans-serif;"><span dir="ltr" style="font-size: 14pt; color: rgb(0, 0, 0); font-weight: 400;">**3D View** </span><span dir="ltr" style="font-size: 14pt; color: rgb(0, 0, 0); font-weight: 300;">- When switching to 3D view the map will show all the terrain as small hills and valleys. In this viewing mode if you press the vertical scale magnifier (shown here) it will increase the exaggeration of these hills and valleys so that they can be more easily identified. </span><span style="font-size: 14pt; color: rgb(0, 0, 0); font-weight: 300;">The focal point when viewing in 3D can be changed by quickly double tapping on a position.</span></span>

<table class="fr-no-borders" id="bkmrk--2" style="width: 84%; margin-right: calc(16%);"><tbody><tr><td style="width: 50.0000%;">![](https://docs.t3rra.com/uploads/images/gallery/2025-03/scaled-1680-/hFpg-i1by5regszd95dc-3k0urpwwcdz-3wxg-png.png)</td><td style="width: 50.0000%;">![](https://docs.t3rra.com/uploads/images/gallery/2025-03/scaled-1680-/Xnt81f-sw8euftr5cy2jvuapghnoywmi98h9a-png.png)</td></tr></tbody></table>

#### <span style="font-family: Helvetica,sans-serif;"><span style="font-size: 21pt; color: rgb(0, 0, 0); font-weight: 400;">**![](https://docs.t3rra.com/uploads/images/gallery/2025-03/scaled-1680-/mQD7k02cfbwoceinmwtmm7xv-ipeirsnk2t0q-png.png)View**</span></span>

<span dir="ltr" style="font-family: Helvetica,sans-serif;"><span style="color: rgb(0, 0, 0); font-family: Helvetica, sans-serif; font-size: 18.6667px; font-style: normal; font-variant-ligatures: normal; font-variant-caps: normal; font-weight: 300; letter-spacing: normal; orphans: 2; text-align: left; text-indent: 0px; text-transform: none; white-space: normal; widows: 2; word-spacing: 0px; -webkit-text-stroke-width: 0px; text-decoration-thickness: initial; text-decoration-style: initial; text-decoration-color: initial; display: inline !important; float: none;">When viewing a map you have a variety of display options.</span> </span>

#### <span style="font-family: Helvetica,sans-serif;"><span style="font-size: 21pt; color: rgb(0, 0, 0); font-weight: 400;">**Surface** </span></span>

<span style="font-family: Helvetica,sans-serif;"><span dir="ltr" style="font-size: 14pt; color: rgb(0, 0, 0); font-weight: 300;">![](https://docs.t3rra.com/uploads/images/gallery/2025-03/scaled-1680-/Vlgfm2alezcu3ly9y77mgsdu9qdezzirtiurq-jpeg.jpeg)This refers to the source for the 3D topography and coloring of the map. There are 6 options:</span></span>

<span style="font-family: Helvetica,sans-serif;">  
</span>

<span style="font-family: Helvetica,sans-serif;"><span style="font-size: 14pt; color: rgb(0, 0, 0); font-weight: 400;">**Elevation** </span><span dir="ltr" style="font-size: 14pt; color: rgb(0, 0, 0); font-weight: 300;">- This terrain viewing mode shows the map as the original surface prior to any dirt being moved. Displays the map in a Red to Blue gradient scale with Red being low areas and Blue being high areas.</span></span>

<span style="font-family: Helvetica,sans-serif;">  
</span>

<span style="font-family: Helvetica,sans-serif;"><span style="font-size: 14pt; color: rgb(0, 0, 0); font-weight: 400;">**Design** </span><span dir="ltr" style="font-size: 14pt; color: rgb(0, 0, 0); font-weight: 300;">- This viewing mode shows the design that has been applied. This is the surface that you are attempting to reach at the end of the dirt moving process. Has the same color scheme as Elevation.</span></span>

<span style="font-family: Helvetica,sans-serif;"><span style="font-size: 14pt; color: rgb(0, 0, 0); font-weight: 400;">**Cut/Fill** </span><span dir="ltr" style="font-size: 14pt; color: rgb(0, 0, 0); font-weight: 300;">- Shows where the design will be taking dirt from and where it will be putting it. Coloring of this layer depends on the current Cut/Fill color scheme (Settings &gt; Application).</span></span>

<span style="font-family: Helvetica,sans-serif;">  
</span>

<span style="font-family: Helvetica,sans-serif;"><span style="font-size: 14pt; color: rgb(0, 0, 0); font-weight: 400;">**As applied** </span><span dir="ltr" style="font-size: 14pt; color: rgb(0, 0, 0); font-weight: 300;">- Displaying the map using this method shows changes as they occur. It shows a real-time representation of progress as work progresses. Has the same color scheme as Elevation. </span><span dir="ltr" style="font-size: 14pt; color: rgb(255, 0, 0); font-weight: 300;">This terrain is only available if ‘</span><span style="font-size: 14pt; color: rgb(255, 0, 0); font-weight: 400;">**As Applied**</span><span dir="ltr" style="font-size: 14pt; color: rgb(255, 0, 0); font-weight: 300;">’ mapping has been enabled in the machine tab of ‘</span><span style="font-size: 14pt; color: rgb(255, 0, 0); font-weight: 400;">**Settings**</span><span dir="ltr" style="font-size: 14pt; color: rgb(255, 0, 0); font-weight: 300;">’.</span>  
</span>

<span style="font-family: Helvetica,sans-serif;">  
</span>

<span style="font-family: Helvetica,sans-serif;"><span style="font-size: 14pt; color: rgb(0, 0, 0); font-weight: 400;">**As Cut/Fill** </span><span dir="ltr" style="font-size: 14pt; color: rgb(0, 0, 0); font-weight: 300;">- Shows where the design will be taking dirt from and where it will be putting it. Coloring of this layer depends on the current Cut/Fill color scheme (Settings &gt; Application).</span></span>

<span style="font-family: Helvetica,sans-serif;">  
</span>

<span style="font-family: Helvetica,sans-serif;"><span style="font-size: 14pt; color: rgb(0, 0, 0); font-weight: 400;">**Pass Count** </span><span style="font-size: 14pt; color: rgb(0, 0, 0); font-weight: 300;">- This layer displays how many passes you have done over an area. </span><span dir="ltr" style="font-size: 14pt; color: rgb(255, 0, 0); font-weight: 300;">This layer is only available once pass count tracking has been enabled in Settings &gt; Machine:</span><span dir="ltr" style="font-size: 14pt; color: rgb(255, 0, 0); font-weight: 300;">![](https://docs.t3rra.com/uploads/images/gallery/2025-03/scaled-1680-/xKih4-ngk659mpypfn2sefmf5yjdjxpn7yywa-png.png)</span></span>

#### <span style="box-sizing: border-box; font-family: Helvetica, sans-serif;"><span style="box-sizing: border-box; font-size: 21pt; color: rgb(0, 0, 0); font-weight: 400;">**Layers**</span></span>

<span style="box-sizing: border-box; font-family: Helvetica, sans-serif;"><span style="box-sizing: border-box; font-size: 21pt; color: rgb(0, 0, 0); font-weight: 400;">**<span dir="ltr" style="color: rgb(0, 0, 0); font-family: Helvetica, sans-serif; font-size: 18.6667px; font-style: normal; font-variant-ligatures: normal; font-variant-caps: normal; font-weight: 300; letter-spacing: normal; orphans: 2; text-align: left; text-indent: 0px; text-transform: none; widows: 2; word-spacing: 0px; -webkit-text-stroke-width: 0px; white-space: normal; text-decoration-thickness: initial; text-decoration-style: initial; text-decoration-color: initial; display: inline !important; float: none;">Various defined layers can be turned on and off here. This includes the current surface (see above), depressions, drains, linework, and overlays such as KML that have been loaded. The buttons at the top allow you to load and clear layers, and beside each layer is a transparency toggle button. Click the button to change its transparency.</span>**</span></span>

<span style="box-sizing: border-box; font-family: Helvetica, sans-serif;"><span style="box-sizing: border-box; font-size: 21pt; color: rgb(0, 0, 0); font-weight: 400;">**<span dir="ltr" style="color: rgb(0, 0, 0); font-family: Helvetica, sans-serif; font-size: 18.6667px; font-style: normal; font-variant-ligatures: normal; font-variant-caps: normal; font-weight: 300; letter-spacing: normal; orphans: 2; text-align: left; text-indent: 0px; text-transform: none; widows: 2; word-spacing: 0px; -webkit-text-stroke-width: 0px; white-space: normal; text-decoration-thickness: initial; text-decoration-style: initial; text-decoration-color: initial; display: inline !important; float: none;"><span style="border: none; display: inline-block; overflow: hidden; width: 50px; height: 48px;">![](https://docs.t3rra.com/uploads/images/gallery/2025-03/scaled-1680-/TeCtwwn1pdkjnfainohxhov-jdh7zyxwbyspg-png.png)</span></span>**</span></span>

<span style="box-sizing: border-box; font-family: Helvetica, sans-serif;"><span style="box-sizing: border-box; font-size: 21pt; color: rgb(255, 0, 0); font-weight: 400;">**<span dir="ltr" style="font-family: Helvetica, sans-serif; font-size: 18.6667px; font-style: normal; font-variant-ligatures: normal; font-variant-caps: normal; font-weight: 300; letter-spacing: normal; orphans: 2; text-align: left; text-indent: 0px; text-transform: none; widows: 2; word-spacing: 0px; -webkit-text-stroke-width: 0px; white-space: normal; text-decoration-thickness: initial; text-decoration-style: initial; text-decoration-color: initial; float: none; display: inline !important;">NOTE: The depressions layer is not shown if the project only has drains (and no elevation surface).</span>**</span></span>

<span style="font-family: Helvetica,sans-serif;"><span class="fr-video fr-deletable fr-fvc fr-dvb fr-draggable"><iframe allowfullscreen="allowfullscreen" class="fr-draggable align-center" frameborder="0" height="360" sandbox="allow-scripts allow-forms allow-same-origin allow-presentation" src="https://www.youtube.com/embed/x5FrylWjpfk?&wmode=opaque" width="640"></iframe>

</span></span>

# GPS Data

### <span dir="ltr" style="box-sizing: border-box; font-size: 14pt; font-family: Helvetica, sans-serif; color: rgb(0, 0, 0); font-weight: 300;">![](https://docs.t3rra.com/uploads/images/gallery/2025-03/scaled-1680-/tEF1ozxdksmzoi4wjnb7lccdo4dqiujumjpew-png.png)</span>

### <span dir="ltr" style="font-size: 14pt; font-family: Helvetica, sans-serif; color: rgb(0, 0, 0); font-weight: 300;">In the lower right corner of the screen is the GPS information button. It displays the latitude and longitude of your current position as well as your current heading.</span>

<span style="font-family: Helvetica,sans-serif;">  
</span>

<span style="font-family: Helvetica,sans-serif;"><span dir="ltr" style="font-size: 14pt; color: rgb(0, 0, 0); font-weight: 300;">TIP: Right clicking (press and hold) on this button will reveal a context menu with the option to display coordinates in UTM format.</span></span>

<span dir="ltr" style="font-family: Helvetica,sans-serif;">  
</span>

<span style="font-family: Helvetica,sans-serif;"><span style="font-size: 14pt; color: rgb(0, 0, 0); font-weight: 300;">When you press this button the ‘</span><span style="font-size: 14pt; color: rgb(0, 0, 0); font-weight: 400;">GPS Info</span><span style="font-size: 14pt; color: rgb(0, 0, 0); font-weight: 300;">’ window will open with more detailed GPS information.</span></span>

<span style="font-family: Helvetica,sans-serif;">![](https://docs.t3rra.com/uploads/images/gallery/2025-03/scaled-1680-/hwRf7r6qrru2iurxdcwgdfvze5kmemjijroda-png.png)</span>

<span style="font-family: Helvetica,sans-serif;">  
</span>

<span style="font-family: Helvetica,sans-serif;"><span style="font-size: 14pt; color: rgb(0, 0, 0); font-weight: 300;">This window provides the following information: </span></span>

- <span style="font-family: Helvetica,sans-serif;"><span style="font-size: 14pt; color: rgb(0, 0, 0); font-weight: 400;">**Serial port parameters**:</span><span style="font-size: 14pt; color: rgb(0, 0, 0); font-weight: 300;"> displays the current settings for the com port and baud rate that is being used. There are flashing arrows which indicate that the software is sending and receiving information. </span></span>
- <span style="font-family: Helvetica,sans-serif;"><span style="font-size: 14pt; color: rgb(0, 0, 0); font-weight: 400;">**Warning Thresholds**:</span><span style="font-size: 14pt; color: rgb(0, 0, 0); font-weight: 300;"> used to set limits for certain parameters. When these thresholds are being approached the borders of the screen will flash orange, once any of the thresholds have been exceeded or connection to GPS is cut the borders of the screen will flash red.</span></span>
- <span style="font-family: Helvetica,sans-serif;"><span style="font-size: 14pt; color: rgb(0, 0, 0); font-weight: 400;">**Output**:</span><span style="font-size: 14pt; color: rgb(0, 0, 0); font-weight: 300;"> shows all the GPS information currently being received.</span></span>

<span style="font-family: Helvetica,sans-serif;"><span style="font-size: 14pt; color: rgb(0, 0, 0); font-weight: 400;">**Serial port parameters**</span><span style="font-size: 14pt; color: rgb(0, 0, 0); font-weight: 300;">  
</span>  
</span>

<span style="font-family: Helvetica,sans-serif;"><span dir="ltr" style="font-size: 14pt; color: rgb(0, 0, 0); font-weight: 400;">![](https://docs.t3rra.com/uploads/images/gallery/2025-03/scaled-1680-/PAhvfdrdmpoteveimu4p71tgyvjyoz51dnyva-png.png)**Com port**:</span><span dir="ltr" style="font-size: 14pt; color: rgb(0, 0, 0); font-weight: 300;"> The Com port # is assigned by the adapter. In the drop down box you can find all available com ports. It is important that this is set to the serial port that is physically attached via cable to the iGrade™ Application Controller. Diagnostic information about current serial ports can be found in the Windows Device Manager. One way of accessing this Windows tool is via the button in bottom left of ‘Settings &gt; GPS’ .</span></span>

![](https://docs.t3rra.com/uploads/images/gallery/2025-03/scaled-1680-/Cz6le-nvs-4a1gbrebuzup0nog5mfuckakr3w-png.png)

<span style="font-family: Helvetica,sans-serif;"><span style="font-size: 14pt; color: rgb(0, 0, 0); font-weight: 400;">**Baud rate**:</span><span style="font-size: 14pt; color: rgb(0, 0, 0); font-weight: 300;"> The speed at which the system talks to iGrade™. It is important that this matches the iGrade™ settings or the T3RRA software will not be able to talk to iGrade™. We recommend setting the baud rate to 38400 when connected to iGrade v1. If connected to iGrade™ v2 we recommend setting the baud rate to 115200 with </span><span style="font-size: 14pt; color: rgb(0, 0, 0); font-weight: 400;">**NMEA Message Type**</span><span style="font-size: 14pt; color: rgb(0, 0, 0); font-weight: 300;"> set to “All”. </span></span>

<span style="font-family: Helvetica,sans-serif;"><span style="font-size: 14pt; color: rgb(0, 0, 0); font-weight: 400;">**Warning Thresholds**</span></span>

<span style="font-family: Helvetica,sans-serif;"><span dir="ltr" style="font-size: 14pt; color: rgb(0, 0, 0); font-weight: 400;">![](https://docs.t3rra.com/uploads/images/gallery/2025-03/scaled-1680-/vdElc-g0gijblg1c-ep-b8l8ofkbkcwdy8f9g-png.png)**Idle timeout**:</span><span style="font-size: 14pt; color: rgb(0, 0, 0); font-weight: 300;"> If no GPS messages have been received in this time period an error warning will show.</span></span>

<span style="font-family: Helvetica,sans-serif;">  
</span>

<span style="font-family: Helvetica,sans-serif;"><span style="font-size: 14pt; color: rgb(0, 0, 0); font-weight: 400;">**RTK Timeout**:</span><span style="font-size: 14pt; color: rgb(0, 0, 0); font-weight: 300;"> This monitors the time since the last good RTK correction packet was received. It should not normally be set above 10-20sec.</span></span>

<span style="font-family: Helvetica,sans-serif;">  
</span>

<span style="font-family: Helvetica,sans-serif;"><span style="font-size: 14pt; color: rgb(0, 0, 0); font-weight: 400;">**Max VDOP**:</span><span style="font-size: 14pt; color: rgb(0, 0, 0); font-weight: 300;"> Vertical Dilution of Precision is a measure of the altitude accuracy. For the most accurate implementation you will want this value as low as possible however setting lower than 2 may cause interruptions in the use of T3RRA software.</span></span>

<span style="font-family: Helvetica,sans-serif;">  
</span>

<span style="font-family: Helvetica,sans-serif;"><span style="font-size: 14pt; color: rgb(0, 0, 0); font-weight: 400;">**Min Satellite Count**:</span><span style="font-size: 14pt; color: rgb(0, 0, 0); font-weight: 300;"> Sets how few satellites the GPS needs to see before a warning is shown.</span></span>

<span style="font-family: Helvetica,sans-serif;"><span style="font-size: 14pt; color: rgb(0, 0, 0); font-weight: 400;">**Output**</span></span>

![](https://docs.t3rra.com/uploads/images/gallery/2025-03/scaled-1680-/IWOtrcmdgum-qtiht66scjm0l85mpwbwk-kyw-png.png)

<span dir="ltr">**Current &amp; Raw GPS Data**<span style="color: rgb(0, 0, 0); font-family: Helvetica, sans-serif; font-size: 14pt; font-weight: 400;">:</span><span dir="ltr"><span><span style="font-size: 14pt;"> Current displays the current position data for the </span><span style="font-size: 18.6667px;">receiver</span><span style="font-size: 14pt;">, while Raw GPS Data will display all the </span><span style="font-size: 18.6667px;">messages</span></span><span style="color: rgb(0, 0, 0); font-family: Helvetica, sans-serif; font-size: 14pt; font-weight: 400;"> that are coming in.</span></span></span>

<span style="font-family: Helvetica,sans-serif;"><span style="font-size: 14pt; color: rgb(0, 0, 0); font-weight: 400;">**Lat &amp; Lon**:</span><span style="font-size: 14pt; color: rgb(0, 0, 0); font-weight: 300;"> Your current location coordinates (latitude and longitude).</span></span>

<span style="font-family: Helvetica,sans-serif;">  
</span>

<span style="font-family: Helvetica,sans-serif;"><span style="font-size: 14pt; color: rgb(0, 0, 0); font-weight: 400;">**Altitude**:</span><span style="font-size: 14pt; color: rgb(0, 0, 0); font-weight: 300;"> Your current height (Displayed in chosen measurement format) above sea level.</span></span>

<span style="font-family: Helvetica,sans-serif;">  
</span>

<span style="font-family: Helvetica,sans-serif;"><span style="font-size: 14pt; color: rgb(0, 0, 0); font-weight: 400;">**Num Sats**:</span><span style="font-size: 14pt; color: rgb(0, 0, 0); font-weight: 300;"> The number of satellites that your GPS is currently tracking. This is linked to the Min Satellite Count in Warning thresholds and provides an error if this number drops below what is set there.</span></span>

<span style="font-family: Helvetica,sans-serif;">  
</span>

<span style="font-family: Helvetica,sans-serif;"><span style="font-size: 14pt; color: rgb(0, 0, 0); font-weight: 400;">**Fix**:</span><span style="font-size: 14pt; color: rgb(0, 0, 0); font-weight: 300;"> The type of position solution calculated.</span></span>

<span style="font-family: Helvetica,sans-serif;">  
</span>

<span style="font-family: Helvetica,sans-serif;"><span style="font-size: 14pt; color: rgb(0, 0, 0); font-weight: 400;">**Time**:</span><span style="font-size: 14pt; color: rgb(0, 0, 0); font-weight: 300;"> The current GPS time.</span></span>

<span style="font-family: Helvetica,sans-serif;">  
</span>

<span style="font-family: Helvetica,sans-serif;"><span style="font-size: 14pt; color: rgb(0, 0, 0); font-weight: 400;">**Last Correction**</span><span style="font-size: 14pt; color: rgb(0, 0, 0); font-weight: 300;">: Time since receiving the last differential correction message from the base station. Should be as low as possible for the most accurate readings. It is linked to the RTK Timeout in Warning thresholds and will provide an error if it exceeds that time limit.</span></span>

<span style="font-family: Helvetica,sans-serif;">  
</span>

<span style="font-family: Helvetica,sans-serif;"><span style="font-size: 14pt; color: rgb(0, 0, 0); font-weight: 400;">**VDOP**:</span><span style="font-size: 14pt; color: rgb(0, 0, 0); font-weight: 300;"> Vertical Dilution of Precision. If this number exceeds the value in the Max VDOP in warning thresholds it will show an error.</span></span>

<span style="font-family: Helvetica,sans-serif;">  
</span>

# Markers

<span dir="ltr" style="font-size: 14pt; font-family: Helvetica, sans-serif; color: rgb(0, 0, 0); font-weight: 300;">![](https://docs.t3rra.com/uploads/images/gallery/2025-03/scaled-1680-/6UAv46xrsliqggjidbocwygkhccx7gu4emdpq-png.png)Markers on designs allow for setting points of interest at user-selected locations. This includes using a marker as a benchmark “control point” location in the design. To use a marker as a Benchmark location, refer to </span><span style="font-family: Helvetica,sans-serif;"><span style="font-size: 13pt; color: rgb(0, 0, 0); font-weight: bold;">‘</span><span style="font-size: 12pt; color: rgb(0, 0, 0);">**Set Zero using a marker**’</span><span dir="ltr" style="font-size: 14pt; color: rgb(0, 0, 0); font-weight: 300;"> in the Implementation section of this manual.</span></span>

<span style="font-family: Helvetica,sans-serif;">  
</span>

<span style="font-family: Helvetica,sans-serif;"><span style="font-size: 14pt; color: rgb(0, 0, 0); font-weight: 400;">**Set marker**</span><span style="font-size: 14pt; color: rgb(0, 0, 0); font-weight: 300;"> - use this tool to set a marker on the map. Markers are always placed at the current location.</span></span>

<span style="font-family: Helvetica,sans-serif;"><span dir="ltr" style="font-size: 14pt; color: rgb(0, 0, 0); font-weight: 300;">![](https://docs.t3rra.com/uploads/images/gallery/2025-03/scaled-1680-/B6uaozgmmrooe2rzkcdjjjxkvsncrtzgc20ug-png.png)When a new marker is created a window will appear allowing a name for the marker to be entered.</span></span>

<span style="font-family: Helvetica,sans-serif;">  
</span>

<span style="font-family: Helvetica,sans-serif;">  
</span>

<span style="font-family: Helvetica,sans-serif;">  
</span>

<span style="font-family: Helvetica,sans-serif;">  
</span>

<span dir="ltr" style="font-family: Helvetica,sans-serif;"><span class="fr-video fr-deletable fr-fvc fr-dvb fr-draggable"><iframe allowfullscreen="allowfullscreen" class="fr-draggable align-center" frameborder="0" height="360" sandbox="allow-scripts allow-forms allow-same-origin allow-presentation" src="https://www.youtube.com/embed/sk7BdYk62K8?&wmode=opaque" width="640"></iframe>

</span>  
</span>

<span style="font-family: Helvetica,sans-serif;"><span dir="ltr" style="font-size: 14pt; color: rgb(0, 0, 0); font-weight: 400;">![](https://docs.t3rra.com/uploads/images/gallery/2025-03/scaled-1680-/MJAqa83-ezbzf-gjs0btzpiakmlqrvn-eqg-png.png)**Edit Marker**</span><span style="font-size: 14pt; color: rgb(0, 0, 0); font-weight: 300;"> - this opens a window that allows you to select any marker on the map and edit it.</span></span>

<span style="font-family: Helvetica,sans-serif;">  
</span>

<span style="font-family: Helvetica,sans-serif;">  
</span>

<span style="font-family: Helvetica,sans-serif;">  
</span>

<span style="font-family: Helvetica,sans-serif;">  
</span>

<span style="font-family: Helvetica,sans-serif;"><span dir="ltr" style="font-size: 14pt; color: rgb(0, 0, 0); font-weight: 300;">The ‘Edit Marker’ button will open the below window allowing you to see the information of each marker that has been placed including heading, distance and height of the marker relative to your current position.</span></span>

<span style="font-family: Helvetica,sans-serif;"><span dir="ltr" style="font-size: 14pt; color: rgb(0, 0, 0); font-weight: 300;">![](https://docs.t3rra.com/uploads/images/gallery/2025-03/scaled-1680-/PMk6iym8mprymcwlgoivantos9vnzet-eai7a-png.png)Pressing the button next to the marker name will let you change the name of the marker.</span></span>

<span style="font-size: 14pt; font-family: Helvetica, sans-serif; color: rgb(0, 0, 0); font-weight: 300;">The buttons at the bottom of the window allow you to select all the markers, delete the currently selected markers, export the currently selected markers and close the window. </span>

# Start, Pause and Stop controls

<span dir="ltr" style="font-size: 14pt; font-family: Helvetica, sans-serif; color: rgb(0, 0, 0); font-weight: 300;">![](https://docs.t3rra.com/uploads/images/gallery/2025-03/scaled-1680-/B3Y3s4qz-fll0hy6jtjutzwshvametdzogiq-png.png)![](https://docs.t3rra.com/uploads/images/gallery/2025-03/scaled-1680-/qEF9ka9fbteaoykc1b05zr395p3z5imu2x7ka-png.png)In the Surveying and Implementation screens the ‘</span><span style="font-family: Helvetica,sans-serif;"><span style="font-size: 14pt; color: rgb(0, 0, 0); font-weight: 400;">**Start**</span><span style="font-size: 14pt; color: rgb(0, 0, 0); font-weight: 300;">’, </span><span style="font-size: 14pt; color: rgb(0, 0, 0); font-weight: 400;">‘**Pause**</span><span style="font-size: 14pt; color: rgb(0, 0, 0); font-weight: 300;">’, and ‘</span><span style="font-size: 14pt; color: rgb(0, 0, 0); font-weight: 400;">**Stop**</span><span style="font-size: 14pt; color: rgb(0, 0, 0); font-weight: 300;">’ buttons are used to control the beginning and ending of the relevant activities.</span></span>

<span style="font-family: Helvetica,sans-serif;"><span style="font-size: 14pt; color: rgb(0, 0, 0); font-weight: 300;">These buttons do have slightly different functions depending on when they are used.</span></span>

<span style="font-family: Helvetica,sans-serif;">  
</span>

<span style="font-family: Helvetica,sans-serif;"><span style="font-size: 14pt; color: rgb(0, 0, 0); font-weight: 400;">**Normal function**:</span></span>

<span style="font-family: Helvetica,sans-serif;"><span style="font-size: 14pt; color: rgb(0, 0, 0); font-weight: 300;">During normal function these buttons will act in the following way.  
‘</span><span style="font-size: 14pt; color: rgb(0, 0, 0); font-weight: 400;">**Start**</span><span dir="ltr" style="font-size: 14pt; color: rgb(0, 0, 0); font-weight: 300;">’ will begin the system either surveying data or implementing a design. It will also start logging path counts (if enabled). <span style="color: rgb(0, 0, 0); font-family: Helvetica, sans-serif; font-size: 18.6667px; font-style: normal; font-variant-ligatures: normal; font-variant-caps: normal; font-weight: 300; letter-spacing: normal; orphans: 2; text-align: left; text-indent: 0px; text-transform: none; white-space: normal; widows: 2; word-spacing: 0px; -webkit-text-stroke-width: 0px; text-decoration-thickness: initial; text-decoration-style: initial; text-decoration-color: initial; display: inline !important; float: none;">The title of the button will reflect which action it will start.</span></span></span>

<span style="font-family: Helvetica,sans-serif;">  
</span>

<span style="font-family: Helvetica,sans-serif;"><span style="font-size: 14pt; color: rgb(0, 0, 0); font-weight: 300;">‘</span><span style="font-size: 14pt; color: rgb(0, 0, 0); font-weight: 400;">**Pause**</span><span style="font-size: 14pt; color: rgb(0, 0, 0); font-weight: 300;">’ is only applicable to Surveying. The use of the pause button in surveying is to allow you to continue a path after moving around obstacles. For example surveying a drain, pressing the pause button and moving then the start button will tell the system that the same drain continues where you are.</span></span>

<span style="font-family: Helvetica,sans-serif;">  
</span>

<span style="font-family: Helvetica,sans-serif;"><span style="font-size: 14pt; color: rgb(0, 0, 0); font-weight: 300;">‘</span><span style="font-size: 14pt; color: rgb(0, 0, 0); font-weight: 400;">**Stop**</span><span style="font-size: 14pt; color: rgb(0, 0, 0); font-weight: 300;">’ will stop the surveying of the area or the implementation of a design. Using the stop button in surveying tells the system that when you press start next it is a separate area. Using the same example as pausing, if surveying a drain pressing the stop button moving and then the start button will tell the system that this is a new separate drain.</span></span>

<span style="font-family: Helvetica,sans-serif;">  
</span>

<span style="font-family: Helvetica,sans-serif;"><span style="font-size: 14pt; color: rgb(0, 0, 0); font-weight: 400;">**Drain Surveying function**:</span></span>

<span style="font-family: Helvetica,sans-serif;"><span style="font-size: 14pt; color: rgb(0, 0, 0); font-weight: 300;">The ‘</span><span style="font-size: 14pt; color: rgb(0, 0, 0); font-weight: 400;">**Start**</span><span style="font-size: 14pt; color: rgb(0, 0, 0); font-weight: 300;">’ ‘</span><span style="font-size: 14pt; color: rgb(0, 0, 0); font-weight: 400;">**Pause**</span><span style="font-size: 14pt; color: rgb(0, 0, 0); font-weight: 300;">’, and ‘</span><span style="font-size: 14pt; color: rgb(0, 0, 0); font-weight: 400;">**Stop**</span><span style="font-size: 14pt; color: rgb(0, 0, 0); font-weight: 300;">’ buttons will change function slightly when the software is set to survey drains.</span></span>

<span style="font-family: Helvetica,sans-serif;"><span style="font-size: 14pt; color: rgb(0, 0, 0); font-weight: 300;">‘</span><span style="font-size: 14pt; color: rgb(0, 0, 0); font-weight: 400;">**Start**</span><span style="font-size: 14pt; color: rgb(0, 0, 0); font-weight: 300;">’ will start the system surveying a drain.</span></span>

<span style="font-family: Helvetica,sans-serif;">  
</span>

<span style="font-family: Helvetica,sans-serif;"><span style="font-size: 14pt; color: rgb(0, 0, 0); font-weight: 300;">‘</span><span style="font-size: 14pt; color: rgb(0, 0, 0); font-weight: 400;">**Stop**</span><span style="font-size: 14pt; color: rgb(0, 0, 0); font-weight: 300;">’ will end the current drain survey. Pressing ‘</span><span style="font-size: 14pt; color: rgb(0, 0, 0); font-weight: 400;">**Start**</span><span style="font-size: 14pt; color: rgb(0, 0, 0); font-weight: 300;">’ after this will start a new drain.</span></span>

<span style="font-family: Helvetica,sans-serif;">  
</span>

<span dir="ltr" style="font-size: 14pt; font-family: Helvetica, sans-serif; color: rgb(0, 0, 0); font-weight: 300;">Pausing collection is designed to allow for situations where the collecting vehicle cannot physically traverse a section of drain line.</span>

# Drain Surveying specific edit controls

<span dir="ltr" style="font-size: 14pt; font-family: Helvetica, sans-serif; color: rgb(0, 0, 0); font-weight: 300;">The following tools become available in the ‘</span><span style="font-family: Helvetica,sans-serif;"><span style="font-size: 14pt; color: rgb(0, 0, 0); font-weight: 400;">**Collection**</span><span style="font-size: 14pt; color: rgb(0, 0, 0); font-weight: 300;">’ and ‘</span><span style="font-size: 14pt; color: rgb(0, 0, 0); font-weight: 400;">**Surfacing**</span><span dir="ltr" style="font-size: 14pt; color: rgb(0, 0, 0); font-weight: 300;">’ stages if drain survey points exist.</span></span>

- <span style="font-family: Helvetica,sans-serif;"><span dir="ltr" style="font-size: 14pt; color: rgb(0, 0, 0); font-weight: 300;">Edit Drain</span></span>
- <span style="font-family: Helvetica,sans-serif;"><span dir="ltr" style="font-size: 14pt; color: rgb(0, 0, 0); font-weight: 300;">Merge Drains</span></span>
- <span style="font-family: Helvetica,sans-serif;"><span dir="ltr" style="font-size: 14pt; color: rgb(0, 0, 0); font-weight: 300;">Extend Drain</span></span>
- <span style="font-family: Helvetica,sans-serif;"><span dir="ltr" style="font-size: 14pt; color: rgb(0, 0, 0); font-weight: 300;">Split Drain</span></span>

<span style="font-family: Helvetica,sans-serif;">  
</span>

![](https://docs.t3rra.com/uploads/images/gallery/2025-03/scaled-1680-/py2ykvydx0jhd62r9rmjwvpai4hd1cvfnowdw-png.png)

<span style="font-family: Helvetica,sans-serif;">  
</span>

##### <span style="font-family: Helvetica,sans-serif;"><span dir="ltr" style="font-size: 20pt; color: rgb(0, 0, 0); font-weight: 400;">![](https://docs.t3rra.com/uploads/images/gallery/2025-03/scaled-1680-/1FAqvutwgg9e8y-sxwmfwl-mezc6sgzibmcrg-png.png)</span><span dir="ltr" style="font-size: 24px; color: rgb(0, 0, 0); font-weight: 400;">**Edit Drain**</span><span style="font-size: 20pt; color: rgb(0, 0, 0); font-weight: 300;"> </span></span>

<span style="font-family: Helvetica,sans-serif;">  
</span>

<span style="font-family: Helvetica,sans-serif;"><span dir="ltr" style="font-size: 14pt; color: rgb(0, 0, 0); font-weight: 300;">This button allows you to edit complete drain paths from the project.</span></span>

<span style="font-family: Helvetica,sans-serif;">  
</span>

<span style="font-family: Helvetica,sans-serif;">  
</span>

<span dir="ltr" style="font-family: Helvetica,sans-serif;">![](https://docs.t3rra.com/uploads/images/gallery/2025-03/scaled-1680-/Bpjxfboctlzpfnn4yxyen4eo1hiefzo6o-eeg-png.png)</span>

<span dir="ltr" style="font-family: Helvetica, sans-serif; font-size: 14pt; color: rgb(0, 0, 0);">After pressing the '**Edit**</span><span style="font-family: Helvetica, sans-serif; font-size: 14pt; color: rgb(0, 0, 0); font-weight: 400;"> **drain**</span><span dir="ltr"><span><span dir="ltr" style="font-size: 14pt;">' button a window will appear with a list of available drain paths. Select a drain from the list, and press the </span><span style="font-size: 18.6667px;">corresponding</span><span dir="ltr" style="font-size: 14pt;"> button to either change the name of the drain or delete it.</span></span></span>

#####   


<span style="font-family: Helvetica,sans-serif;">**<span style="font-size: 24px;">Merge drains</span>**</span>

![](https://docs.t3rra.com/uploads/images/gallery/2025-03/scaled-1680-/eG35utr-9e5urxzmwq3a9tnevzggntatdtthg-png.png)<span dir="ltr" style="color: rgb(0, 0, 0); font-family: Helvetica, sans-serif; font-size: 18.6667px; font-style: normal; font-variant-ligatures: normal; font-variant-caps: normal; font-weight: 300; letter-spacing: normal; orphans: 2; text-align: left; text-indent: 0px; text-transform: none; widows: 2; word-spacing: 0px; -webkit-text-stroke-width: 0px; white-space: normal; text-decoration-thickness: initial; text-decoration-style: initial; text-decoration-color: initial; display: inline !important; float: none;">This tool allows two drains to together at either end. When merging a copy of the original drains with the joining line will be made and you be given the option to delete the originals if you would like. </span>

![](https://docs.t3rra.com/uploads/images/gallery/2025-03/scaled-1680-/ZHWiroepeqcfuv6ubatiimkrkejq8ujai-mmg-png.png)

<span style="font-size: 24px; font-family: Helvetica, sans-serif; color: rgb(0, 0, 0); font-weight: 400;">**Extend drain**</span>

![](https://docs.t3rra.com/uploads/images/gallery/2025-03/scaled-1680-/Jnfdoqvf6i-41q6hysk-c44jgt9xxjrclrz9w-png.png)

<span dir="ltr" style="font-size: 14pt; font-family: Helvetica, sans-serif; color: rgb(0, 0, 0); font-weight: 300;">This tool allows you to arbitrarily extend a drain from either end of the surveyed path. This can be useful if the drain needs to extend to a location that was not directly accessible by the surveying vehicle.</span>

<span style="font-size: 14pt; font-family: Helvetica, sans-serif; color: rgb(0, 0, 0); font-weight: 300;">Pressing the '</span><span style="font-size: 14pt; font-family: Helvetica, sans-serif; color: rgb(0, 0, 0); font-weight: 400;">**Extend Drain**</span><span style="font-size: 14pt; font-family: Helvetica, sans-serif; color: rgb(0, 0, 0); font-weight: 300;">' button will bring up the below screen. This screen allows you to extend the drain in whatever direction you wish.</span>

<span dir="ltr" style="font-size: 14pt; font-family: Helvetica, sans-serif; color: rgb(0, 0, 0); font-weight: 300;">The red arrow shows the direction in which the drain will be extended, as well as which end of the drain will be extended.</span>

<span dir="ltr" style="font-size: 14pt; font-family: Helvetica, sans-serif; color: rgb(0, 0, 0); font-weight: 300;">![](https://docs.t3rra.com/uploads/images/gallery/2025-03/scaled-1680-/MiAizndjyjvnv2ynf2lvmvlnyyknuij3odl5a-png.png)Use the controls on the left hand side to select a drain. Then choose the length, elevation, and direction of the extension.</span>

<span style="font-size: 14pt; font-family: Helvetica, sans-serif; color: rgb(0, 0, 0); font-weight: 400;">‘**Rel elevation**’ </span><span dir="ltr" style="font-size: 14pt; font-family: Helvetica, sans-serif; color: rgb(0, 0, 0); font-weight: 300;">adds (or removes) the value entered into to the elevation of the existing drain end to calculate the elevation of the extended drain end.</span>

<span style="font-size: 14pt; font-family: Helvetica, sans-serif; color: rgb(0, 0, 0); font-weight: 400;">‘**Abs elevation**’</span><span dir="ltr" style="font-size: 14pt; font-family: Helvetica, sans-serif; color: rgb(0, 0, 0); font-weight: 300;"> Sets the extended drain end to the value entered.</span>

<span style="font-size: 14pt; font-family: Helvetica, sans-serif; color: rgb(0, 0, 0); font-weight: 300;">For example, to extend the drain 1ft below an ending elevation height of 100ft:</span>

<span dir="ltr" style="font-size: 14pt; font-family: Helvetica, sans-serif; color: rgb(0, 0, 0); font-weight: 300;">Rel elevation value: -1ft</span>

<span dir="ltr" style="font-size: 14pt; font-family: Helvetica, sans-serif; color: rgb(0, 0, 0); font-weight: 300;">Abs elevation value: 99ft</span>

<span style="font-size: 14pt; font-family: Helvetica, sans-serif; color: rgb(0, 0, 0); font-weight: 300;">Once you have finished making these adjustments press the '</span><span style="font-size: 14pt; font-family: Helvetica, sans-serif; color: rgb(0, 0, 0); font-weight: 400;">Extend Drain</span><span style="font-size: 14pt; font-family: Helvetica, sans-serif; color: rgb(0, 0, 0); font-weight: 300;">' button.</span>

<span dir="ltr" style="font-size: 14pt; font-family: Helvetica, sans-serif; color: rgb(0, 0, 0); font-weight: 300;"><span class="fr-video fr-deletable fr-fvc fr-dvb fr-draggable"><iframe allowfullscreen="allowfullscreen" class="fr-draggable align-center" frameborder="0" height="360" sandbox="allow-scripts allow-forms allow-same-origin allow-presentation" src="https://www.youtube.com/embed/G3HQhuOQewQ?&wmode=opaque" width="640"></iframe>

</span></span>

#####   


##### <span dir="ltr" style="font-size: 24px; font-family: Helvetica, sans-serif; color: rgb(0, 0, 0); font-weight: 400;">**Split drain**</span>

<span style="font-size: 14pt; font-family: Helvetica, sans-serif; color: rgb(0, 0, 0); font-weight: 300;">![](https://docs.t3rra.com/uploads/images/gallery/2025-03/scaled-1680-/HFZ3h2-4jbitbzuq4q-h9giu78siwlt2uymq-png.png)Split drain allows you to split a drain into two separate drains. </span>

<span style="font-size: 14pt; font-family: Helvetica, sans-serif; color: rgb(0, 0, 0); font-weight: 300;">First select which drain it is you wish to edit from the '</span><span style="font-size: 14pt; font-family: Helvetica, sans-serif; color: rgb(0, 0, 0); font-weight: 400;">**Which drain to split?**</span><span style="font-size: 14pt; font-family: Helvetica, sans-serif; color: rgb(0, 0, 0); font-weight: 300;">' drop down menu in the bottom center.</span>

![](https://docs.t3rra.com/uploads/images/gallery/2025-03/scaled-1680-/TIiulertvwncrbppjkzhybzuvxziyvngrtj-q-png.png)

<span style="font-size: 14pt; font-family: Helvetica, sans-serif; color: rgb(0, 0, 0); font-weight: 300;">Once a drain has been selected you can press anywhere along the drain profile. A blue arrow will appear to show where the split will occur. The arrow can also be moved using the left and right arrows found to the right of the ‘</span><span style="font-size: 14pt; font-family: Helvetica, sans-serif; color: rgb(0, 0, 0); font-weight: 400;">**Split at Distance**</span><span style="font-size: 14pt; font-family: Helvetica, sans-serif; color: rgb(0, 0, 0); font-weight: 300;">’ option.</span>

<span style="font-size: 14pt; font-family: Helvetica, sans-serif; color: rgb(0, 0, 0); font-weight: 300;">Create a Marker for referencing by choosing the Marker button.</span>

<span style="font-size: 14pt; font-family: Helvetica, sans-serif; color: rgb(0, 0, 0); font-weight: 300;">Name the new drain using the '</span><span style="font-size: 14pt; font-family: Helvetica, sans-serif; color: rgb(0, 0, 0); font-weight: 400;">**New drain name**</span><span style="font-size: 14pt; font-family: Helvetica, sans-serif; color: rgb(0, 0, 0); font-weight: 300;">' text box. Once you are happy with all of these settings press the '</span><span style="font-size: 14pt; font-family: Helvetica, sans-serif; color: rgb(0, 0, 0); font-weight: 400;">**Split Drain At Point**</span><span style="font-size: 14pt; font-family: Helvetica, sans-serif; color: rgb(0, 0, 0); font-weight: 300;">' button to apply the split.</span>

<span style="font-size: 14pt; font-family: Helvetica, sans-serif; color: rgb(255, 0, 0); font-weight: 300;">NOTE: The new drain name cannot be the same as an existing drain. The '</span><span style="font-family: Helvetica,sans-serif;"><span style="font-size: 14pt; color: rgb(255, 0, 0); font-weight: 400;">**Split Drain At Point**</span></span><span style="font-size: 14pt; font-family: Helvetica, sans-serif; color: rgb(255, 0, 0); font-weight: 300;">' button will become disabled in this case.</span>

<span dir="ltr" style="font-size: 14pt; font-family: Helvetica, sans-serif; color: rgb(255, 0, 0); font-weight: 300;"><span class="fr-video fr-deletable fr-fvc fr-dvb fr-draggable"><iframe allowfullscreen="allowfullscreen" class="fr-draggable align-center" frameborder="0" height="360" sandbox="allow-scripts allow-forms allow-same-origin allow-presentation" src="https://www.youtube.com/embed/slorWX6Yhds?&wmode=opaque" width="640"></iframe>

</span></span>

###   

# 2D Current Position Tracking Options

<span dir="ltr" style="font-size: 14pt; font-family: Helvetica, sans-serif; color: rgb(0, 0, 0); font-weight: 300;">When surveying or implementing there are 4 options that control how vehicle location is tracked on the screen in 2D. The options for 2D tracking are ‘</span><span style="font-family: Helvetica,sans-serif;"><span style="font-size: 14pt; color: rgb(0, 0, 0); font-weight: 400;">**Scroll**</span><span style="font-size: 14pt; color: rgb(0, 0, 0); font-weight: 300;">’, ‘</span><span style="font-size: 14pt; color: rgb(0, 0, 0); font-weight: 400;">**Center**</span><span style="font-size: 14pt; color: rgb(0, 0, 0); font-weight: 300;">’, ‘</span><span style="font-size: 14pt; color: rgb(0, 0, 0); font-weight: 400;">**Dir. up**</span><span style="font-size: 14pt; color: rgb(0, 0, 0); font-weight: 300;">’, and ‘</span><span style="font-size: 14pt; color: rgb(0, 0, 0); font-weight: 400;">Manual</span><span style="font-size: 14pt; color: rgb(0, 0, 0); font-weight: 300;">’. </span></span>

<span style="font-family: Helvetica,sans-serif;"><span dir="ltr" style="font-size: 14pt; color: rgb(0, 0, 0); font-weight: 400;">![](https://docs.t3rra.com/uploads/images/gallery/2025-03/scaled-1680-/HI6efj9qqw3kaebxb2hge-lvf3mjtpk-soboa-png.png)**Scroll** </span><span dir="ltr" style="font-size: 14pt; color: rgb(0, 0, 0); font-weight: 300;">  
This option will show the GPS position indicator moving freely on the screen and will move the screen as the indicator approaches the edge to ensure that the indicator is always present on the screen.</span></span>

<span style="font-family: Helvetica,sans-serif;"><span dir="ltr" style="font-size: 14pt; color: rgb(0, 0, 0); font-weight: 400;">![](https://docs.t3rra.com/uploads/images/gallery/2025-03/scaled-1680-/0o6jaiwaajwbdjzfchbr0iy6nkmh-zwqnvm7g-png.png)**Dir. Up**</span></span>

<span style="font-family: Helvetica,sans-serif;"><span style="font-size: 14pt; color: rgb(0, 0, 0); font-weight: 300;">When the ‘</span><span style="font-size: 14pt; color: rgb(0, 0, 0); font-weight: 400;">**Direction Up**</span><span style="font-size: 14pt; color: rgb(0, 0, 0); font-weight: 300;">’ option is active the map will rotate to make sure that the direction of travel is always to the top of the screen.</span></span>

<span style="font-family: Helvetica,sans-serif;">  
</span>

<span style="font-family: Helvetica,sans-serif;"><span dir="ltr" style="font-size: 14pt; color: rgb(0, 0, 0); font-weight: 400;">![](https://docs.t3rra.com/uploads/images/gallery/2025-03/scaled-1680-/yL7penidfqd57ojlwpes5d46uaet6t2ze8ang-png.png)**Center**</span></span>

<span style="font-family: Helvetica,sans-serif;"><span style="font-size: 14pt; color: rgb(0, 0, 0); font-weight: 300;">The Center option has 2 parts, first it locks the indicator to the center of the screen so as it moves the map moves to make sure it stays in the center. The second part is that the map is locked to always have north at the top of the screen.</span></span>

<span style="font-family: Helvetica,sans-serif;"><span dir="ltr" style="font-size: 14pt; color: rgb(0, 0, 0); font-weight: 400;">![](https://docs.t3rra.com/uploads/images/gallery/2025-03/scaled-1680-/bDXqeixmb2bpd4lgy72x9j26ikqxnhv3xxszw-png.png)**Manual**</span></span>

<span style="font-family: Helvetica,sans-serif;"><span style="font-size: 14pt; color: rgb(0, 0, 0); font-weight: 300;">This option makes it so that the system does not lock the direction of the map or fixate on the location of the indicator so that even while surveying or implementing you can inspect other sections of the map. Caution: in this mode the vehicle icon can move off the edge of the map. </span></span>

# 3D Current Position Tracking Options

<span dir="ltr" style="font-size: 14pt; font-family: Helvetica, sans-serif; color: rgb(0, 0, 0); font-weight: 300;">When surveying or implementing in 3D there are 2 options available. The first option is ‘</span><span style="font-family: Helvetica,sans-serif;"><span style="font-size: 14pt; color: rgb(0, 0, 0); font-weight: 400;">**Follow Tractor**</span><span style="font-size: 14pt; color: rgb(0, 0, 0); font-weight: 300;">’ and the second option is ‘</span><span style="font-size: 14pt; color: rgb(0, 0, 0); font-weight: 400;">**Stop Following**</span><span style="font-size: 14pt; color: rgb(0, 0, 0); font-weight: 300;">’.</span></span>

<span style="font-family: Helvetica,sans-serif;"><span dir="ltr" style="font-size: 14pt; color: rgb(0, 0, 0); font-weight: 400;">![](https://docs.t3rra.com/uploads/images/gallery/2025-03/scaled-1680-/kJXshvhag5bafi7wddm1vm-dngmts91hd0tia-png.png)**Follow Tractor**</span></span>

<span style="font-family: Helvetica,sans-serif;"><span style="font-size: 14pt; color: rgb(0, 0, 0); font-weight: 300;">This option keeps the tractor at the center of the screen at all times, the camera will be placed behind the tractor when pressed.. While in 3D viewing the camera can only be moved to view the tractor from various angles and will rotate with the tractor as the primary focus.</span></span>

<span style="font-family: Helvetica,sans-serif;">  
</span>

<span style="font-family: Helvetica,sans-serif;"><span dir="ltr" style="font-size: 14pt; color: rgb(0, 0, 0); font-weight: 400;">![](https://docs.t3rra.com/uploads/images/gallery/2025-03/scaled-1680-/JI6ybzrirmm4lohdap3c-jig8xk9r-75vgw2g-png.png)**Stop Following**</span></span>

<span style="font-family: Helvetica,sans-serif;"><span style="font-size: 14pt; color: rgb(0, 0, 0); font-weight: 300;">This option stops the camera from following the tractor. While using this option the tractor is able to drive off the edge of the screen and the camera will not follow it, however whenever a change is made to the camera angle it will snap back to the tractor's current position and use the tractor as the focal point. </span></span>

# Screenshot

<span dir="ltr" style="font-size: 14pt; font-family: Helvetica, sans-serif; color: rgb(0, 0, 0); font-weight: 300;">![](https://docs.t3rra.com/uploads/images/gallery/2025-03/scaled-1680-/Koum-rh2t4imcmzilavtoawxv1vh7yst0mwta-png.png)In the top right of any mapping window is a small button with a camera. Pressing the camera button will take a screenshot of what is currently on the screen.</span>

<span style="font-family: Helvetica,sans-serif;">  
</span>

<span style="font-family: Helvetica,sans-serif;"><span dir="ltr" style="font-size: 14pt; color: rgb(0, 0, 0); font-weight: 300;">After taking a screenshot a pop-up window will appear (shown below). Pressing ‘Yes’ will open the folder where the screenshot is saved.</span></span>

<span style="font-family: Helvetica,sans-serif;"><span dir="ltr" style="font-size: 14pt; color: rgb(0, 0, 0); font-weight: 300;">![](https://docs.t3rra.com/uploads/images/gallery/2025-03/scaled-1680-/jMJpdd-dfrbbljbo67xfipphouu-1dkk1m79w-png.png) </span></span>

# Battery Level

<span dir="ltr" style="font-size: 14pt; font-family: Helvetica, sans-serif; color: rgb(0, 0, 0); font-weight: 300;">In the top right of the screen next to the screenshot button you will find the Battery level indicator. </span><span style="font-family: Helvetica,sans-serif;"><span dir="ltr" style="font-size: 14pt; color: rgb(0, 0, 0); font-weight: 300;">This indicator displays the tablet/computer's battery level and whether it is plugged into power or not.</span></span>

<span style="font-family: Helvetica,sans-serif;"><span dir="ltr" style="font-size: 14pt; color: rgb(0, 0, 0); font-weight: 300;">![](https://docs.t3rra.com/uploads/images/gallery/2025-03/scaled-1680-/ZCQipt1irgundec75-myka-rsdthghbczhj5q-png.png)</span></span>