# Line Label guide
The ‘Line Label guide’ tool allows you to select two points anywhere on the field and display the distance between them with a label attached. When the tool has been selected the cursor will change into a cross.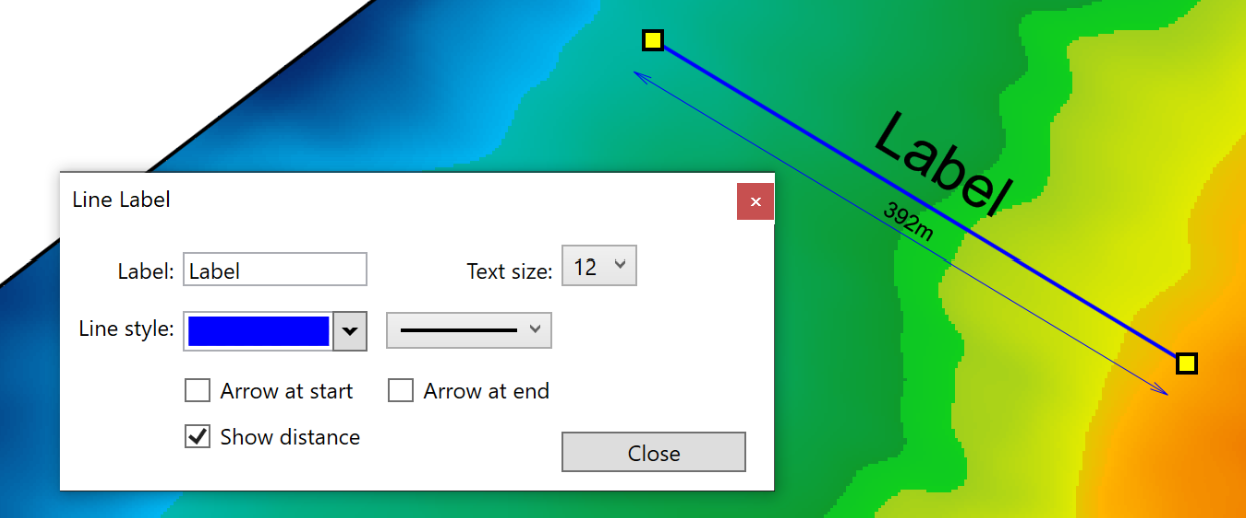
- ‘Label’ This is the title of the line that has just been created. The label’s text size can be changed using the ‘Text size’ option to its right. This text size option will only affect the title on the guide, it will not increase the size of the text in the measurement.
- ‘Line style’. The left drop down menu allows you to change the color of the line, the right drop down menu allows you to select the thickness of the line.
- ‘Arrow at start’ and ‘Arrow at end’ allow you to add arrows to the start and end of the line.
- ‘Show distance’ adds a secondary, thinner, line below the original line that displays the distance covered by the line. This option is turned on by default.