# Adjust surface (used to adjust a design surface)
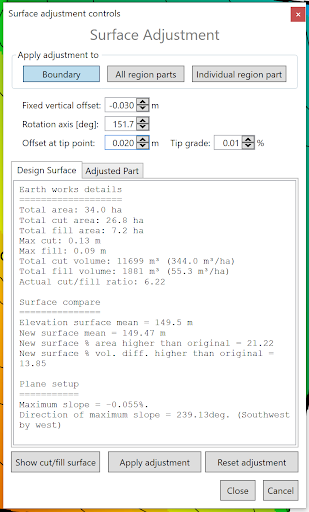‘Surface Adjustment’ allows you to make additional changes to the designs that were made in the layer creation.
- ‘Vertical offset’ which can be adjusted with up and down buttons at 0.01 increments or by typing in a set value to shift the design vertically up or down.
- ‘Rotation axis’ This can be adjusted by typing in a value, using the up and down buttons or by using the yellow dot that appears in the working area.
- ‘Offset at tip point’ works in conjunction with the ‘Rotation axis’ setting to make the changes along the set point.
- The bottom portion of the window displays information about the whole design surface and the adjusted part, including a comparison to the original elevation surface.
As you make changes, the cut/fill map will automatically adjust accordingly. Once you are done changing it, you need to accept or reject it by pressing either the ‘Apply adjustment’ or the ‘Reset adjustment’ button at the bottom.