# Importing and Exporting Files
# Importing and Creating Surfaces
There are many different file types which can be used to import or create surfaces in T3RRA Design Plus. This will generally need to be done to start a new project.
The file type that you will be working with will depend on how you acquired your data. That is, if you are a T3RRA Cutta user or a John Deere operator, you will have different types of data available for import.
NOTE: Import elevation data into an existing nearby project to ensure the same UTM Zone.
Regardless of file type, these can all be accessed as follows:
1. Select the ‘import’ icon on the left hand side of the menu bar

2. This will open the below pop-up window

3. Select the relevant file type (either directly from the list on the left hand side or by typing in the search bar).
# File types
Here is the list of available file types for import (instructions of how to use some files types are linked below):
- **CSV (.csv)** - the most generic import. Can bring in survey points, boundaries, guidance lines and markers. Expects the columns to be in the format of Longitude, Latitude, Elevation. An optional ‘Name’ column is used for the marker imports
- **DXF (.dxf)** - Drawing Interchange Format, or Drawing Exchange Format) is a CAD data file format developed by Autodesk for enabling data interoperability between AutoCAD and other programs.
- **Ezigrade (.ezigrade)** - imports an Ezigrade file
- **Field Level II (.gps)** - Imports a Field Level II .gps file. Supports bringing in survey data, boundary data, section lines and markers.
- **Field Level XML (.xml)** - Imports a Field Level II .xml file. Supports bringing in survey data, boundary data, section lines and markers.
- **Generic XYZ Files (.xyz)**
- **GeoTIFF (.tiff)**
- **JSONGrid (.jsongrid)**
- **KML/KMZ (.kml)**
- **Land XML (.xml)**
- **LAS/LAZ (.las)**
- **MyJohnDeere Field Operation** - Allows downloading shapefile data from John Deere Operations Centre
- **OptiSurface Design (.adg)**
- **Pct Earthworks Grid (.PctEarthworksGrid)**
- **PCTXYZ file (.pctxyz)**
- **RCD Folder** - Used by John Deere Displays to store field data, including guidance lines.
- **RCD Gen4 (ADAPT)**
- **Shapefile (.shp)**
- **Space Shuttle Radar Topography (SRTM) (.hgt)**
- **Surfer grid elevations (\*.grd)**
- **T3RRA Control File (.tci)**
- **T3RRA iDitch Project File (.idz)**
- **Trimble Multiplane (.txt)**
- **USGS DEM elevations (\*.dem)**
- **XYZOut import (.xyzout)**
**File Type: T3RRA Control File (.tci)**
If you are a T3RRA Cutta user, you can easily import a surface from T3RRA Cutta into T3RRA Design Plus
1. Select the ‘import’ icon on the left hand side of the menu bar.
2. Select T3RRA Control File (.tci) from the list on the left hand side. This will show all available \*.tci files on your device.
3. Select relevant .tci file
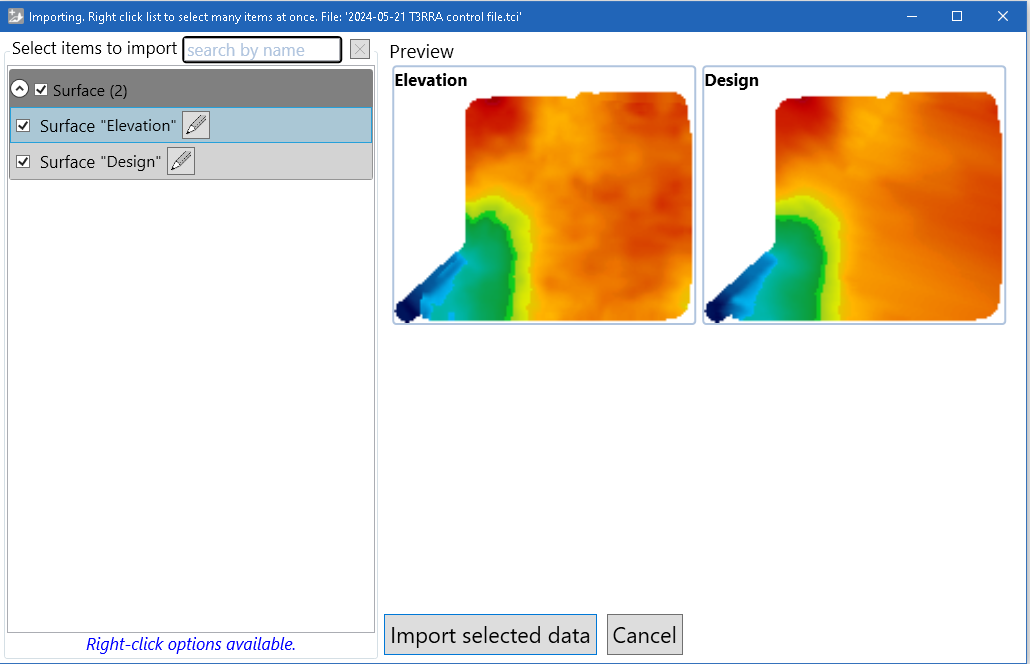
4. This will open up a pop up window, select relevant .tci file here and press OK
5. Once a file has been selected, press the open button and after a conversion process the elevation surface and identified design surfaces will appear in the working area and the layer selection area.
To import surveyed points from a .tci file and surface within T3RRA Design Plus, from the top Layers menu, choose Surfaces > Layer > Import > From raw data points (Deere RCD, CSV, etc) > T3RRA Software Survey Points (\*.tci) and follow the prompts.
# Importing Elevations if you are a John Deere Operator
T3RRA Design Plus can import elevation data from three separate John Deere sources. These are:
- John Deere RCD logs
These are from Gen3 and earlier John Deere displays (such as the 2630). You would normally download the data from your display using a thumb drive and then copy it to the computer running T3RRA Design Plus. Be sure to copy the entire folder structure, not simply individual files.
- John Deere RCD SWM Survey logs
Deere customers who have ‘Surface Water Pro’ may have data in this format. These logs are collected specifically in the tractor as elevation surveys.
- John Deere Gen4 (ADAPT) logs
These are from Gen4 John Deere displays (such as the 4640). You would normally download the data from your display using a thumb drive and then copy it to the computer running T3RRA Design Plus. Be sure to copy the entire folder structure, not simply individual files.
**Importing Elevations from John Deere RCD logs**
NOTE: You must have a folder named RCD on your computer for this to work
1. Select the RCD button on the left hand side of the menu bar

2. This will pop up a window, select relevant RCD file and press OK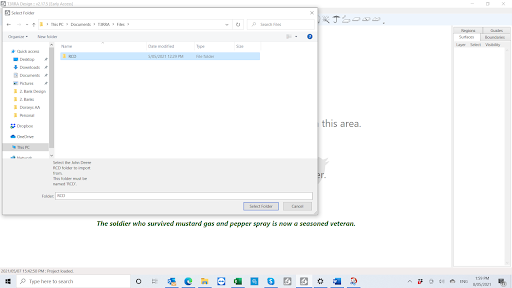
3. Once a file has been selected, press the open button and after a conversion process the elevation surface and identified design surfaces will appear in the working area and the layer selection area.
# Importing a Surface from an Existing Elevation Surface
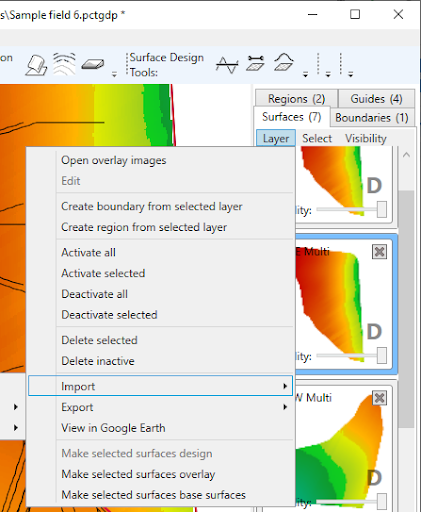
By working in the Surface Tab in the Layers Panel, select: Layer > Import > From existing elevation surface:
- PCT Image elevations (\*.pcti)
- USGS DEM elevations (\*.dem)
- Space Shuttle Radar Topography
- SRTM1 elevations (\*.hgt)
- SRTM3 elevations (\*hgt)
- SRTM30 elevations (\*.dem)
- Generic XYZ elevations (\*.xyz)
- DXF (\*.dxf)
- Gridded DXF elevation points (\*dxf)
- DXF 3d Faces (\*.dxf)
- DXF PolyFaceMesh (\*dxf)
- LandXML surface (\*.xml)
- JSONGrid elevations (\*jsongrid)
- Surfer grid elevations (\*.grd)
- Esri ASCII elevations (\*.asc)
- UK LIDAR (OSGB 1936 / British National Grid (\*.asc)
- Trimble Field Level II (\*.gps)
- Ezigrade surfaces (\*.ezigrade)
**Examples of Importing a Surface from an Existing Elevation Surface**
***File Type: DXF Surface***
DXF files are a standard format used by civil designers, with file names that end in “.dxf”. They can contain all manner of drawings and text in 2D and 3D. Because of this, they are not georeferenced and require you to know the georeference information. They can be exported from all civil CAD programs. We support importing surfaces from DXF, but also linework and markers.
NOTE: DWG is a file format related to DXF. If you encounter a DWG, we recommend you request your designer to re-export it as a DXF. It is possible to convert most DWG to DXF with free tools like “DWG DXF Converter” by AnyDWG Software (available in the Windows Store). However, the quality of the conversion is not guaranteed.
*To Import a DXF Surface:*
From the Surface Tab in the Layers Panel, select: Layer > Import > From existing elevation surface > DXF (\*.dxf)
Select the relevant option from the below list:
- DXF 3D Faces (\*.dxf)
- NOTE: If you are not sure, choose this, as it is the most common option.
- It is when you have triangulated points to create an elevation surface.
- Gridded DXF elevation points (\*.dxf)
- Is a grid of regularly spaced points with no triangles between them.
- DXF PolyFaceMesh (\*.dxf)
- This is an uncommon alternative mesh format, usually with a mesh composed of squares.
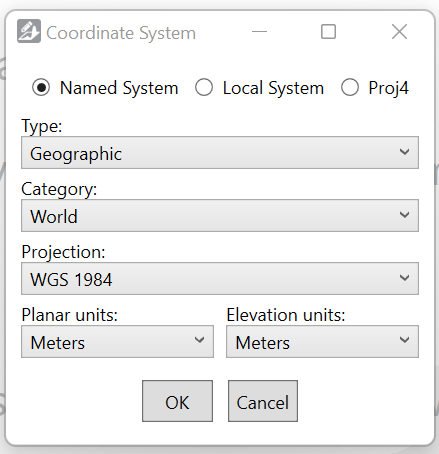
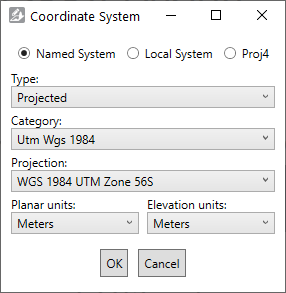This coordinate system selection window will then appear. Since projection information is not included in DXF files, you will need to select it now. This tells the importer how to correctly interpret the X, Y and Z coordinates as locations on the Earth.
Common selections include:
- WGS84 (longitudes and latitudes) is under:
? Named System
> Type: Geographic
> Category: World
> Projection: WGS 1984.
- UTM Zone projections are (see screen capture for an example):
? Named System
> Type: Projected
> Category: UTM Wgs 1984.
- Map Grid of Australia projections are under:
? Named System
> Type: Projected
> Category: National Grids Australia.
- State Planes are under:
? Named System
> Type: Projected
> Categories like State Plane Nad 1983 Feet.
NOTE: Be sure to select the correct planar and elevation units from the dropdown menus for your data too.
A local system is a custom coordinate system, and you will need the reference longitude and latitude, the location of the reference point locally, and the local system type (e.g. Orthographic).
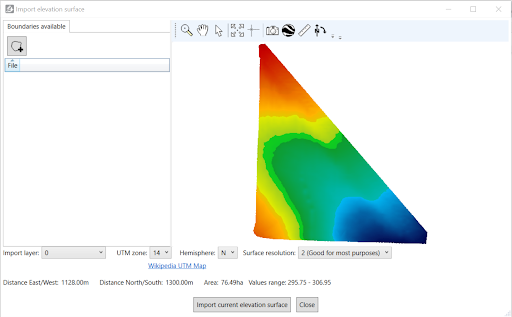
After selecting ‘OK’, the ‘Import elevation surface’ screen will pop up. Ensure you select the appropriate pixel size (in the lower right of the window) for the type of work you are doing, but remember that smaller pixel sizes produce larger files that take longer to process. If there are multiple layers in the file, you can select them with the drop-down in the lower left of the window.
At this point, it is recommended that you verify the projection was correct by opening it in Google Earth.
NOTE: You must have Google Earth Pro installed on your computer to do this.
To export it to Google Earth:
> Select the Google Earth icon in the toolbar.
> Enter a name and click OK
> Compare the elevation map’s location to the satellite imagery. If the projection is correct, it should line up pretty well with field boundaries and landmarks.
In the ‘Import elevation surface’ window there are several options:
- Import boundary - This allows you to import only a part of the field. You can draw a boundary polygon in Google Earth, export it as KML, then import it here. Note that a path (like a polyline) is not a valid boundary - it has to be a polygon.
- Import layer - Select which layers to import. Some files contain more than one surface layer.
- UTM zone and Hemisphere - For new projects, when your field crosses a UTM boundary or hemisphere, you can choose which UTM Zone it is imported into.
- Surface resolution - Read the descriptions for each pixel size to help you choose appropriately.
NOTE: The lower the surface resolution, the longer the import will take to complete.
***File Type: LandXML Surfaces (\*.xml)***
LandXML is a non-proprietary file format created in 2000 to facilitate the interchange and archival of elevation models and other related survey and civil engineering data.
*To Import a .XML Surface:*
> From the Surface Tab in the Layers Panel, select: Layer > Import > From existing elevation surface > LandXML Surfaces (\*.xml) > Select the relevant file
A ‘Coordinate System’ pop-up box will appear. (Is this information pre-populated based on the file or will changes need to be made?)
Once you select the relevant details in the pop-up window above, select ‘OK.
Here you will see a ‘Import elevation surface’ pop-up window. There will be instructions (shown in RED) to choose the hemisphere for this data. Once selected, you will also need to select the UTM zone as well.
***File Type: Trimble Field Level II (\*.gps)***
.gps files are used in Trimble FMX and TMX displays
*To Import a .GPS Surface:*
> From the Surface Tab in the Layers Panel, select: Layer > Import > From existing elevation surface > Trimble Field Level II (\*.gps) > Select the relevant file

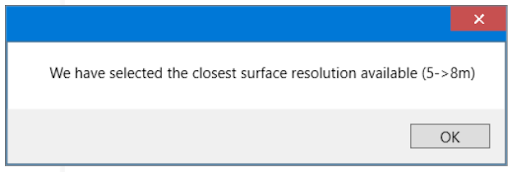
A box will appear stating which surface resolution has been selected based on the file you are importing.
At this point, it is recommended that you verify the projection was correct by opening it in Google Earth.
NOTE: You must have Google Earth Pro installed on your computer to do this.
To export it to Google Earth:
> Select the Google Earth icon in the toolbar
> Enter a name and click OK
> Compare the elevation map’s location to the satellite imagery. If the projection is correct, it should line up pretty well with field boundaries and landmarks.
In the ‘Import elevation surface’ window there are several options:
- Import boundary - This allows you to import only a part of the field. You can draw a boundary polygon in Google Earth, export it as KML, then import it here.
- Import layer - Select which layers to import. Some files contain more than one surface layer.
- UTM zone and Hemisphere - For new projects, when your field crosses a UTM boundary or hemisphere, you can choose which UTM Zone it is imported into.
- Surface resolution - This will be preselected (see above) during the import process.
NOTE: The lower the surface resolution, the longer the import will take to complete.
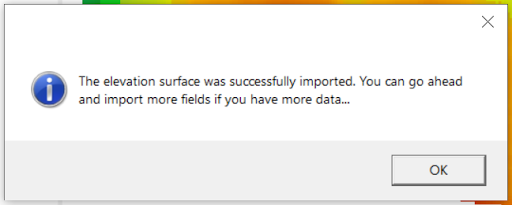Once you are happy with the above surface and selections, press ‘Import current elevation surface’. A pop up window will appear:
This then imports that surface into the working area of T3RRA Design Plus, while still keeping the ‘importer’ running. You can either close out of the Importer or import more surfaces if required. It will also import the linework and master benchmark (MB) into Guides. These can be included in a .gps export to ensure it has the same reference point.
# Importing a Surface from Raw Data Points
By working in the Surface Tab in the Layers Panel, select: Layer > Import > From raw data points (Deere RCD, CSV, etc.):
- T3RRA Software Survey Points (\*.tci)
- John Deere Gen4 (ADAPT) logs
- John Deere RCD logs
- John Deere RCD SWM survey logs
- Raw CSV Data Points (\*.csv) - can thin points to be more manageable
- Raw shapefile data points (\*.shp)
- Multiplane data points (\*.txt)
- FieldLevel XML survey points (\*.xml)
- APRS LASer file format (\*.las/z) - can thin points to be more manageable
***Examples of Importing a Surface from Raw Data Points***
***File Type: Multiplane data points (\*.txt)***
To Import:
> From the Surface Tab in the Layers Panel, select: Layer > Import > From raw data points (John Deere RCD, CSV, etc) > Select relevant Multiplane (\*.txt) file.
Once you have selected the relevant file to import, the following pop ups will appear:
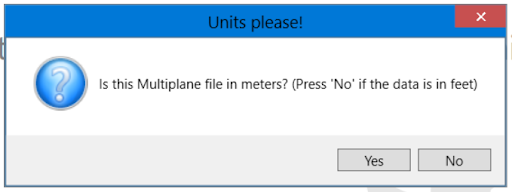
Select ‘YES’ if the Multiplane file is in meters or ‘NO’ if it is in feet.
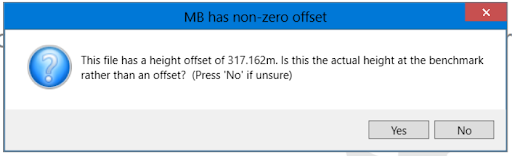
The next pop-up will be:
Sometimes the master benchmark has a separate offset, but it is actually the elevation there.
This is a somewhat unusual variation, so you’re advised to press ‘No’ if you’re not sure. If you will be exporting your design to a Multiplane file, a .gps file or a FieldLevel.xml file, the height mentioned here can be used for your Master Benchmark (MB) in those exports. In that case, import the MB from the same Multiplane file by going to the Guides Tab in the Layers Panel and selecting: Layer > Import > Import benchmarks from Multiplane file. The same pop ups will appear.
***Raw point data surface and Import***
Continuing on, a new import screen will appear, Raw point data surface and Import. Here there will be many of the same tools which can be found on the standard T3RRA Design Plus screen. These tools include:
- Navigation Tools
- The Pointer Tool
- The grab tool
- The magnifying glass
- The ruler
- Zoom to full extent
- Rotate
- The crosshairs
- The camera
- Google Earth
To find out more about the above tools go to Navigation Tools
- Selection Tools are always available in a drop-down list. To find out more about these tools, go to Selection Tools.
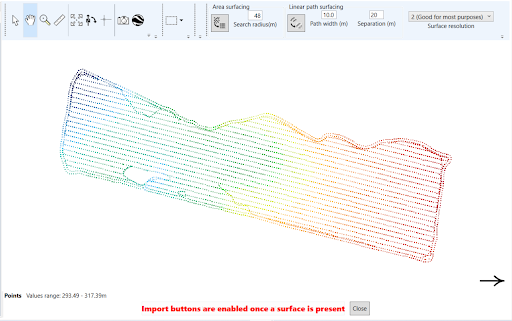
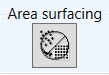
*Area surfacing*
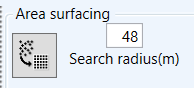The search radius (m) is pre populated based on the data set that has been imported. This figure can be changed to to achieve a different surface outcome.

To surface all points, click this icon
NOTE: Depending on the size of the surface, this can sometimes take some time to process.
NOTE: If your surface is not complete (i.e. there are areas of white), you will need to ‘remove surface’ by clicking the icon on the right and increasing the search radius.
*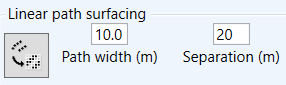*
*Linear Surfacing*
Linear path surfacing is for when you have a single string of survey points. Since it is a single line, this method does not triangulate between nearby points - it sets the elevation of each pixel to the closest survey point. Linear path surfacing is the same as surfacing drains in T3RRA Cutta.
*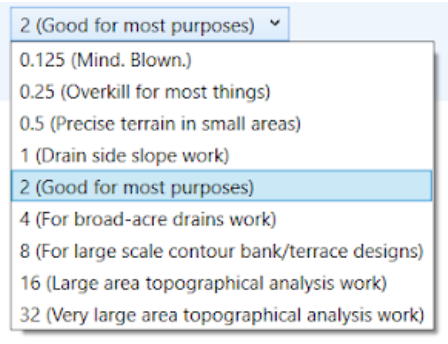Surface Resolution*
This setting allows you to select the pixel size for the surface that you are creating. Smaller pixels are good for precision drainage work, larger pixels are good for wide scale leveling.
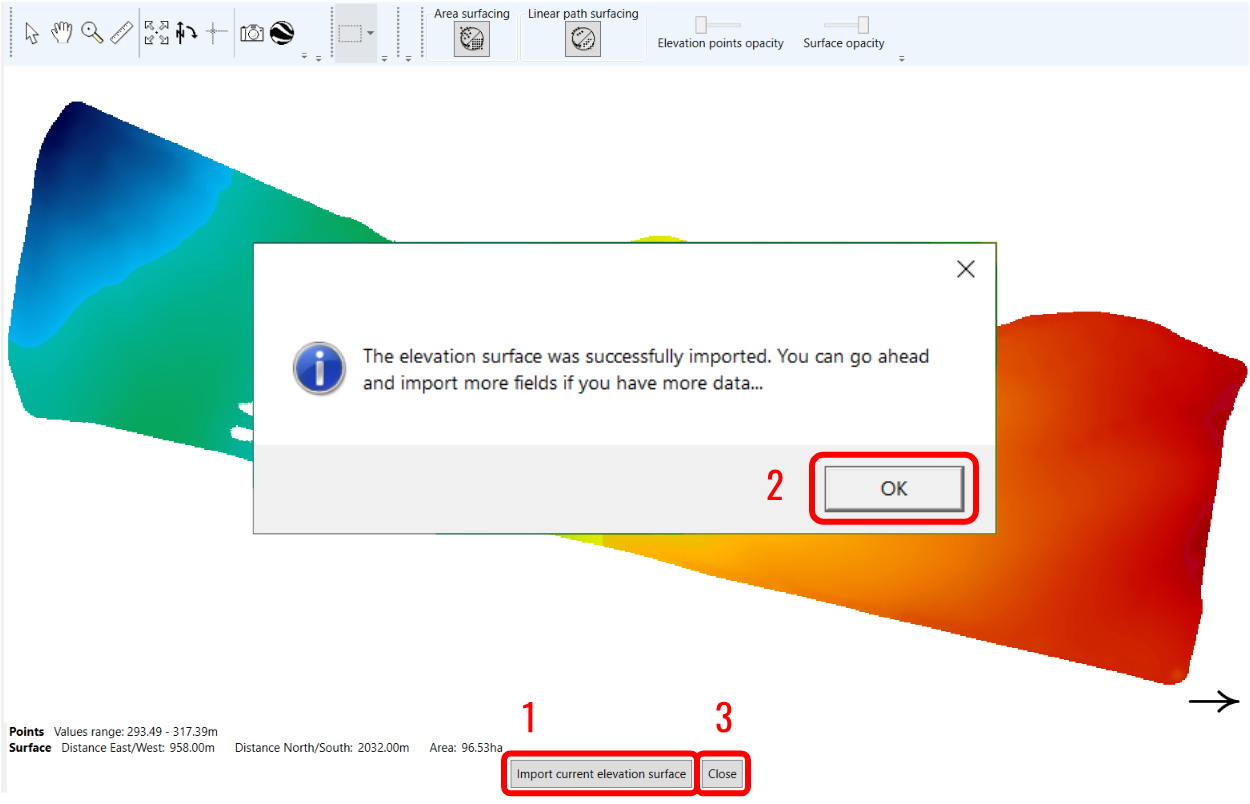
Once you’ve surfaced and are happy with the results, click the “Import current elevation surface” (1) button at the bottom of the window (see below). Click OK on the prompt that comes up (2), and then click “Close” (3) to get back to T3RRA Design Plus and work with your new surface.
***File Type: Raw CSV data points (\*.csv)***
To Import:
> From the Surface Tab in the Layers Panel, select: Layer > Import > From raw data points (John Deere RCD, CSV, etc) > Select Raw CSV data points (\*.csv) > Select the relevant file
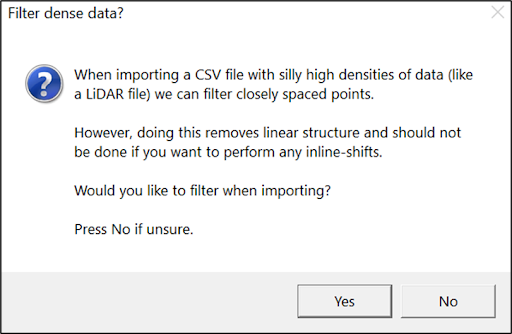Once the relevant file has been selected, this pop up will appear. If you choose yes, points that are very close together are filtered out. This can improve the performance of the next steps when there are many points in the file. If you choose no, all points are imported without any filtering. If you are unsure, press No.
After selecting either Yes or No, you will be taken to the following screen ‘Import delimited text data’ (partial screen grab shown here).
This screen is broken into four sections. These are explained in more detail below:
1. Import options
2. Coordinate system
3. Elevation column
4. Data set
*Import Delimited Text Data Screen Explained*
1. Import options:
**Field delimiter:** This should be pre-populated by scanning the selected file. It is the character that separates data fields. CSV means Comma Separated Values, so usually Comma will be selected.
**Decimal separator:** This should be pre-populated by scanning the selected file. It is the character that separates the whole number from the fractional part. It is usually Period, however, in other cultures, it is sometimes Comma. When Comma is selected, choose something else for the Field delimiter.
**\# Lines to ignore:** Some CSV files have extra lines/rows at the top that are not header or data. Increase this number to ignore them.
**Data file has header row:** This should be pre-populated by scanning the selected file. If selected, the names from the header row will be used to refer to the columns.
2. Coordinate system:The coordinate system controls the X and Y placement of your data. Update the fields here to match the data in the import file.
3. Elevation column:
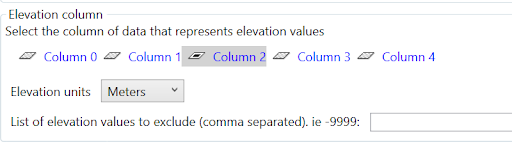Which column contains the elevation data? Click on the column and select the appropriate units. If there is a value that indicates that there is no elevation at a point, enter it into the last text box.
4. Data set:
Extract as an example only. This is a preview of the information in your file. Having this in view can help you choose the right options above.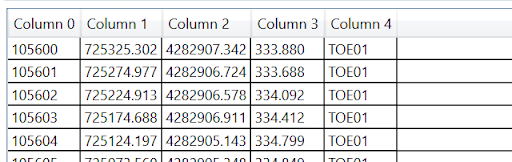
Once you are satisfied with your selections, select ‘OK’. You will then be taken to the Raw point data surface and Import, which is explained in detail here.
***File Type: Raw shapefile data points (\*.shp)***
To Import:
> From the Surface Tab in the Layers Panel, select: Layer > Import > From raw data points (John Deere RCD, CSV, etc) > Select Raw shapefile data points (\*.shp).
NOTE: Shapefiles have three required sub-files to import successfully. There needs to be, as a minimum, the following raw elevation points to import:
- .shp - shape format; the feature geometry itself {content-type: x-gis/x-shapefile}
- .shx - shape index format; a positional index of the feature geometry to allow seeking forwards and backwards quickly {context-type: x-gis/x-shapefile}
- .dbf - attribute format; columnar attributes for each shape, in dBase IV format {content-type: application/octet-stream OR text/plan}
Once you have selected the relevant file to import, the process will continue as for importing raw CSV data, found here.
# Importing Annotations to T3RRA Design Plus
Depending on your available data, there are many annotations which can be imported into your project. These could further help with the accuracy and detail of the design.
***Importing Multiplane Boundaries***
A simple way to import Multiplane Boundaries:
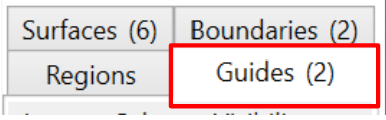
Select ‘Guides’ from the tabs on the right hand side of the screen.
> Select Layer > Import > Import Multiplane boundary
Select the required Multiplane.txt file
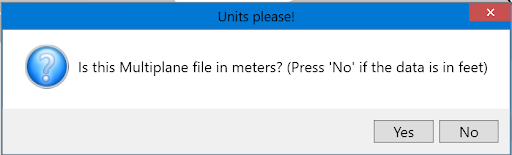
The following ‘Units please!’ window will appear. If the file is in meters, select Yes. If in feet, select No.
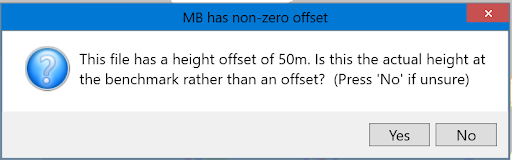
Continuing on, a ‘MB has non-zero offset’ window will open. Sometimes, a Multiplane.txt file will contain a file elevation offset in the master benchmark. If this is the case, click Yes. Most of the time, click No. If the elevations are not what you expect, then simply re-import and click the other option.
There will now be a new tile in the Guides Tab and the boundary will be present on the project. This can be edited by selecting , in the top menu bar.
# Exporting Files from T3RRA Design Plus
There is a lot of flexibility when exporting from T3RRA Design Plus. This includes control files and overlays. Export individual layers or several into a folder. To get started, load a project and click the export button. Alternatively, choose File > Export Data.
Exporting a control file is how you get your design into a tractor or bulldozer with T3RRA Cutta (.tci), or produce a Trimble FMX/TMX compatible file (.gps). You can either create a control file with an individual layer or by combining many layers, such as surfaces, guides, regions and boundaries, etc.
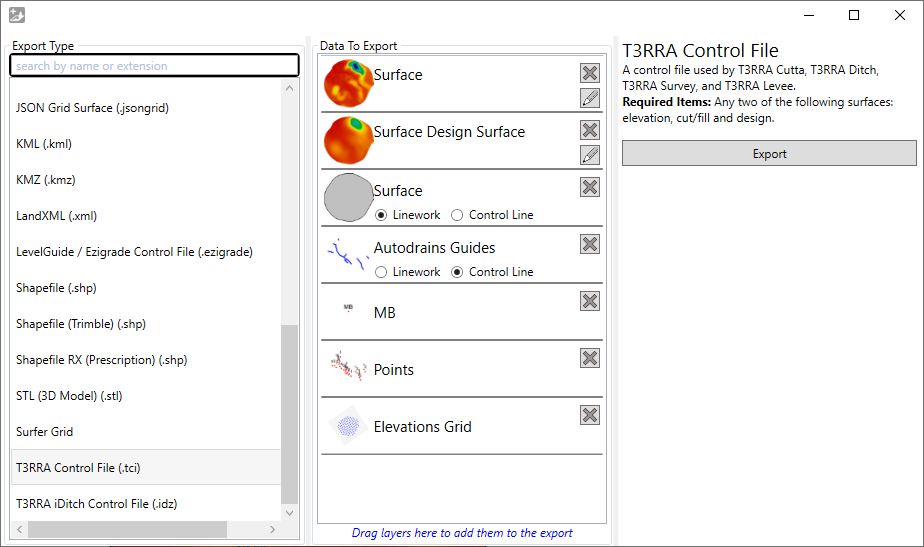
Once the export window is opened, you will be able to select the export type from the left menu. The options include:
- [T3RRA Cutta](https://t3rra-help.freshdesk.com/a/solutions/articles/51000379213) (\*.tci, our preferred control file format. Works well with T3RRA Cutta, funnily enough)
- [Field Level II for FMX/TMX](https://t3rra-help.freshdesk.com/a/solutions/articles/51000379217) (\*.gps)
- Shapefile (\*.shp)
- Comma Separated Values (\*.csv)
- Ezigrade (\*.ezigrade)
- [DXF 3D Faces](https://t3rra-help.freshdesk.com/a/solutions/articles/51000379215) (\*.dxf, a great format for most CAD packages like AutoCAD, QGIS, Magnet and BricsCAD)
- Land XML (\*.xml, a great format for interoperability)
After the export file type has been selected, you can remove and add layers to the central column of the export window. To remove layers, click the X button on the right of an item. To add layers, drag them in from the layers panel on the right of the main window.
See also [exporting a T3RRA Cutta file](https://t3rra-help.freshdesk.com/a/solutions/articles/51000379213), [exporting a DXF file](https://t3rra-help.freshdesk.com/a/solutions/articles/51000379215), and exporting a [Field Level II FMX/TMX file](https://t3rra-help.freshdesk.com/a/solutions/articles/51000379217).
# Exporting Files - Control File
It is also possible to export a Control File from T3RRA Design Plus. This is how you get your design into a tractor or bulldozer with T3RRA Cutta (.tci), or produce a Trimble FMX/TMX compatible file (.gps). You can either create a control file with an individual layer or by combining many layers, such as surfaces, guides, regions and boundaries, etc.
To export a control file, simply select the below icon on the menu bar at the top:


Once selected, a box will pop up. You will then be able to select from a drop down menu, which file type you are wanting to export. The options are:
- T3RRA Cutta (\*.tci)
- Field Level II for FMX/TMX (\*.gps)
- SBG SmartProfiler Shapes (\*.shp)
- Comma Separated Values (\*.csv)
- Ezigrade (\*.ezigrade)
- DXF 3D Faces (\*.dxf)
- Field Level XML (\*.xml)
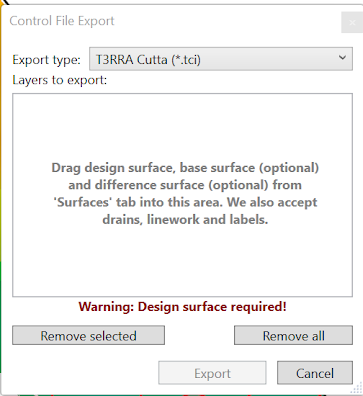
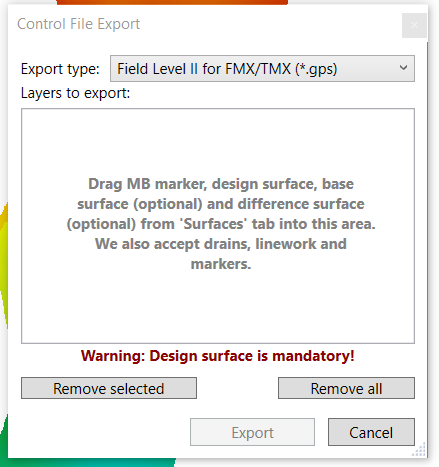
After the export file type has been selected, you need to drag layers from the ‘Layer Type Selection Panel’.
From the Surface Tab, these will (could) include:
- Design surface
- Base surface (optional)
- Difference surface (optional)
You can also drag in several other layers, like from the Guides Tab, including Drains, Linework, and Labels (e.g. a Master Bench). To remove layers, select them and click ‘Remove Selected’. You can also remove all layers as well.
NOTE: The ‘Export’ button will remain inactive until you have included the minimum layers needed for that export file type
***Exporting a T3RRA Cutta (\*.tci) Control File***
This is our preferred control file format. It works very well with T3RRA Cutta, funnily enough.
1. Open the Control File Export window as described above.
2. Select T3RRA Cutta (\*.tci) from the Export type drop down list.
3. Drag and drop required design surface layer.
4. Drag in any drains, linework and markers. When you drag in drains and linework, you can choose whether T3RRA Cutta treats them as just linework or as drains. Treating them as drains will enable profile views for them in T3RRA Cutta.
5. Select Export.
***Exporting a DXF Control File***
The DXF file type is a common interchange format used by civil designers.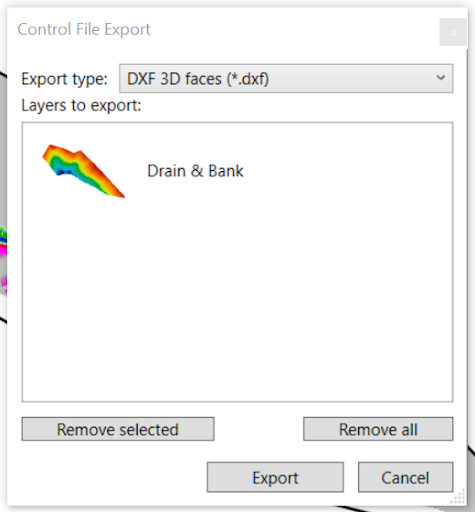 We support exporting a DXF file of a surface. It may be exported as 3D faces or a grid of points. A 3D faces file contains a collection of triangles that define the surface. To export this type of file:
1. Open the Control File Export window as described above.
2. Select DXF 3D faces (\*.dxf) from the Export type drop down list.
3. Drag and drop required design surface layer.
4. Select Export.
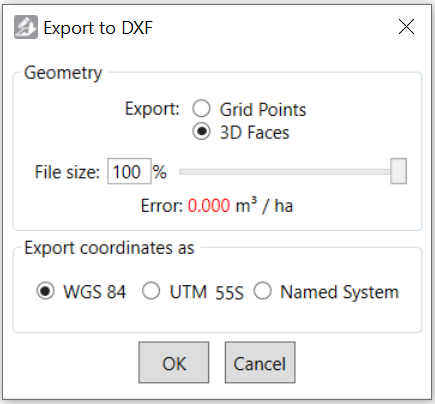
5. Then a few more options will appear. Choose your export type, file size, and coordinate system. A lower file size is achieved by intelligently simplifying the triangles that are output.
6. Ensure you record which coordinate system and give this information to whoever will be using the DXF file.
7. When you have specified each option, click OK.
***Exporting a Field Level II for FMX/TMX (\*gps) display***
The .gps file is used in Trimble displays. We support exporting files for these systems with a design surface, a base surface, linework, and markers. To export this type of file:
1. Open the Control File Export window as described above.
2. Select Field Level II for FMX/TMX (\*.gps) from the Export type drop down list
3. Drop and drag the design surface, the cut/fill or elevation surface, and other layers. Ensure you include a marker with the name MB that has your master benchmark elevation set.
4. When you have finished selecting layers, click OK.
NOTE: The older FMX displays require files to be exactly 1010 KB, so you may be prompted to resize the surface.
# Exporting a PDF
It is possible to download your design file as a PDF, either to share or to print.
This is done by secting:
File > Print.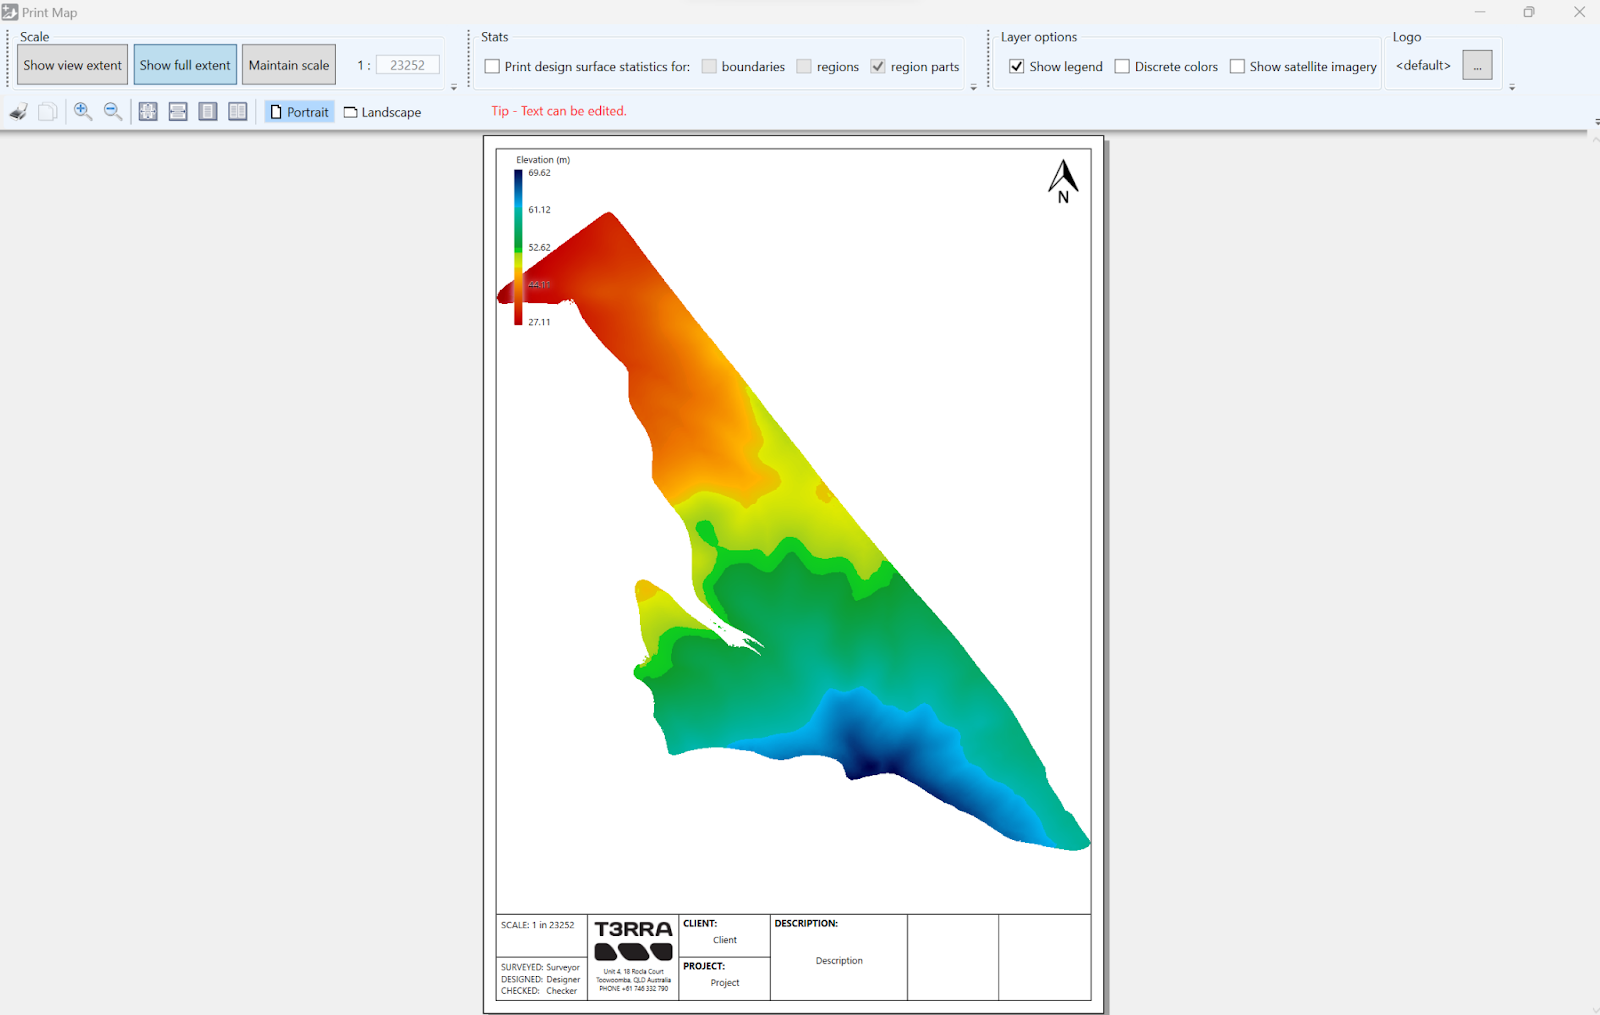
This will bring up this pop up screen.
- Scale: There will be options to edit the scale of the image.
- Stats - allows you to edit the text in the lower boxes of the page
- Layer Options:
- Show legend
- Discrete colors
- Show satellite imagery - you must first have the satellite imagery selected (found in the Edit Menu) for this option to be available.
- Logo - upload your own logo onto the PDF document
# Exporting a T3RRA Cutta (*.tci) control file
This is our preferred control file format. It works very well with T3RRA Cutta, funnily enough.
1. Open the Export window as described [here](https://t3rra-help.freshdesk.com/a/solutions/articles/51000362054).
2. Select T3RRA Cutta (\*.tci) from the Export Type list.
3. Remove any excess surfaces from the list in the center.
4. For the drains and linework, choose whether T3RRA Cutta treats them as just linework or control lines (i.e. drains). Treating them as drains will enable profile views for them in T3RRA Cutta.
5. Click the \[Export\] button and choose a location and file name.
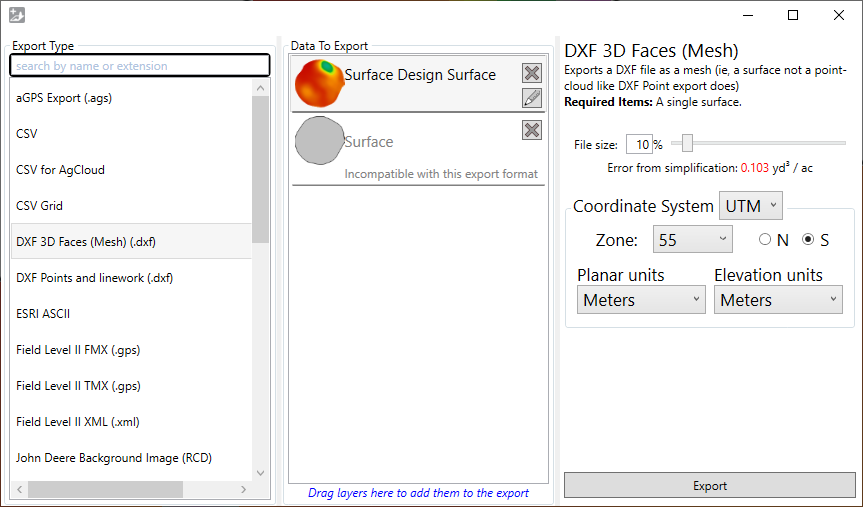
# Exporting a DXF file
The DXF file type is a common interchange format used by civil designers. We support exporting a DXF file of a surface. It may be exported as 3D faces. A 3D faces file contains a collection of triangles that define the surface. To export this type of file:
1. Open the Export window as described [here](https://t3rra-help.freshdesk.com/a/solutions/articles/51000362054).
2. Select DXF 3D faces (Mesh) (\*.dxf) from the Export Type list.
3. Remove all but the desired design surface.
4. On the right, choose your file size and coordinate system. A lower file size is achieved by intelligently simplifying the triangles that are output.
5. Ensure you record the chosen coordinate system (ideally in the file name you choose in the next step) and give this information to whoever will be using the DXF file.
6. Click Export and choose a folder and file name.
# Exporting a Field Level II for FMX/TMX (*gps) display
The .gps file is used in Trimble displays. We support exporting files for these systems with a design surface, a base surface, linework, and markers. To export this type of file:
1. Open the Export window as described [here](https://t3rra-help.freshdesk.com/a/solutions/articles/51000362054).
2. Select Field Level II FMX or TMX (\*.gps) from the Export list.
3. Remove any excess surfaces and other layers. Ensure you include a marker with the name MB that has your master benchmark elevation set.
4. When you have finished adding/removing layers, click OK.
NOTE: The older FMX displays require files to be exactly 1010 KB, so you may be prompted to resize the surface.
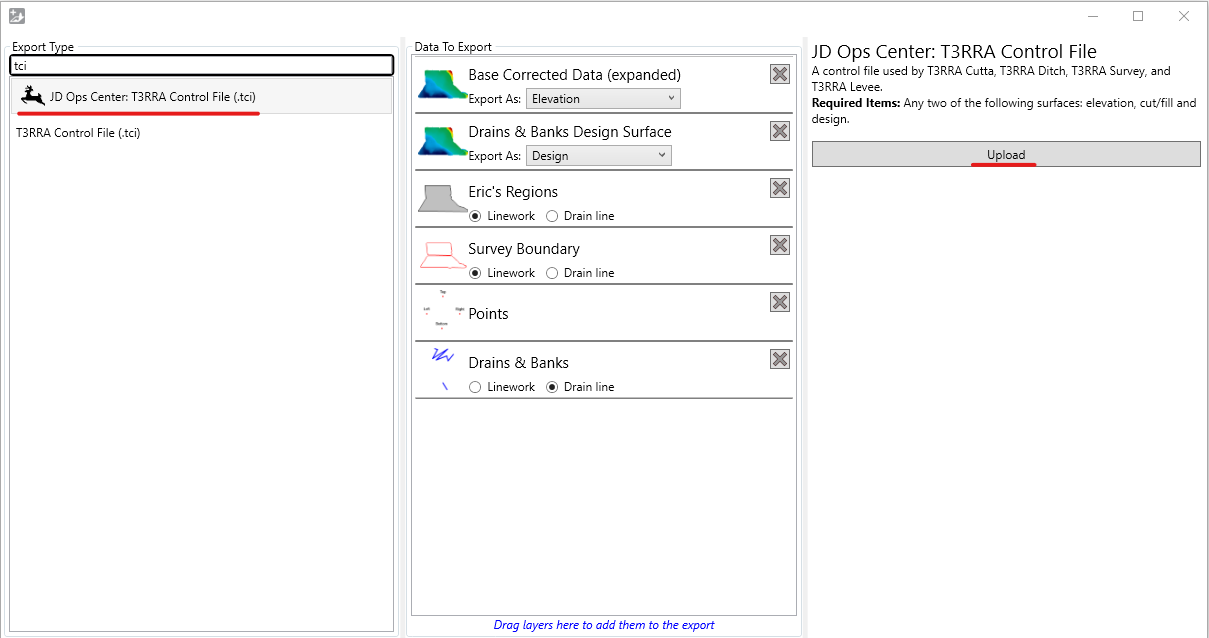
# Exporting T3RRA Control File to JD Ops Center
1. Open the Export window.
2. Choose "JD Ops Center: T3RRA Control File(.tci)", choose data to export and select Upload. If this is the first time you have attempted to transfer files to JD Ops Center, you will be prompted to sign in to your MyJohnDeere account.
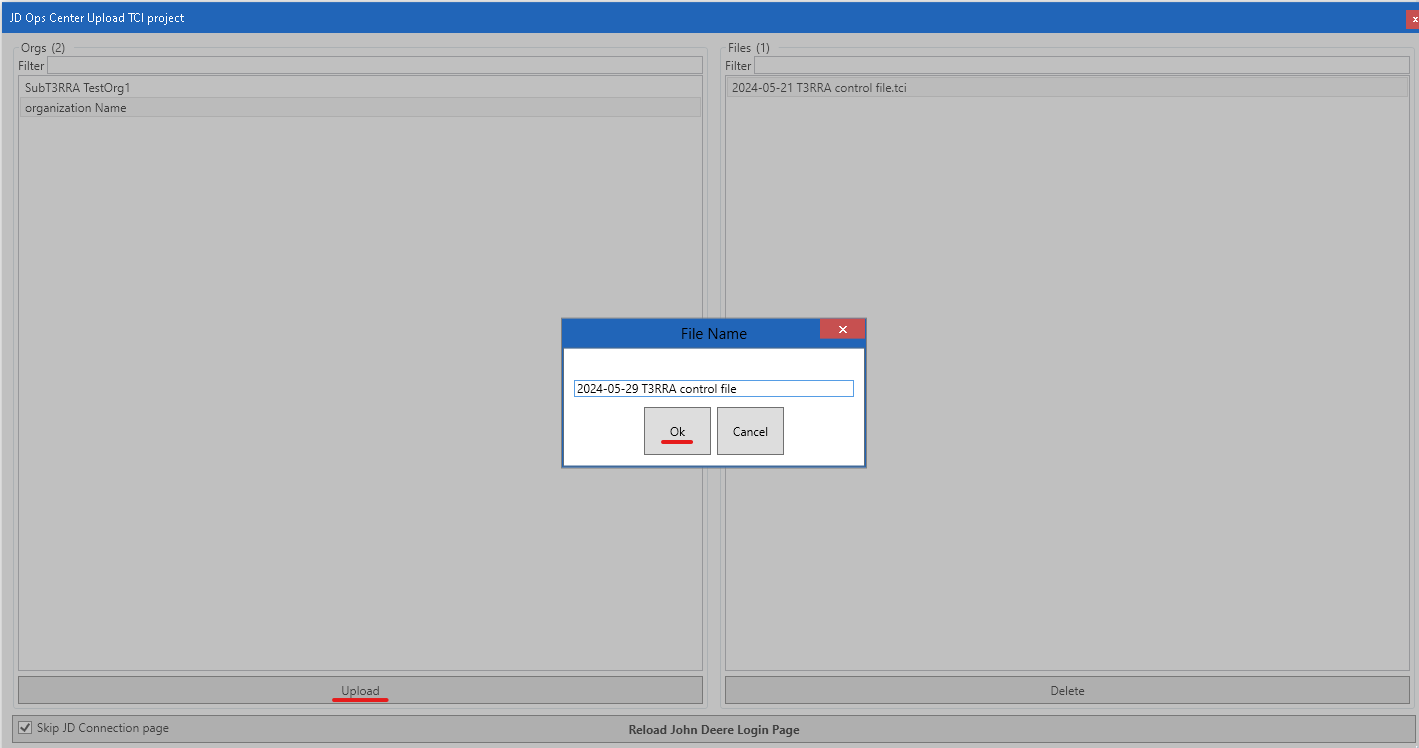
3. When prompted, choose your Ops Center organization and hit Upload. Edit the file name if desired.
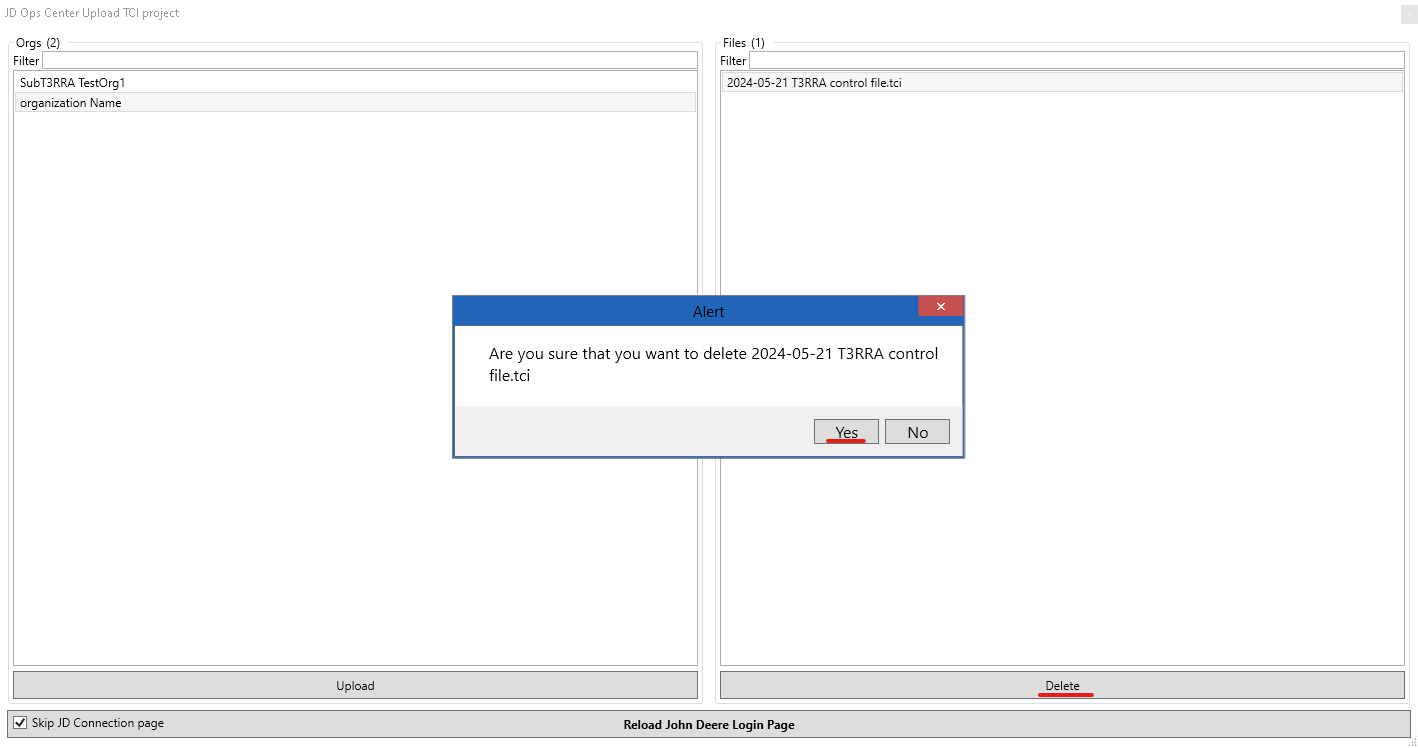
4. If you want to remove uploaded T3RRA Control File. Select uploaded file in the list and click "Delete" button.
5. You can import uploaded TCI file from import window.
# Importing T3RRA Control File from JD Ops Center
1. Open the Import window and select T3RRA Control File(tci).
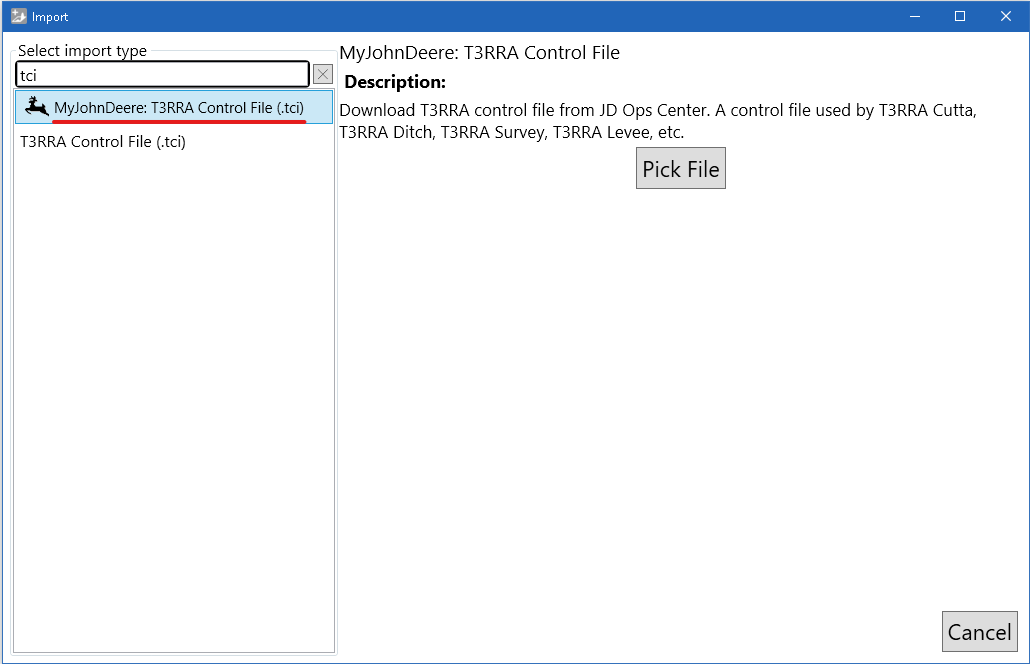
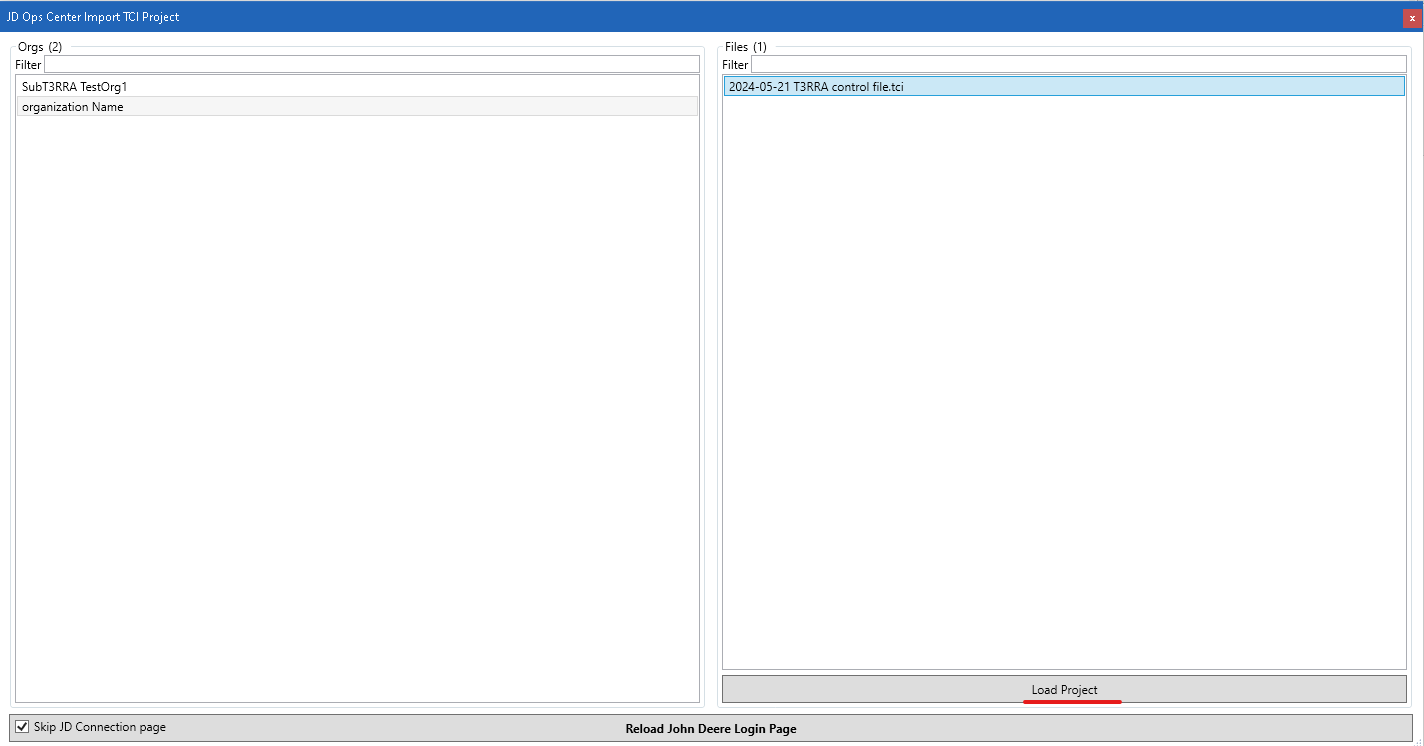
2. Clicking 'Pick File' button will open JD Ops Center browser to show projects in JD Ops Center.
3. Select file you want to import and hit "Load Porject" button.
4. Once the selected file downloaded, the second import page should appear and show the data in the T3RRA Control File. Choose data you want to import and click "Import selected data" button.