# Common tools found in the Wizard

# Zoom Control
### <span style="border:none;display:inline-block;overflow:hidden;width:162px;height:212px;">![](https://docs.t3rra.com/uploads/images/gallery/2025-03/scaled-1680-/BR77zxkee-j3st-pfveswnkzzkdtguliyvasg-jpeg.jpeg)</span>

<span style="font-size: 14pt; font-family: Arial, Helvetica, sans-serif; color: rgb(0, 0, 0); font-weight: 300;">There are multiple methods available for zooming your map.</span>

<span style="font-family: Arial,Helvetica,sans-serif;">  
</span>

<span style="font-family: Arial,Helvetica,sans-serif;"><span dir="ltr" style="font-size: 14pt; color: rgb(0, 0, 0); font-weight: 300;">The first method that can be used is the 2-finger pinch controls (if using on a tablet). By pinching your fingers together on the screen you can zoom out and by moving your fingers apart you can zoom in. You can also use the scroll button on your mouse. </span></span>

<span style="font-family: Arial,Helvetica,sans-serif;">  
</span>

<span style="font-family: Arial,Helvetica,sans-serif;"><span style="font-size: 14pt; color: rgb(0, 0, 0); font-weight: 300;">The alternate method is the use of zoom in and zoom out buttons that can be added to the bar along the top right.</span></span>

<span style="font-family: Arial,Helvetica,sans-serif;">  
</span>

<span style="font-family: Arial,Helvetica,sans-serif;"><span style="border:none;display:inline-block;overflow:hidden;width:196px;height:116px;">![](https://docs.t3rra.com/uploads/images/gallery/2025-03/scaled-1680-/2arocqpbcs5b-tt-n9euozyv6mi8o1ovkc22a-png.png)</span></span>

<span style="font-family: Arial,Helvetica,sans-serif;">  
</span>

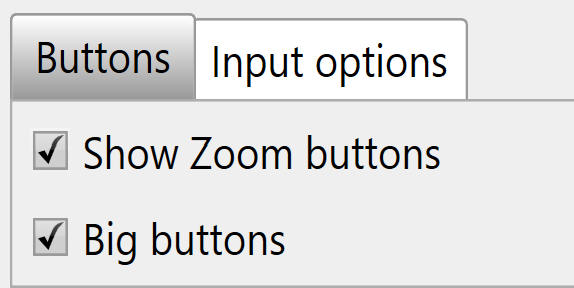
<span style="font-family: Arial,Helvetica,sans-serif;"><span style="font-size: 14pt; color: rgb(0, 0, 0); font-weight: 300;">The zoom buttons are not shown by default. To enable these buttons check the '</span><span style="font-size: 14pt; color: rgb(0, 0, 0); font-weight: 400;">Show zoom buttons</span><span style="font-size: 14pt; color: rgb(0, 0, 0); font-weight: 300;">' box under ‘</span><span style="font-size: 14pt; color: rgb(0, 0, 0); font-weight: 400;">Settings &gt; Application</span><span dir="ltr" style="font-size: 14pt; color: rgb(0, 0, 0); font-weight: 300;">’.</span></span>

<span style="font-family: Arial,Helvetica,sans-serif;">  
</span>

<span style="font-family: Arial,Helvetica,sans-serif;"><span style="border:none;display:inline-block;overflow:hidden;width:220px;height:107px;">![](https://docs.t3rra.com/uploads/images/gallery/2025-03/scaled-1680-/u8E6bi2-af3glfxvk13-w-hxywhmz-xs4syyg-png.png)</span></span>

<span style="font-family: Arial,Helvetica,sans-serif;">  
</span>

<span style="font-family: Arial,Helvetica,sans-serif;">  
</span>

<span style="font-family: Arial,Helvetica,sans-serif;">  
</span>

<span style="font-family: Arial,Helvetica,sans-serif;">  
</span>

<span style="font-family: Arial,Helvetica,sans-serif;">  
</span>

<span style="font-family: Arial,Helvetica,sans-serif;"><span style="border:none;display:inline-block;overflow:hidden;width:97px;height:116px;">![](https://docs.t3rra.com/uploads/images/gallery/2025-03/scaled-1680-/cZ8bot4odgm5xx2nt8fxtlqgtj-zkmr0wrlda-png.png)</span></span>

<span style="font-family: Arial,Helvetica,sans-serif;"><span style="font-size: 14pt; color: rgb(0, 0, 0); font-weight: 300;">Independent of these zoom controls is the '</span><span style="font-size: 14pt; color: rgb(0, 0, 0); font-weight: 400;">Zoom to full</span><span style="font-size: 14pt; color: rgb(0, 0, 0); font-weight: 300;">' button, this button does NOT need to be enabled. When pressed the button zooms the map in or out to the maximum size that shows the entire surface grid of the map.</span></span>

<span style="font-family: Arial,Helvetica,sans-serif;">  
</span>

<span style="font-family: Arial,Helvetica,sans-serif;">  
</span>

# Image Overlays

### <span style="border:none;display:inline-block;overflow:hidden;width:97px;height:97px;">![](https://docs.t3rra.com/uploads/images/gallery/2025-03/scaled-1680-/O8Hld8qngepjbh392gqqppxempi0hm4tgyrg-png.png)</span>

<span style="font-size: 14pt; font-family: Arial, Helvetica, sans-serif; color: rgb(0, 0, 0); font-weight: 300;">‘Image overlays’ allows geo-referenced image data to be imported into a field.</span>

<span style="font-family: Arial,Helvetica,sans-serif;"><span dir="ltr" style="font-size: 14pt; color: rgb(0, 0, 0); font-weight: 300;">The image overlay is accessed by pressing the View button at the top of the screen (Shown right).</span></span>

<span style="font-family: Arial,Helvetica,sans-serif;"><span style="border:1pt solid #000000;display:inline-block;overflow:hidden;width:297px;height:488px;">![](https://docs.t3rra.com/uploads/images/gallery/2025-03/scaled-1680-/5pnhhovxviea9wdmmtmcxv2yyq4wdxrrrsnrw-png.png)</span></span>

<span style="font-family: Arial,Helvetica,sans-serif;">  
</span>

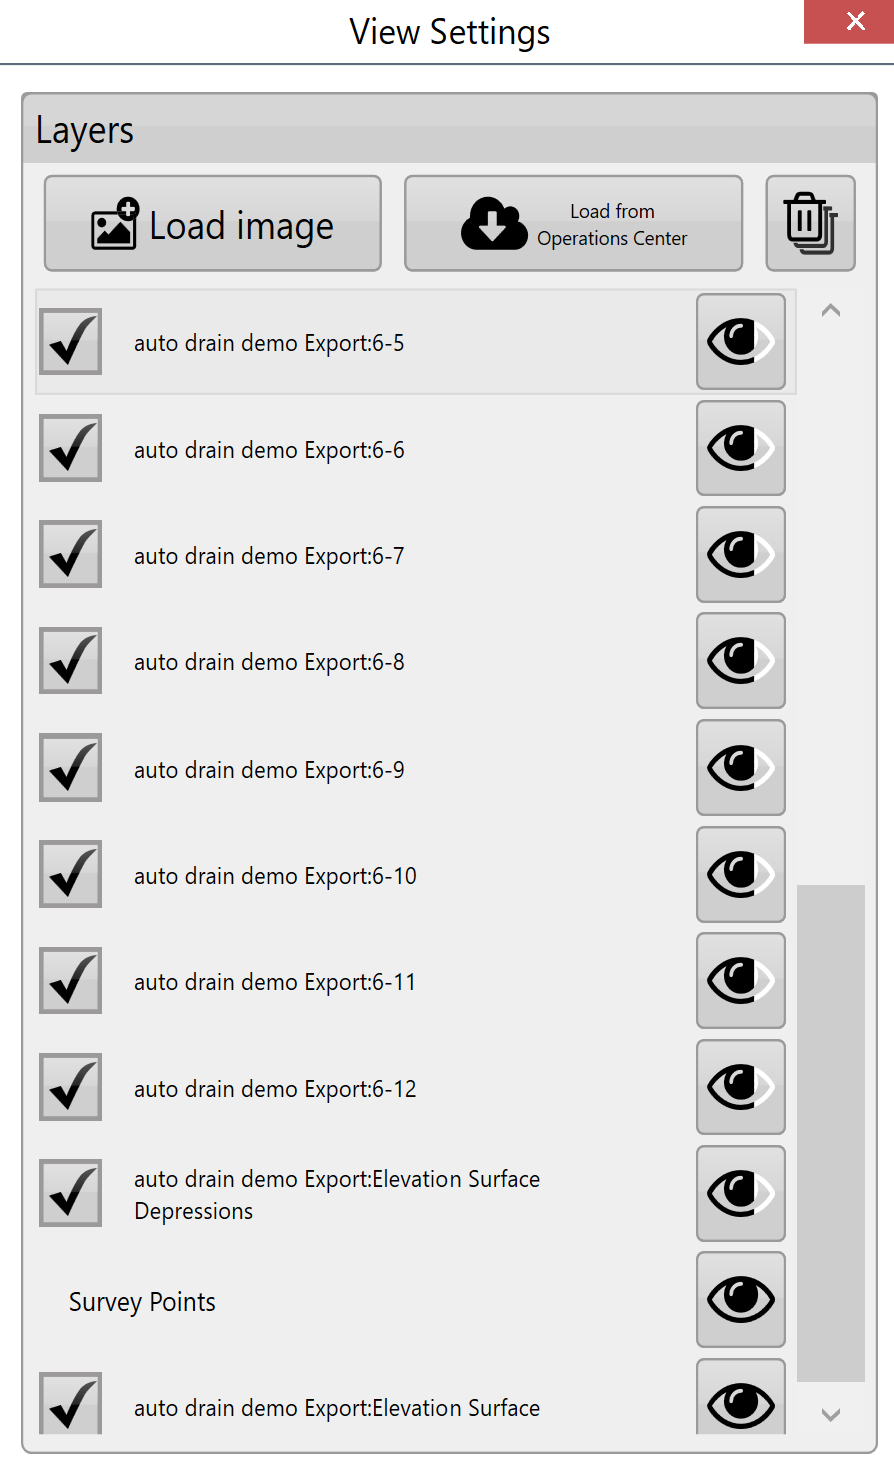
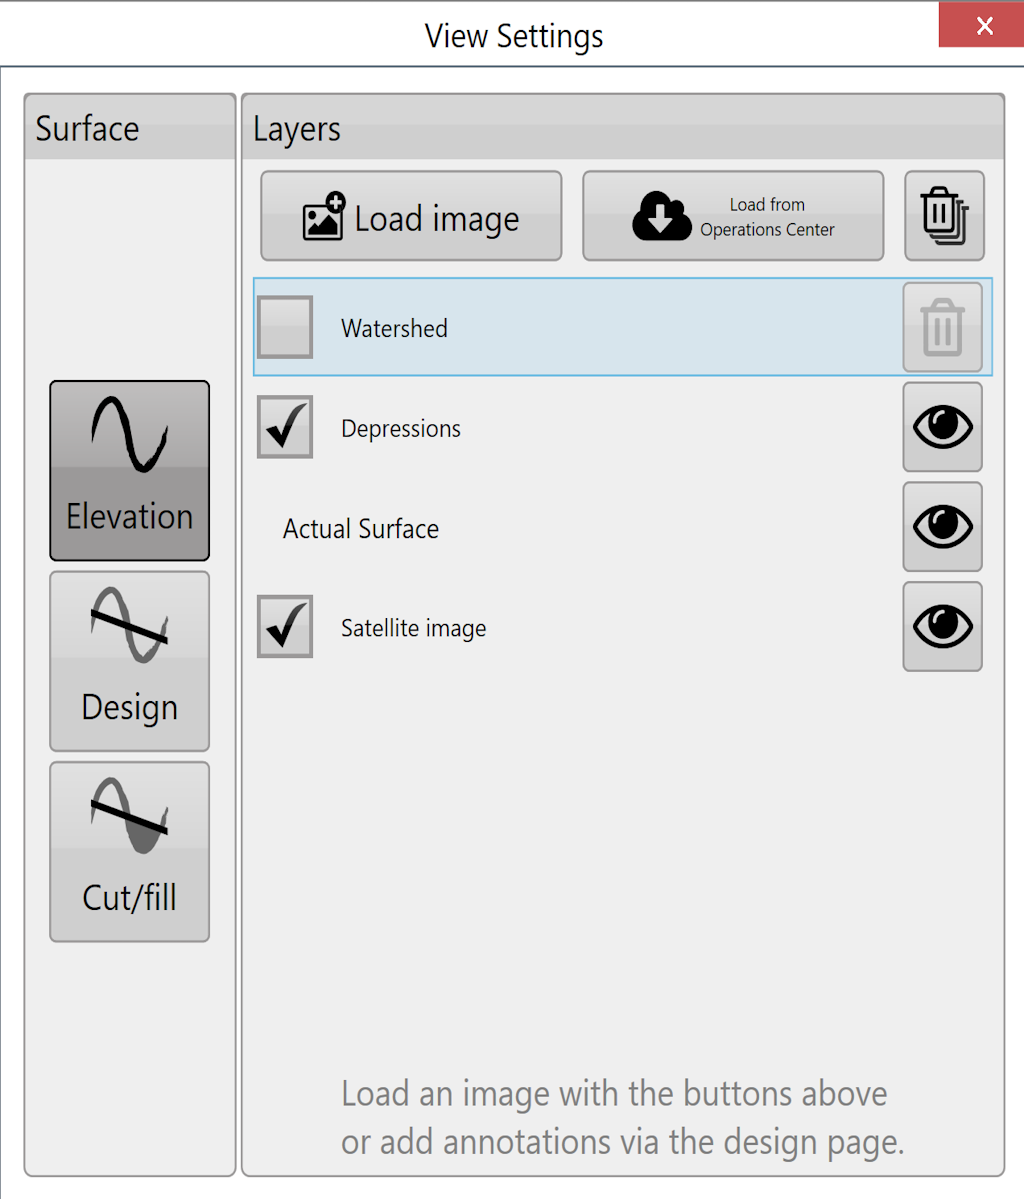
<span style="font-family: Arial,Helvetica,sans-serif;"><span dir="ltr" style="font-size: 14pt; color: rgb(0, 0, 0);">Load image - </span></span><span style="font-family: Arial,Helvetica,sans-serif;"><span dir="ltr" style="font-size: 14pt; color: rgb(0, 0, 0); font-weight: 300;">This is the primary method for adding overlay images to the field. When the button is pressed a file window will open to select the desired file. The file types that are currently supported as overlay images are </span><span style="font-size: 14pt; color: rgb(0, 0, 0); font-weight: 400;">.KML</span><span style="font-size: 14pt; color: rgb(0, 0, 0); font-weight: 300;"> and </span><span style="font-size: 14pt; color: rgb(0, 0, 0); font-weight: 400;">.TIFF</span><span style="font-size: 14pt; color: rgb(0, 0, 0); font-weight: 300;">.</span></span>

<span style="font-family: Arial,Helvetica,sans-serif;">  
</span>

<span style="font-family: Arial,Helvetica,sans-serif;"><span dir="ltr" style="font-size: 14pt; color: rgb(0, 0, 0);">Load image from JDOC - </span></span><span style="font-family: Arial,Helvetica,sans-serif;"><span dir="ltr" style="font-size: 14pt; color: rgb(0, 0, 0); font-weight: 300;">Images from the John Deere Operations Center can be downloaded into the image overlay. This is useful for comparing previous data (such as yields) with current survey data. </span></span>

<span style="font-family: Arial,Helvetica,sans-serif;">  
</span>

<span style="font-family: Arial,Helvetica,sans-serif;"><span dir="ltr" style="font-size: 14pt; color: rgb(0, 0, 0);">Delete images - </span></span><span style="font-family: Arial,Helvetica,sans-serif;"><span dir="ltr" style="font-size: 14pt; color: rgb(0, 0, 0); font-weight: 300;">Overlay images can be deleted by unchecking the box next to them and pressing the ‘delete images’ button. This will delete the layer from the available list.</span></span>

<span style="font-family: Arial,Helvetica,sans-serif;">  
</span>

<span style="font-family: Arial,Helvetica,sans-serif;"><span dir="ltr" style="font-size: 14pt; color: rgb(0, 0, 0);">Transparency - </span></span><span style="font-family: Arial,Helvetica,sans-serif;"><span dir="ltr" style="font-size: 14pt; color: rgb(0, 0, 0); font-weight: 300;">Overlay images can be set to be transparent so that layers below them can be seen. Check the box to the left of the layer and then press the transparency button on the right side.</span></span>

<span style="font-family: Arial,Helvetica,sans-serif;">  
</span>

<span style="font-family: Arial,Helvetica,sans-serif;"><span dir="ltr" style="font-size: 14pt; color: rgb(0, 0, 0);">Layers - </span></span><span dir="ltr" style="font-size: 14pt; font-family: Arial, Helvetica, sans-serif; color: rgb(0, 0, 0); font-weight: 300;">Pressing on any of the layers will cause it to be displayed over the others. Drag layers to adjust where they ‘sit’ on the image.</span>

# Choose Mode - 2D or 3D

#### <span style="font-size: 21pt; font-family: Arial, Helvetica, sans-serif; color: rgb(0, 0, 0); font-weight: 400;">Mode</span>

<span style="font-family: Arial,Helvetica,sans-serif;"><span style="font-size: 14pt; color: rgb(0, 0, 0); font-weight: 400;">2D View</span><span dir="ltr" style="font-size: 14pt; color: rgb(0, 0, 0); font-weight: 300;"> - By default the map will be displayed in a 2D aerial view.</span></span>

<span style="font-family: Arial,Helvetica,sans-serif;"><span dir="ltr" style="font-size: 14pt; color: rgb(0, 0, 0); font-weight: 300;">![](https://docs.t3rra.com/uploads/images/gallery/2025-03/scaled-1680-/8929-8wzuoonstve0nr-i-eh-wtvojz1eon0w-png.png)</span></span>

<span style="font-family: Arial,Helvetica,sans-serif;">  
</span>

<span style="font-family: Arial,Helvetica,sans-serif;"><span style="font-size: 14pt; color: rgb(0, 0, 0); font-weight: 400;">3D View</span><span style="font-size: 14pt; color: rgb(0, 0, 0); font-weight: 300;"> - When switching to 3D view the map will show all the terrain as small hills and valleys. In this viewing mode if you press the vertical scale magnifier (shown here) it will increase the exaggeration of these hills and valleys so that they can be more easily identified. The focal point when viewing in 3D can be changed by quickly double tapping on a position.</span></span>

<span style="font-family: Arial,Helvetica,sans-serif;"><span style="border:none;display:inline-block;overflow:hidden;width:98px;height:93px;">![](https://docs.t3rra.com/uploads/images/gallery/2025-03/scaled-1680-/nvulni52dgghz7xn6jmvqd5i5tuvhzr5tpcwq-png.png)</span></span>

<span style="font-family: Arial,Helvetica,sans-serif;">  
</span>

# View

<span style="box-sizing: border-box; font-family: Arial, Helvetica, sans-serif;"><span style="box-sizing: border-box; font-size: 14pt; color: rgb(0, 0, 0); font-weight: 300;">When viewing a map you have a variety of display options.</span></span>

<span style="box-sizing: border-box; font-family: Arial, Helvetica, sans-serif;">  
</span>

<span style="box-sizing: border-box; font-family: Arial, Helvetica, sans-serif;"><span dir="ltr" style="box-sizing: border-box; font-size: 14pt; color: rgb(0, 0, 0); font-weight: 300;">![](https://docs.t3rra.com/uploads/images/gallery/2025-03/scaled-1680-/eZ3rrzpy6aqxfnmuhdj5afc2jbdio0vskewqa-png.png)</span></span>

<span style="box-sizing: border-box; font-family: Arial, Helvetica, sans-serif;">  
</span>

#### <span style="box-sizing: border-box; font-family: Arial, Helvetica, sans-serif;"><span style="box-sizing: border-box; font-size: 21pt; color: rgb(0, 0, 0); font-weight: 400;">Surface</span></span>

<span style="box-sizing: border-box; font-family: Arial, Helvetica, sans-serif;"><span style="box-sizing: border-box; font-size: 14pt; color: rgb(0, 0, 0); font-weight: 300;">This refers to the source for the 3D topography and coloring of the map. There are 6 options:</span></span>

<span style="box-sizing: border-box; font-family: Arial, Helvetica, sans-serif;">  
</span>

<span style="box-sizing: border-box; font-family: Arial, Helvetica, sans-serif;"><span style="box-sizing: border-box; border: none; display: inline-block; overflow: hidden; width: 322px; height: 359px;">![](https://docs.t3rra.com/uploads/images/gallery/2025-03/scaled-1680-/ONsgrsqxs4czjn32oephe9ld-zektrytyww5g-png.png)</span></span>

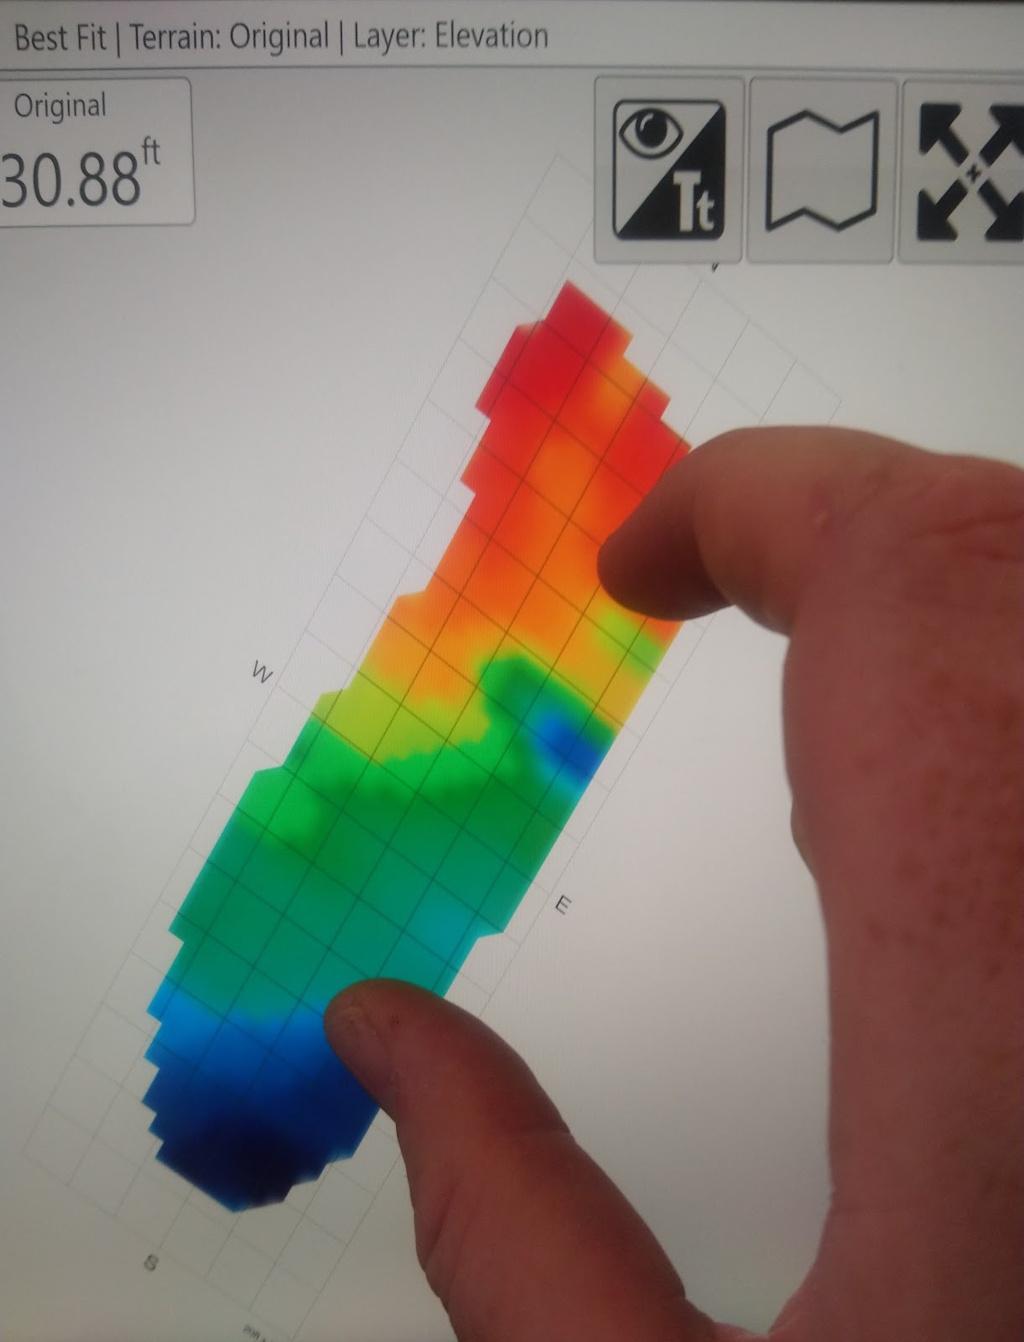
<span style="box-sizing: border-box; font-family: Arial, Helvetica, sans-serif;"><span style="box-sizing: border-box; font-size: 14pt; color: rgb(0, 0, 0); font-weight: 400;">Elevation </span><span style="box-sizing: border-box; font-size: 14pt; color: rgb(0, 0, 0); font-weight: 300;">- This terrain viewing mode shows the map as the original surface prior to any dirt being moved. Displays the map in a Red to Blue gradient scale with Red being low areas and Blue being high areas.</span></span>

<span style="box-sizing: border-box; font-family: Arial, Helvetica, sans-serif;">  
</span>

<span style="box-sizing: border-box; font-family: Arial, Helvetica, sans-serif;"><span style="box-sizing: border-box; font-size: 14pt; color: rgb(0, 0, 0); font-weight: 400;">Design </span><span dir="ltr" style="box-sizing: border-box; font-size: 14pt; color: rgb(0, 0, 0); font-weight: 300;">- This viewing mode shows the design that has been applied. This is the surface that you are attempting to reach at the end of the dirt moving process. Has the same color scheme as Elevation.</span></span>

<span dir="ltr" style="box-sizing: border-box; font-family: Arial, Helvetica, sans-serif;">![](https://docs.t3rra.com/uploads/images/gallery/2025-03/scaled-1680-/NDpemmljtzmf5goc6dxm-cbam7kbkcllwtzdq-png.png)</span>

<span dir="ltr" style="color: rgb(0, 0, 0); font-family: Arial, Helvetica, sans-serif; font-size: 18.6667px; font-style: normal; font-variant-ligatures: normal; font-variant-caps: normal; font-weight: 300; letter-spacing: normal; orphans: 2; text-align: start; text-indent: 0px; text-transform: none; widows: 2; word-spacing: 0px; -webkit-text-stroke-width: 0px; white-space: normal;  text-decoration-thickness: initial; text-decoration-style: initial; text-decoration-color: initial; display: inline !important; float: none;">(Legend range is decided by both Elevation and Design surfaces.)</span>

<span style="box-sizing: border-box; font-family: Arial, Helvetica, sans-serif;"><span dir="ltr" style="box-sizing: border-box; font-size: 14pt; color: rgb(0, 0, 0); font-weight: 400;">Cut/Fill </span><span dir="ltr" style="box-sizing: border-box; font-size: 14pt; color: rgb(0, 0, 0); font-weight: 300;">- Shows where the design will be taking dirt from and where it will be putting it. Coloring of this layer depends on the current Cut/Fill color scheme (Settings &gt; Application). </span></span>

![](https://docs.t3rra.com/uploads/images/gallery/2025-03/scaled-1680-/ltJmxstzepss-kfwg2leeutwbu9dc4ouxbcwq-png.png)

<span dir="ltr" style="color: rgb(0, 0, 0); font-family: Arial, Helvetica, sans-serif; font-size: 18.6667px; font-style: normal; font-variant-ligatures: normal; font-variant-caps: normal; font-weight: 300; letter-spacing: normal; orphans: 2; text-align: start; text-indent: 0px; text-transform: none; widows: 2; word-spacing: 0px; -webkit-text-stroke-width: 0px; white-space: normal;  text-decoration-thickness: initial; text-decoration-style: initial; text-decoration-color: initial; display: inline !important; float: none;">(<span style="color: rgb(0, 0, 0); font-family: Arial, Helvetica, sans-serif; font-size: 18.6667px; font-style: normal; font-variant-ligatures: normal; font-variant-caps: normal; font-weight: 300; letter-spacing: normal; orphans: 2; text-align: start; text-indent: 0px; text-transform: none; widows: 2; word-spacing: 0px; -webkit-text-stroke-width: 0px; white-space: normal;  text-decoration-thickness: initial; text-decoration-style: initial; text-decoration-color: initial; display: inline !important; float: none;">Cut/Fill</span> legend shows histogram.)</span>

<span style="box-sizing: border-box; font-family: Arial, Helvetica, sans-serif;"><span dir="ltr" style="box-sizing: border-box; font-size: 14pt; color: rgb(0, 0, 0); font-weight: 300;">Satellite image - Toggles satellite image background on and off. The eye changes the visibility of the image to link to google earth. </span></span>

<span style="box-sizing: border-box; font-family: Arial, Helvetica, sans-serif;">  
</span>

#### <span style="box-sizing: border-box; font-family: Arial, Helvetica, sans-serif;"><span dir="ltr" style="box-sizing: border-box; font-size: 21pt; color: rgb(0, 0, 0); font-weight: 400;">Layers</span></span>

<span style="box-sizing: border-box; font-family: Arial, Helvetica, sans-serif;"><span style="box-sizing: border-box; font-size: 14pt; color: rgb(0, 0, 0); font-weight: 300;">Various defined layers can be turned on and off here. This includes the current surface (see above), depressions, drains, linework, and overlays such as KML that have been loaded. The buttons at the top allow you to load and clear layers, and beside each layer is a transparency toggle button. Click the button to change its transparency.</span></span>

<span style="box-sizing: border-box; font-family: Arial, Helvetica, sans-serif;"><span style="box-sizing: border-box; border: none; display: inline-block; overflow: hidden; width: 50px; height: 48px;">![](https://docs.t3rra.com/uploads/images/gallery/2025-03/scaled-1680-/hPl34jh-hylofuystozhl9alhramrmks0whxg-png.png)</span></span>

<span style="box-sizing: border-box; font-family: Arial, Helvetica, sans-serif;">  
</span>

<span style="box-sizing: border-box; font-family: Arial, Helvetica, sans-serif;"><span style="box-sizing: border-box; font-size: 14pt; color: rgb(255, 0, 0); font-weight: 300;">NOTE: The depressions layer is not shown if the project only has drains (and no elevation surface).</span></span>

<span style="box-sizing: border-box; font-family: Arial, Helvetica, sans-serif;">  
</span>

<div align="left" dir="ltr" id="bkmrk-for-a-youtube-video-" style="box-sizing: border-box; word-break: normal; overflow-wrap: break-word; font-size: 13px; line-height: 18px; color: rgb(24, 50, 71); font-style: normal; font-variant-ligatures: normal; font-variant-caps: normal; font-weight: 400; letter-spacing: normal; orphans: 2; text-indent: 0px; text-transform: none; widows: 2; word-spacing: 0px; -webkit-text-stroke-width: 0px; white-space: normal;  text-decoration-thickness: initial; text-decoration-style: initial; text-decoration-color: initial; margin-left: 0pt; font-family: Arial, Helvetica, sans-serif;"><table style="box-sizing: border-box; border-collapse: collapse; border-spacing: 0px; background-color: transparent; max-width: 100%; border: none; empty-cells: show; cursor: default;"><colgroup style="box-sizing: border-box;"><col style="box-sizing: border-box;" width="490"></col><col style="box-sizing: border-box;" width="134"></col></colgroup><tbody style="box-sizing: border-box;"><tr style="box-sizing: border-box; height: 106.5pt;"><td style="box-sizing: border-box; padding: 5pt; min-width: 5px; cursor: text; font-size: 13px; border: 1pt solid rgb(241, 194, 50); overflow: hidden; overflow-wrap: break-word;"><span style="box-sizing: border-box; font-family: Arial, Helvetica, sans-serif;"><span style="box-sizing: border-box; font-size: 14pt; color: rgb(0, 0, 0); font-weight: 300;">For a youtube video tutorial on modes and layers visit Markers</span>[<span style="box-sizing: border-box; font-size: 14pt; color: rgb(17, 85, 204); font-weight: 300; text-decoration-skip-ink: none;">https://youtu.be/x5FrylWjpfk</span>](https://youtu.be/x5FrylWjpfk)<span style="box-sizing: border-box; font-size: 14pt; color: rgb(0, 0, 0); font-weight: 300;"> or use your phone to scan this barcode </span></span>

</td><td style="box-sizing: border-box; padding: 5pt; min-width: 5px; cursor: text; font-size: 13px; border: 1pt solid rgb(241, 194, 50); overflow: hidden; overflow-wrap: break-word;"><span style="box-sizing: border-box; font-family: Arial, Helvetica, sans-serif;"><span style="box-sizing: border-box; font-size: 14pt; color: rgb(0, 0, 0); font-weight: 300;"><span style="box-sizing: border-box; border: none; display: inline-block; overflow: hidden; width: 120px; height: 120px;">![](https://docs.t3rra.com/uploads/images/gallery/2025-03/scaled-1680-/0xTtigsmr0ot1af0upeqisagdks-gpofpdw4g-png.png)</span></span></span>

</td></tr></tbody></table>

</div>

# Markers

<span dir="ltr" style="font-size: 14pt; font-family: Arial, Helvetica, sans-serif; color: rgb(0, 0, 0); font-weight: 300;">Markers on designs allow for setting points of interest at user-selected locations. This includes using a marker as a benchmark “control point” location in the design. To use a marker as a Benchmark location, refer to </span><span style="font-family: Arial,Helvetica,sans-serif;"><span style="font-size: 13pt; color: rgb(0, 0, 0); font-weight: 700;">‘</span><span style="font-size: 12pt; color: rgb(0, 0, 0); font-weight: 700;">Set Zero using a marker’</span><span style="font-size: 14pt; color: rgb(0, 0, 0); font-weight: 300;"> in the Implementation section of this manual.</span></span>

<span style="font-family: Arial,Helvetica,sans-serif;">  
</span>

<span style="font-family: Arial,Helvetica,sans-serif;"><span style="border:none;display:inline-block;overflow:hidden;width:103px;height:122px;">![](https://docs.t3rra.com/uploads/images/gallery/2025-03/scaled-1680-/6jCkvxwq1lq5ejbih-pusiqhymklb33pgkeyq-png.png)</span></span>

<span style="font-family: Arial,Helvetica,sans-serif;">  
</span>

<span style="font-family: Arial,Helvetica,sans-serif;"><span style="font-size: 14pt; color: rgb(0, 0, 0); font-weight: 400;">Set marker</span><span style="font-size: 14pt; color: rgb(0, 0, 0); font-weight: 300;"> - use this tool to set a marker on the map. Markers are always placed at the current location.</span></span>

<span style="font-family: Arial,Helvetica,sans-serif;">  
</span>

<span style="font-family: Arial,Helvetica,sans-serif;">  
</span>

<span style="font-family: Arial,Helvetica,sans-serif;"><span style="border:none;display:inline-block;overflow:hidden;width:221px;height:144px;">![](https://docs.t3rra.com/uploads/images/gallery/2025-03/scaled-1680-/2rWajzmxefjovcazxncl7mqjtt9m-eolfyykg-png.png)</span></span>

<span style="font-family: Arial,Helvetica,sans-serif;">  
</span>

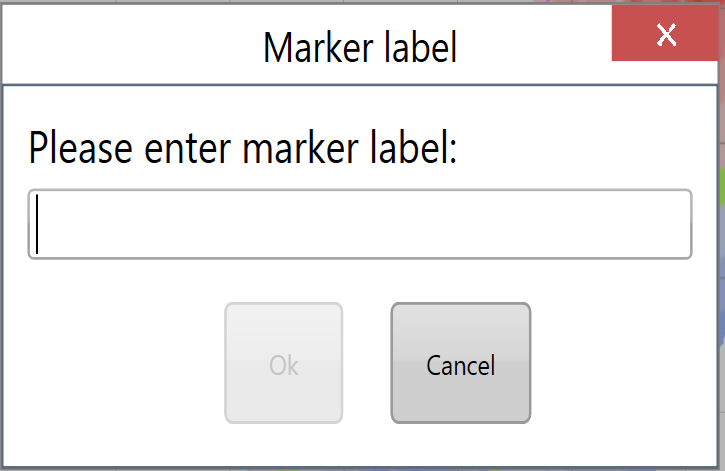
<span style="font-family: Arial,Helvetica,sans-serif;"><span dir="ltr" style="font-size: 14pt; color: rgb(0, 0, 0); font-weight: 300;">When a new marker is created a window will appear allowing a name for the marker to be entered.</span></span>

<span style="font-family: Arial,Helvetica,sans-serif;">  
</span>

<span style="font-family: Arial,Helvetica,sans-serif;">  
</span>

<div align="left" dir="ltr" id="bkmrk-for-a-youtube-video-" style="margin-left: 0pt; font-family: Arial, Helvetica, sans-serif;"><span style="font-family: Arial,Helvetica,sans-serif;"></span><table style="border:none;border-collapse:collapse;"><colgroup><col width="490"></col><col width="134"></col></colgroup><tbody><tr style="height:106.5pt;"><td style="border-width: 1pt; border-style: solid; border-color: rgb(241, 194, 50); padding: 5pt; overflow: hidden; overflow-wrap: break-word;"><span style="font-family: Arial,Helvetica,sans-serif;"><span style="font-size: 14pt; color: rgb(0, 0, 0); font-weight: 300;">For a youtube video tutorial on setting markers visit </span>[<span style="font-size: 14pt; color: rgb(17, 85, 204); font-weight: 300; text-decoration-skip-ink: none;">https://youtu.be/sk7BdYk62K8</span>](https://youtu.be/sk7BdYk62K8)<span style="font-size: 14pt; color: rgb(0, 0, 0); font-weight: 300;"> or use your phone to scan this barcode </span></span>

</td><td style="border-width: 1pt; border-style: solid; border-color: rgb(241, 194, 50); padding: 5pt; overflow: hidden; overflow-wrap: break-word;"><span style="font-family: Arial,Helvetica,sans-serif;"><span style="font-size: 14pt; color: rgb(0, 0, 0); font-weight: 300;"><span style="border:none;display:inline-block;overflow:hidden;width:120px;height:120px;">![](https://docs.t3rra.com/uploads/images/gallery/2025-03/scaled-1680-/LDU9fvblqmreob7l1msop8xppehpako-nqs6w-png.png)</span></span></span>

</td></tr></tbody></table>

</div><span style="font-family: Arial,Helvetica,sans-serif;">  
</span>

<span style="font-family: Arial,Helvetica,sans-serif;">  
</span>

<span style="font-family: Arial,Helvetica,sans-serif;"><span style="border:none;display:inline-block;overflow:hidden;width:103px;height:123px;">![](https://docs.t3rra.com/uploads/images/gallery/2025-03/scaled-1680-/3bihqeaujz5m3lz9ba068uvr5q6mlnxbntu6w-png.png)</span></span>

<span style="font-family: Arial,Helvetica,sans-serif;">  
</span>

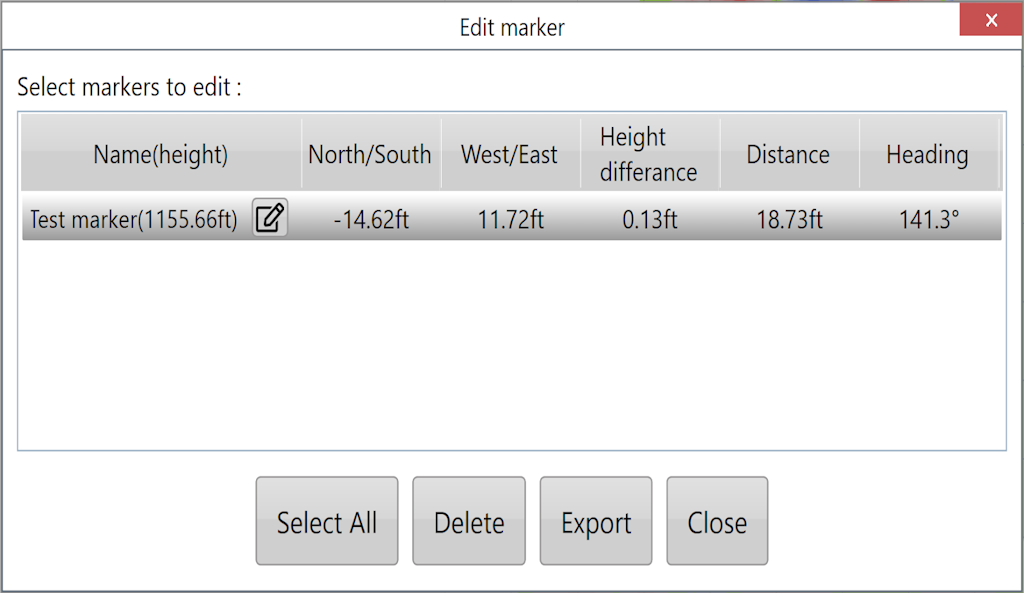
<span style="font-family: Arial,Helvetica,sans-serif;"><span style="font-size: 14pt; color: rgb(0, 0, 0); font-weight: 400;">Edit Marker</span><span style="font-size: 14pt; color: rgb(0, 0, 0); font-weight: 300;"> - this opens a window that allows you to select any marker on the map and edit it.</span></span>

<span style="font-family: Arial,Helvetica,sans-serif;">  
</span>

<span style="font-family: Arial,Helvetica,sans-serif;"><span style="font-size: 14pt; color: rgb(0, 0, 0); font-weight: 300;">The ‘Edit Marker’ button will open the below window allowing you to see the information of each marker that has been placed including heading, distance and height of the marker relative to your current position.</span></span>

<span style="font-family: Arial,Helvetica,sans-serif;"><span style="border:none;display:inline-block;overflow:hidden;width:392px;height:227px;">![](https://docs.t3rra.com/uploads/images/gallery/2025-03/scaled-1680-/dKpvbaxedyuxrungdrqla9tdg66ndaylnsgnq-png.png)</span></span>

<span style="font-family: Arial,Helvetica,sans-serif;"><span style="font-size: 14pt; color: rgb(0, 0, 0); font-weight: 300;">Pressing the button next to the marker name will let you change the name of the marker.</span></span>

<span style="font-size: 14pt; font-family: Arial, Helvetica, sans-serif; color: rgb(0, 0, 0); font-weight: 300;">The buttons at the bottom of the window allow you to select all the markers, delete the currently selected markers, export the currently selected markers and close the window. </span>

# Screenshot

<span style="font-size: 14pt; font-family: Arial, Helvetica, sans-serif; color: rgb(0, 0, 0); font-weight: 300;">In the top right of any mapping window is a small button with a camera. Pressing the camera button will take a screenshot of what is currently on the screen.</span>

<span style="font-family: Arial,Helvetica,sans-serif;">  
</span>

<span style="font-family: Arial,Helvetica,sans-serif;"><span style="border:none;display:inline-block;overflow:hidden;width:303px;height:123px;">![](https://docs.t3rra.com/uploads/images/gallery/2025-03/scaled-1680-/rkHzu-b5yrq2q7p1qsa9e-wvaeazprhyr8og-png.png)</span></span>

<span style="font-family: Arial,Helvetica,sans-serif;">  
</span>

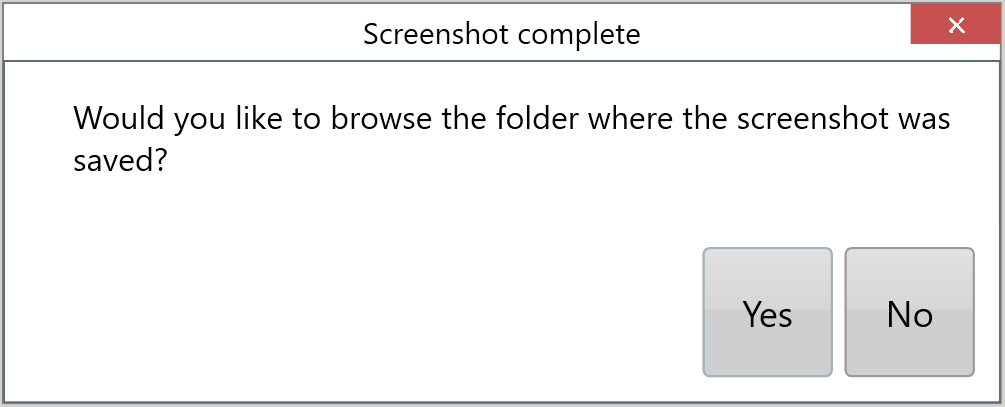
<span style="font-family: Arial,Helvetica,sans-serif;"><span dir="ltr" style="font-size: 14pt; color: rgb(0, 0, 0); font-weight: 300;">After taking a screenshot a pop-up window will appear (shown below). Pressing ‘Yes’ will open the folder where the screenshot is saved. See the following Youtube video for more info on </span></span>[<span dir="ltr" style="font-size: 18px;">Screenshots</span>](https://www.youtube.com/watch?v=hjoM_rv3JE4).
# Battery Level
### <span style="border:none;display:inline-block;overflow:hidden;width:370px;height:94px;">![](https://docs.t3rra.com/uploads/images/gallery/2025-03/scaled-1680-/XyVn9vzwlwzcsrypgiua9fbkarfrh9-cord6a-png.png)</span>

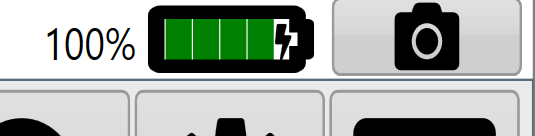
<span style="font-size: 14pt; font-family: Arial, Helvetica, sans-serif; color: rgb(0, 0, 0); font-weight: 300;">In the top right of the screen next to the screenshot button you will find the Battery level indicator. </span>

<span style="font-size: 14pt; font-family: Arial, Helvetica, sans-serif; color: rgb(0, 0, 0); font-weight: 300;">This indicator displays the tablet/computer's battery level and whether it is plugged into power or not.</span>

# Google Earth

![](https://docs.t3rra.com/uploads/images/gallery/2025-03/scaled-1680-/7I3czzvcgjoj8qxkumxqmwj4k1a-swehnjpqa-png.png)

<span dir="ltr" style="font-family: Arial, Helvetica, sans-serif; font-size: 18px;">Google Earth will capture the current display area and overlay it on a satellite image of the field location. Check out the [Google Earth](https://www.youtube.com/watch?v=KP5TTMcTkws) Youtube video for more information. </span>

<span dir="ltr" style="font-family: Arial, Helvetica, sans-serif; font-size: 18px; color: rgb(226, 80, 65);">Note: You must have Google Earth Pro installed on your computer for this to work.</span>