6.2 | RuggON PX501 Tablet Installation
This section covers installation of a typical RuggON PX501 tablet supplied by T3RRA, but these instructions are also relevant to those opting to use their own tablet PC.
Tablet Mounting Options
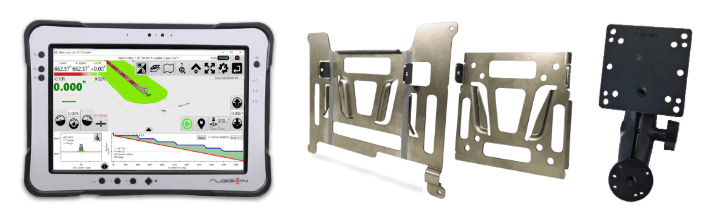
The tablet must be mounted somewhere in the cab where the operator can maintain good visibility of the screen.
Ensure the tablet does not obstruct operator visibility while driving.
Installation of the tablet for Level COMMAND is carried out in the same fashion as for any other T3RRA software installation. We highly recommend the RuggON PX501 or SOL7 as a tablet computer solution for use with Level COMMAND and provide various accessories for mounting them in the T3RRA Shop.
Mounting the Tablet
- Fasten the square silver tablet VESA plate to the square black RAM arm VESA plate.
- Using a suitable RAM mount or adapter bracket, create a mounting point for the swivelling RAM arm and fasten it to the tractor cab.
- Position the VESA plate appropriately so that the tablet can be slotted into and removed from the mount easily when required.
- Fasten the larger silver tablet plate to the back of the PX501 using the provided screws.
- The tablet is now ready to be slotted into the VESA plate on the black RAM arm and repositioned to the correct viewing angle.
- The tablet is now ready for connection to COMMAND.
Connecting the Tablet to COMMAND
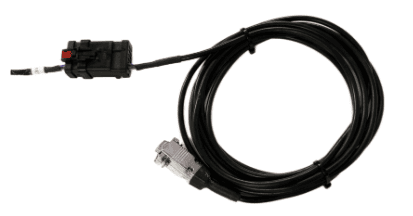
- Using a T3H-T001 or T3H-T002 cable, connect the 12-way AMPSEAL connector to the matching red and black AMPSEAL connector on the T3H-C002 ECU breakout harness.
- Run the serial cable along the tractor cab wall neatly and fasten to any available points using zip or twist ties.
- Connect the silver DB9 right angled (RA) or straight connection to the tablet and then secure the connector screws using a small screwdriver.
- Bundle and tie up any extra length of cable somewhere out of the way.